
In diesem Tutorial zeigen wir Ihnen, wie Sie Squid 3 auf CentOS installieren und konfigurieren. Für diejenigen unter Ihnen, die es nicht wussten, Squid ist ein Caching-Proxy für das Web, der HTTP, HTTPS unterstützt , FTP usw. Der Squid-Proxy wird von verschiedenen Organisationen und Internetanbietern verwendet, um die Bandbreite zu reduzieren und die Reaktionszeit zu erhöhen.
Dieser Artikel geht davon aus, dass Sie zumindest über Grundkenntnisse in Linux verfügen, wissen, wie man die Shell verwendet, und vor allem, dass Sie Ihre Website auf Ihrem eigenen VPS hosten. Die Installation ist recht einfach und setzt Sie voraus im Root-Konto ausgeführt werden, wenn nicht, müssen Sie möglicherweise 'sudo hinzufügen ‘ zu den Befehlen, um Root-Rechte zu erhalten. Ich zeige Ihnen Schritt für Schritt die Installation von Squid auf dem CentOS-Linux-Server.
Installieren und konfigurieren Sie Squid 3 unter CentOS
Schritt 1. Zur Installation müssen Sie zuerst yum aktualisieren Repository und Pakete, indem Sie den folgenden Befehl eingeben:
sudo yum -y update
Schritt 2. Squid 3 unter CentOS installieren und konfigurieren.
Installieren Sie das Squid-Paket und die Abhängigkeiten mit dem folgenden Befehl:
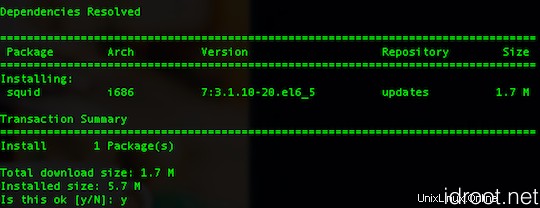
sudo yum -y install squid
Schritt 3. Konfiguration Squid.
Bearbeiten Sie die Squid-Konfigurationsdatei ‚/etc/squid/squid.conf ’
nano /etc/squid/squid.conf
# Recommended minimum configuration:
auth_param basic program /usr/lib/squid/ncsa_auth /etc/squid/squid_passwd
acl ncsa_users proxy_auth REQUIRED
http_access allow ncsa_users

acl manager proto cache_object
acl localhost src 127.0.0.1/32
acl to_localhost dst 127.0.0.0/8 0.0.0.0/32
acl SSL_ports port 443
acl Safe_ports port 80        # http
acl Safe_ports port 21        # ftp
acl Safe_ports port 443        # https
acl Safe_ports port 1025-65535    # unregistered ports
acl Safe_ports port 280        # http-mgmt
acl Safe_ports port 488        # gss-http
acl Safe_ports port 591        # filemaker
acl Safe_ports port 777        # multiling http
acl CONNECT method CONNECT

http_access allow manager localhost
http_access deny manager
http_access deny !Safe_ports
http_access deny CONNECT !SSL_ports
http_access deny all
http_port 3128

hierarchy_stoplist cgi-bin ?
coredump_dir /var/spool/squid
cache deny all

refresh_pattern ^ftp:        1440    20%    10080
refresh_pattern ^gopher:    1440    0%    1440
refresh_pattern -i (/cgi-bin/|\?) 0    0%    0
refresh_pattern .        0    20%    4320

icp_port 3130

forwarded_for off

request_header_access Allow allow all
request_header_access Authorization allow all
request_header_access Proxy-Authorization allow all
request_header_access Proxy-Authenticate allow all
request_header_access Cache-Control allow all
request_header_access Content-Encoding allow all
request_header_access Content-Length allow all
request_header_access Content-Type allow all
request_header_access Date allow all
request_header_access Expires allow all
request_header_access Host allow all
request_header_access If-Modified-Since allow all
request_header_access Last-Modified allow all
request_header_access Location allow all
request_header_access Pragma allow all
request_header_access Accept allow all
request_header_access Accept-Charset allow all
request_header_access Accept-Encoding allow all
request_header_access Accept-Language allow all
request_header_access Content-Language allow all
request_header_access Mime-Version allow all
request_header_access Retry-After allow all
request_header_access Title allow all
request_header_access Connection allow all
request_header_access Proxy-Connection allow all
request_header_access User-Agent allow all
request_header_access Cookie allow all
request_header_access All deny all
visible_hostname idroot.us
Schritt 4. Erstellen Sie unsere Authentifizierungsdatei, die Squid verwenden kann, um Benutzerauthentifizierungen zu überprüfen:
htpasswd -b /etc/squid/squid_passwd username password
Beispiel:
htpasswd -b -c /etc/squid/squid_passwd ranty ratna
Herzlichen Glückwunsch! Sie haben Squid erfolgreich installiert. Vielen Dank, dass Sie dieses Tutorial zur Installation des Squid-Proxys auf dem CentOS-System verwendet haben. Für zusätzliche Hilfe oder nützliche Informationen empfehlen wir Ihnen, die offizielle Squid-Website zu besuchen.
P>