In der heutigen Geschäftswelt ist es zunehmend notwendig, Arbeitsbereiche, Labors, Tools und andere Arten von Ressourcen gemeinsam zu nutzen. Die optimale Nutzung der verfügbaren Ressourcen ist für moderne Unternehmen zu einem Wettbewerbsvorteil geworden.
Jedes Unternehmen hat endliche Ressourcen, daher gibt es einen Streit über die Nutzung dieser Ressourcen durch alle Mitglieder, das ist der Punkt, der Streit um diese Ressourcen kann zu Problemen unter den Mitarbeitern, Verschleiß der Beziehungen und Unproduktivität in der Organisation führen.
Diese Diskussion scheint weit von der Technologie entfernt zu sein, aber um diese Art von Problemen zu lösen, sind viele kostenlose Software verfügbar, und in diesem Artikel schreibe ich über ein Unternehmenstool, das helfen kann, die Nutzung von Ressourcen fair und effektiv zu organisieren Weise.
Softwareübersicht
Booked ist eine in PHP und MySQL geschriebene Open-Source-Software, die Organisationen und Gruppen dabei hilft, Ressourcen jeglicher Art effizient zu verwalten, aufzuzeichnen und zu verfolgen. Sie können Zeitpläne erstellen, damit Benutzer Zeitpläne finden können, die für die Ressourcennutzung verfügbar sind.
Gebucht ermöglicht die gerechte Verteilung von Ressourcen durch die Verwendung von Kontingenten. Außerdem können Sie die Verwendung von Ressourcen durch Reservierungsgenehmigungen steuern. Ein automatischer Bereich zwischen den Reservierungen einer Ressource kann ebenfalls konfiguriert werden.
Gebucht umfasst großartige Unternehmensfunktionen wie Unterstützung für viele Sprachen, webbasiert, Mobile First, Berichtssystem, Erinnerungen, LDAP, Active Directory, ical-Dateien zur Integration mit E-Mail-Clients und mehr.
Die Umgebung
In diesem Artikel werden die gebuchte Installation und die grundlegende Konfiguration behandelt. Dieser Artikel wurde basierend auf der folgenden Umgebung geschrieben:Eine Virtual Box-VM mit CENTOS 7 Minimal, 2 GB RAM, 8 GB HD und 2 Netzwerkschnittstellen (nur Host und NAT).
Sicherheit
Dieser Artikel deckt dieses Thema, das komplex und umfangreich ist, nicht vollständig ab. Es legte den Fokus auf das einfache S.O. Konfiguration und Gebuchte Systemkonfiguration.
Vorbereitung
Angenommen, Sie verwenden eine Neuinstallation von Centos 7 Minimal, führen Sie vor der Installation von Booked den folgenden Befehl aus, um das System zu aktualisieren und zusätzliche Pakete zu installieren:
yum update
Transaction Summary ================================================================================ Install 1 Package Upgrade 39 Packages Total download size: 91 M Is this ok [y/d/N]: y
Installieren Sie Ihren bevorzugten Texteditor oder verwenden Sie VI. In diesem Artikel verwende ich VIM, um es zu installieren, führen Sie den folgenden Befehl aus:
yum install vim
Installieren Sie das WGET-Paket, führen Sie den folgenden Befehl aus:
yum install wget
Installieren Sie das UNZIP-Paket und führen Sie den folgenden Befehl aus:
yum install unzip
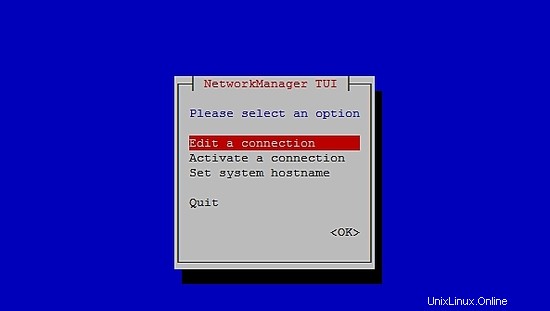
Um das Netzwerk zu konfigurieren, führen Sie den folgenden Befehl aus, um das NMTUI-Tool (Network Manager Text User Interface) zu öffnen und die Netzwerkschnittstellen und den Hostnamen wie gewünscht zu bearbeiten:
nmtui
Führen Sie nach der Einrichtung der Netzwerkeinstellungen und des Hostnamens unter CentOS 7 den folgenden Befehl aus, um die Änderungen zu übernehmen:
service networks restart
Führen Sie den folgenden Befehl aus, um die Netzwerkinformationen zu überprüfen:
ip addr
Die Ausgabe sieht so aus:
1: lo: <LOOPBACK,UP,LOWER_UP> mtu 65536 qdisc noqueue state UNKNOWN qlen 1
link/loopback 00:00:00:00:00:00 brd 00:00:00:00:00:00
inet 127.0.0.1/8 scope host lo
valid_lft forever preferred_lft forever
inet6 ::1/128 scope host
valid_lft forever preferred_lft forever
2: enp0s3: <BROADCAST,MULTICAST,UP,LOWER_UP> mtu 1500 qdisc pfifo_fast state UP qlen 1000
link/ether 08:00:27:67:bc:73 brd ff:ff:ff:ff:ff:ff
inet 10.0.2.15/24 brd 10.0.2.255 scope global dynamic enp0s3
valid_lft 84631sec preferred_lft 84631sec
inet6 fe80::9e25:c982:1091:90eb/64 scope link
valid_lft forever preferred_lft forever
3: enp0s8: <BROADCAST,MULTICAST,UP,LOWER_UP> mtu 1500 qdisc pfifo_fast state UP qlen 1000
link/ether 08:00:27:68:88:f3 brd ff:ff:ff:ff:ff:ff
inet 192.168.56.101/24 brd 192.168.56.255 scope global dynamic enp0s8
valid_lft 1044sec preferred_lft 1044sec
inet6 fe80::a00:27ff:fe68:88f3/64 scope link
valid_lft forever preferred_lft forever
Deaktivieren Sie SELINUX (Security Enhanced Linux) auf Centos 7, bearbeiten Sie die folgende Konfigurationsdatei:
vim /etc/selinux/config
"/etc/selinux/config" 14L, 547C# This file controls the state of SELinux on the system.
# SELINUX= can take one of these three values:
#     enforcing - SELinux security policy is enforced.
#     permissive - SELinux prints warnings instead of enforcing.
#     disabled - No SELinux policy is loaded.
SELINUX=enforcing
# SELINUXTYPE= can take one of three two values:
#     targeted - Targeted processes are protected,
#     minimum - Modification of targeted policy. Only selected processes are prootected.
#     mls - Multi Level Security protection.
SELINUXTYPE=targeted
Ändern Sie den Wert erzwingen der Direktive SELINUX auf deaktiviert , speichern Sie die Datei und starten Sie den Server neu.
Führen Sie den folgenden Befehl aus, um den Status von SELinux auf Centos 7 zu überprüfen:
getenforce
Die Ausgabe muss sein:
Disabled
Um FirewallD auf Centos 7 zu deaktivieren, führen Sie die folgenden Befehle aus:
systemctl disable firewalld
systemctl stop firewalld
Führen Sie den folgenden Befehl aus, um den Firewall-Status auf Centos 7 zu überprüfen:
systemctl status firewalld
Installieren Sie MariaDB, Apache und PHP auf Centos 7
Um MariaDB auf Centos 7 zu installieren, führen Sie den folgenden Befehl aus:
yum -y install mariadb-server
Führen Sie zum Starten von MariaDB den folgenden Befehl aus:
systemctl start mariadb
Um die Sicherheit von MariaDB zu erhöhen, führen Sie den folgenden Befehl aus:
/usr/bin/mysql_secure_installation
Richten Sie die Optionen gemäß der folgenden Ausgabe ein oder verwenden Sie Ihre eigenen Einstellungen:
NOTE: RUNNING ALL PARTS OF THIS SCRIPT IS RECOMMENDED FOR ALL MariaDB
      SERVERS IN PRODUCTION USE!  PLEASE READ EACH STEP CAREFULLY!

In order to log into MariaDB to secure it, we'll need the current
password for the root user.  If you've just installed MariaDB, and
you haven't set the root password yet, the password will be blank,
so you should just press enter here.

Enter current password for root (enter for none):<Press Enter>

OK, successfully used password, moving on...

Setting the root password ensures that nobody can log into the MariaDB
root user without the proper authorisation.

Set root password? [Y/n] <Press Y>
Root-Passwort einrichten:
New password: *******
Re-enter new password: *******
Password updated successfully!
Reloading privilege tables..
 ... Success!

By default, a MariaDB installation has an anonymous user, allowing anyone
to log into MariaDB without having to have a user account created for
them.  This is intended only for testing, and to make the installation
go a bit smoother.  You should remove them before moving into a
production environment.

Remove anonymous users? [Y/n] <Press Y>

... Success!

Normally, root should only be allowed to connect from 'localhost'. This
ensures that someone cannot guess at the root password from the network.

Disallow root login remotely? [Y/n] <Choose acording your needs>

... Success!

By default, MariaDB comes with a database named 'test' that anyone can
access. This is also intended only for testing, and should be removed
before moving into a production environment.

Remove test database and access to it? [Y/n] <Press Y>


- Dropping test database...
 ... Success!
 - Removing privileges on test database...
 ... Success!

Reloading the privilege tables will ensure that all changes made so far
will take effect immediately.

Reload privilege tables now? [Y/n] <Press Y>

... Success!

Cleaning up...

All done! If you've completed all of the above steps, your MariaDB
installation should now be secure.

Thanks for using MariaDB!
Richten Sie MariaDB so ein, dass es automatisch mit Centos 7 gestartet wird:
systemctl enable mariadb.service
Führen Sie den folgenden Befehl aus, um Apache zu installieren:
yum install httpd
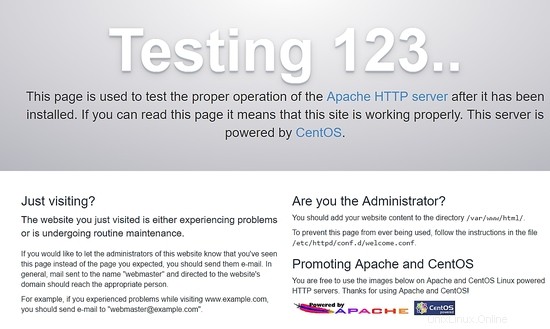
Führen Sie zum Starten von Apache den folgenden Befehl aus:
systemctl start httpd.service
Richten Sie Apache für den automatischen Start mit Centos 7 ein:
systemctl enable httpd.service
Um Apache zu testen, geben Sie in Ihrem Webbrowser die IP-Adresse Ihres Servers ein. Wenn alles in Ordnung ist, sehen Sie eine Testseite:
Um PHP zu installieren, führen Sie den folgenden Befehl aus:
yum install php php-mysql
Starten Sie Apache neu, führen Sie den folgenden Befehl aus:
systemctl restart httpd.service
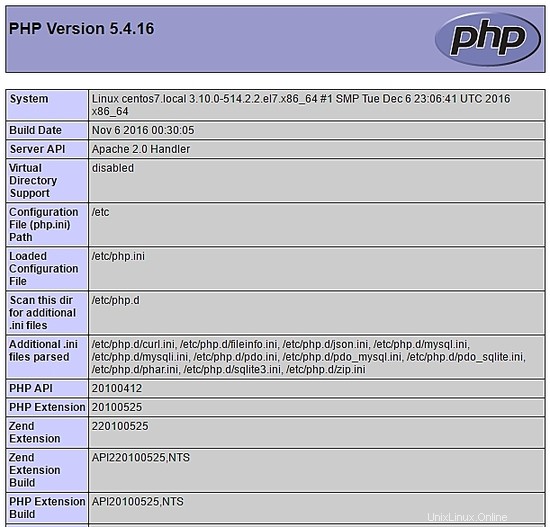
Um PHP zu testen, erstellen Sie eine Datei phpinfo.php im Verzeichnis /var/www/html mit folgendem Inhalt:
<?php phpinfo(); ?>
Jetzt können Sie über den Browser mit der folgenden URL auf die phpinfo.php zugreifen: http://[Ihre-IP-Adresse]/phpinfo.php. Wenn alles in Ordnung ist, können Sie die folgende Seite sehen:
Datenbank über das Terminal einrichten
Greifen Sie über das Terminal auf die MariaDB zu und erstellen Sie die Datenbank bookedscheduler und der Benutzer booked_user mit ausreichenden Rechten, um diese Datenbank zu verwalten. Führen Sie die folgenden Befehle über das Terminal aus:
mysql -u root -p
Erstellen Sie gebuchten Zeitplaner Datenbank:
MariaDB [(none)]> create database bookedscheduler;
Erstellen Sie booked_user auf MariaDb:
CREATE USER 'booked_user'@'localhost' IDENTIFIED BY 'your_password';
Gewähren Sie dem Benutzer booked_user Berechtigungen zu gebuchtem Zeitplan Datenbank:
GRANT ALL PRIVILEGES ON database.bookedscheduler TO 'booked_user'@'localhost';
Gebuchtes Datenbankschema und Daten aus dem Verzeichnis /var/www/html/booked/database_schema/ importieren, die folgenden SQL-Dateien müssen importiert werden, create_schema.sql und create-data.sql :
mysql -u root -p bookedscheduler < create-schema.sql
mysql -u root -p bookedscheduler < create-data.sql
Richten Sie die Datenbank über PHPMyAdmin ein
Installieren Sie PHPMyAdmin auf Centos 7 (optional)
PHPMyAdmin ist ein Tool zum Verwalten von MySQL (MariaDB)-Datenbanken auf benutzerfreundliche Weise über einen Browser. Um phpmyadmin automatisch zu installieren, müssen Sie das Epel-Repository installieren, führen Sie den folgenden Befehl aus:
yum install epel-release
Jetzt können Sie den folgenden Befehl ausführen:
yum install phpmyadmin
Nach der Installation von PHPMyAdmin müssen wir es konfigurieren. Erstellen Sie zunächst eine Kopie der Konfigurationsdatei und bearbeiten Sie die Datei phpMyAdmin.conf in /etc/httpd/conf.d/:
cp /etc/httpd/conf.d/phpMyAdmin.conf /etc/httpd/conf.d/phpMyAdmin.conf.old
vim /etc/httpd/conf.d/phpMyAdmin.conf
Ändern Sie die Werte entsprechend Ihrer Netzwerkumgebung, in meinem Fall habe ich die folgenden Zeilen geändert (17, 25, 34, 42). Meine Konfigurationsdatei sieht so aus:
# phpMyAdmin - Web based MySQL browser written in php
#
# Allows only localhost by default
#
# But allowing phpMyAdmin to anyone other than localhost should be considered
# dangerous unless properly secured by SSL
Alias /phpMyAdmin /usr/share/phpMyAdmin
Alias /phpmyadmin /usr/share/phpMyAdmin

<IfModule mod_authz_core.c>
# Apache 2.4
<RequireAny>
Require ip 127.0.0.1
Require ip 192.168.56.1
Require ip ::1
</RequireAny>
</IfModule>
 <IfModule !mod_authz_core.c>
 # Apache 2.2
 Order Deny,Allow
 Deny from All
 Allow from 192.168.56.1
 Allow from ::1
 </IfModule>
<Directory /usr/share/phpMyAdmin/setup/>
 <IfModule mod_authz_core.c>
 # Apache 2.4
 <RequireAny>
 Require ip 127.0.0.1
 Require ip ::1
 </RequireAny>
 </IfModule>
<IfModule !mod_authz_core.c>
 # Apache 2.2
 Order Deny,Allow
 Deny from All
 Allow from 192.168.56.1
 Allow from ::1
 </IfModule>
</Directory>
# These directories do not require access over HTTP - taken from the original
# phpMyAdmin upstream tarball
#
<Directory /usr/share/phpMyAdmin/libraries/>
 Order Deny,Allow
 Deny from All
 Allow from None
</Directory>
<Directory /usr/share/phpMyAdmin/setup/lib/>
 Order Deny,Allow
 Deny from All
 Allow from None
</Directory>
<Directory /usr/share/phpMyAdmin/setup/frames/>
 Order Deny,Allow
 Deny from All
 Allow from None
</Directory>
# This configuration prevents mod_security at phpMyAdmin directories from
# filtering SQL etc. This may break your mod_security implementation.
#
#<IfModule mod_security.c>
# <Directory /usr/share/phpMyAdmin/>
# SecRuleInheritance Off
# </Directory>
#</IfModule>
Starten Sie Apache neu, führen Sie den folgenden Befehl aus:
systemctl restart httpd.service
Jetzt können Sie über den Browser mit der folgenden URL auf PHPMyAdmin zugreifen: http://[Ihre-IP-Adresse]/phpMyAdmin/
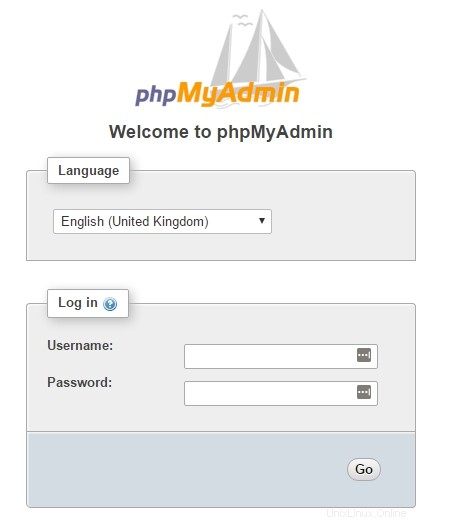
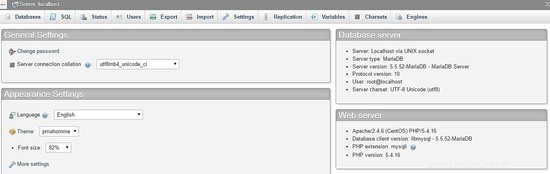
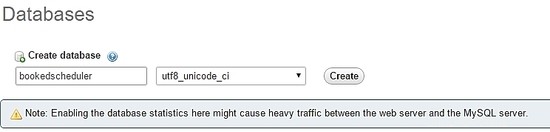
Verwenden Sie Ihr root -Konto und das zuvor in der MariaDB-Installation definierte Passwort, um die Datenbank und den Benutzer zu erstellen. Wählen Sie im Dashboard Datenbanken aus Option zum Erstellen einer neuen Datenbank:
Füllen Sie das Formular mit dem Datenbanknamen aus und wählen Sie Erstellen .
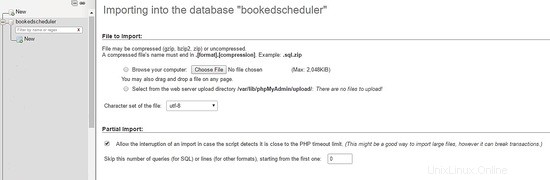
Um die Datenbankdaten zu importieren, wählen Sie im linken Menü den gebuchten Zeitplaner aus Datenbank und den Import Wählen Sie im PHPMyAdmin-Dashboard die folgenden Dateien, create-schema.sql (1) und create-data.sql (2), aus den Installationsdateien aus und importieren Sie sie.
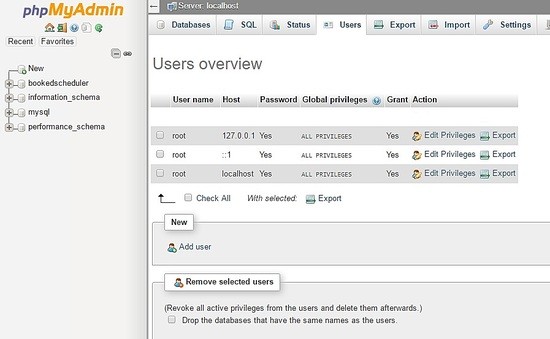
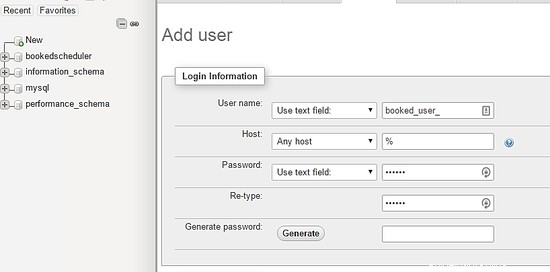
Erstellen Sie den Benutzer booked_user mit der Berechtigung, bookedscheduler zu verwalten Datenbank. Wählen Sie im PHPMyAdmin-Dashboard Nutzer aus und Hinzufügen :
Füllen Sie auf dem Bildschirm zur Benutzererstellung die Felder mit der Benutzerdatenbank (booked_user) aus, richten Sie ein Passwort ein und wählen Sie GO am Ende der Seite:
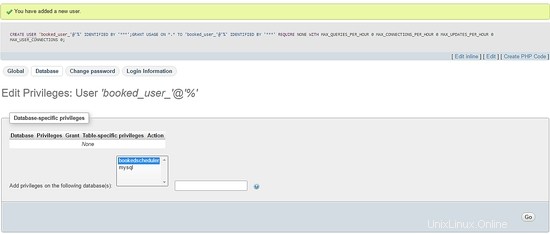
So richten Sie Berechtigungen für booked_user ein auf gebuchtem Zeitplan Datenbank, wählen Sie gebuchter Zeitplaner aus aus einer Datenbankliste und wählen Sie Los:
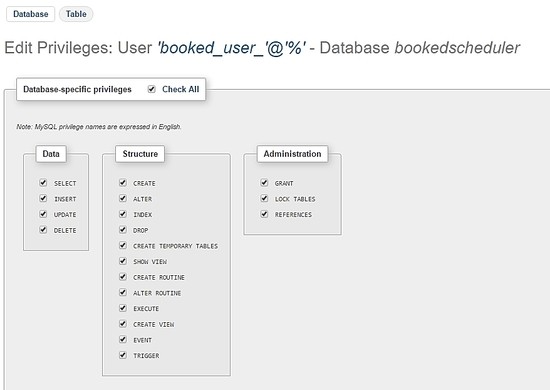
Wählen Sie auf dem Privilegien-Bildschirm die Option Alle markieren und Los :
Installieren von Booked Scheduler Centos 7
Wir haben zwei Möglichkeiten, den Booked Scheduler zu installieren, manuell oder automatisch. Dieser Artikel behandelt nur die manuelle Installation. Um den Booked Scheduler auf Centos 7 zu installieren, gehen Sie in das /tmp-Verzeichnis und laden Sie den Quellcode herunter:
wget https://ufpr.dl.sourceforge.net/project/phpscheduleit/Booked/2.6/booked-2.6.5.zip
Entpacken Sie die Datei im Verzeichnis /var/www/html und führen Sie den folgenden Befehl aus:
unzip booked-2.6.5.zip -d /var/www/html/
Ändern Sie die Berechtigungen der entpackten Datei.
cd /var/www/html/
chown -R apache:apache /booked
Richten Sie die Konfigurationsdatei unter /var/www/html/booked/config ein. Erstellen Sie eine Kopie der config.dist.php-Datei in config.php und bearbeiten Sie die Blöcke der Konfigurationsdatei (Es ist meine Konfigurationsdatei):
cp config.dist.php config.php
Ändern Sie die Werte entsprechend unserer Umgebung, hier präsentiere ich die wichtigsten zu ändernden Einstellungen und seien Sie informiert, die E-Mail-Adresse wird nach der ersten Anmeldung der Systemadministrator sein:
<?php
/**
Copyright 2011-2016 Nick Korbel
This file is part of Booked Scheduler.
Booked Scheduler is free software: you can redistribute it and/or modify
it under the terms of the GNU General Public License as published by
the Free Software Foundation, either version 3 of the License, or
(at your option) any later version.
Booked Scheduler is distributed in the hope that it will be useful,
but WITHOUT ANY WARRANTY; without even the implied warranty of
MERCHANTABILITY or FITNESS FOR A PARTICULAR PURPOSE. See the
GNU General Public License for more details.
You should have received a copy of the GNU General Public License
along with Booked Scheduler. If not, see <http://www.gnu.org/licenses/>.
*/
error_reporting(E_ALL & ~E_NOTICE & ~E_STRICT);
//ini_set('display_errors', 1);
//ini_set('display_startup_errors', 1);
/**
* Application configuration
*/
$conf['settings']['app.title'] = 'Booked Scheduler'; // application title
$conf['settings']['default.timezone'] = 'America/Chicago'; // Change your time zone - look up here http://php.net/manual/en/timezones.php
$conf['settings']['allow.self.registration'] = 'true'; // if users can register themselves
$conf['settings']['admin.email'] = '[email protected]'; // fill with the email address of admin user
$conf['settings']['admin.email.name'] = 'Booked Administrator'; // name to be used in From: field when sending automatic emails
$conf['settings']['default.page.size'] = '50'; // number of records per page
$conf['settings']['enable.email'] = 'true'; // global configuration to enable if any emails will be sent
$conf['settings']['default.language'] = 'en_us'; Change acording to your language // find your language in the lang directory
$conf['settings']['script.url'] = 'http://[your-ip-address]/Web'; // public URL to the Web directory of this instance. this is the URL that appears when you are logging in. leave http: or https: off to auto-detect
$conf['settings']['image.upload.directory'] = 'Web/uploads/images'; // full or relative path to where images will be stored
$conf['settings']['image.upload.url'] = 'uploads/images'; // full or relative path to show uploaded images from
$conf['settings']['cache.templates'] = 'true'; // true recommended, caching template files helps web pages render faster
$conf['settings']['use.local.jquery'] = 'false'; // false recommended, delivers jQuery from Google CDN, uses less bandwidth
$conf['settings']['registration.captcha.enabled'] = 'true'; // recommended. unless using recaptcha this requires php_gd2 enabled in php.ini
$conf['settings']['registration.require.email.activation'] = 'true'; // requires enable.email = true
$conf['settings']['registration.auto.subscribe.email'] = 'false'; // requires enable.email = true
$conf['settings']['registration.notify.admin'] = 'true'; // whether the registration of a new user sends an email to the admin (ala phpScheduleIt 1.2)
$conf['settings']['inactivity.timeout'] = '30'; // minutes before the user is automatically logged out
$conf['settings']['name.format'] = '{first} {last}'; // display format when showing user names
$conf['settings']['css.extension.file'] = ''; // full or relative url to an additional css file to include. this can be used to override the default style
$conf['settings']['disable.password.reset'] = 'false'; // if the password reset functionality should be disabled
$conf['settings']['home.url'] = 'your-intranet-portal-url'; // the url to open when the logo is clicked
$conf['settings']['logout.url'] = 'your-intranet-portal-url'; // the url to be directed to after logging out
$conf['settings']['default.homepage'] = '1'; // the default homepage to use when new users register (1 = Dashboard, 2 = Schedule, 3 = My Calendar, 4 = Resource Calendar)
$conf['settings']['schedule']['use.per.user.colors'] = 'false'; // color reservations by user
$conf['settings']['schedule']['show.inaccessible.resources'] = 'true'; // whether or not resources that are inaccessible to the user are visible
$conf['settings']['schedule']['reservation.label'] = '{name}'; // format for what to display on the reservation slot label. Available properties are: {name}, {title}, {description}, {email}, {phone}, {organization}, {position}, {startdate}, {enddate} {resourcename} {participants} {invitees} {reservationAttributes}. Custom attributes can be added using att with the attribute id. For example {att1}
$conf['settings']['schedule']['hide.blocked.periods'] = 'false'; // if blocked periods should be hidden or shown
/**
* ical integration configuration
*/
$conf['settings']['ics']['require.login'] = 'true'; // recommended, if the user must be logged in to access ics files
$conf['settings']['ics']['subscription.key'] = ''; // must be set to allow webcal subscriptions
$conf['settings']['ics']['import'] = 'false'; // enable iCal import
$conf['settings']['ics']['import.key'] = ''; // it's recommended to set this key when iCal import is enabled
/**
* Privacy configuration - Set up here your business rules
*/
$conf['settings']['privacy']['view.schedules'] = 'true'; // if unauthenticated users can view schedules
$conf['settings']['privacy']['view.reservations'] = 'false'; // if unauthenticated users can view reservations
$conf['settings']['privacy']['hide.user.details'] = 'false'; // if personal user details should be displayed to non-administrators
$conf['settings']['privacy']['hide.reservation.details'] = 'false'; // if reservation details should be displayed to non-administrators
$conf['settings']['privacy']['allow.guest.reservations'] = 'false'; // if reservations can be made by users without a Booked account, if true this overrides schedule and resource visibility
/**
* Reservation specific configuration
*/
$conf['settings']['reservation']['start.time.constraint'] = 'future'; // when reservations can be created or edited. options are future, current, none
$conf['settings']['reservation']['updates.require.approval'] = 'false'; // if updates to previously approved reservations require approval again
$conf['settings']['reservation']['prevent.participation'] = 'false'; // if participation and invitation options should be removed
$conf['settings']['reservation']['prevent.recurrence'] = 'false'; // if recurring reservations are disabled for non-administrators
$conf['settings']['reservation']['enable.reminders'] = 'false'; // if reminders are enabled. this requires email to be enabled and the reminder job to be configured
$conf['settings']['reservation']['allow.guest.participation'] = 'false';
$conf['settings']['reservation']['allow.wait.list'] = 'false';
$conf['settings']['reservation']['checkin.minutes.prior'] = '5';
/**
* Email notification configuration
*/
$conf['settings']['reservation.notify']['resource.admin.add'] = 'false';
$conf['settings']['reservation.notify']['resource.admin.update'] = 'false';
$conf['settings']['reservation.notify']['resource.admin.delete'] = 'false';
$conf['settings']['reservation.notify']['resource.admin.approval'] = 'false';
$conf['settings']['reservation.notify']['application.admin.add'] = 'false';
$conf['settings']['reservation.notify']['application.admin.update'] = 'false';
$conf['settings']['reservation.notify']['application.admin.delete'] = 'false';
$conf['settings']['reservation.notify']['application.admin.approval'] = 'false';
$conf['settings']['reservation.notify']['group.admin.add'] = 'false';
$conf['settings']['reservation.notify']['group.admin.update'] = 'false';
$conf['settings']['reservation.notify']['group.admin.delete'] = 'false';
$conf['settings']['reservation.notify']['group.admin.approval'] = 'false';
/**end business rules
* File upload configuration
*/
$conf['settings']['uploads']['enable.reservation.attachments'] = 'false'; // if reservation attachments can be uploaded
$conf['settings']['uploads']['reservation.attachment.path'] = 'uploads/reservation'; // full or relative (to the root of your installation) filesystem path to store reservation attachments
$conf['settings']['uploads']['reservation.attachment.extensions'] = 'txt,jpg,gif,png,doc,docx,pdf,xls,xlsx,ppt,pptx,csv'; // comma separated list of file extensions that users are allowed to attach. leave empty to allow all extensions
/**
* Database configuration
*/
$conf['settings']['database']['type'] = 'mysql';
$conf['settings']['database']['user'] = 'booked_user'; // database user with permission to the booked database
$conf['settings']['database']['password'] = 'your_password'; fill with the booked_user password
$conf['settings']['database']['hostspec'] = '127.0.0.1'; // ip, dns or named pipe
$conf['settings']['database']['name'] = 'bookedscheduler';
/**TIP: if you have problems to conect to database, please, try with the user and passord of root, if it works, go back to user database permitions.
* Mail server configuration
*/To e-mail configurarion I need to use a relay to my e-mail server and in my server I instaled postfix and configurate it to send e-mails
$conf['settings']['phpmailer']['mailer'] = 'mail'; // options are 'mail', 'smtp' or 'sendmail'
$conf['settings']['phpmailer']['smtp.host'] = 'your-mx'; // 'smtp.company.com'
$conf['settings']['phpmailer']['smtp.port'] = '25';
$conf['settings']['phpmailer']['smtp.secure'] = ''; // options are '', 'ssl' or 'tls'
$conf['settings']['phpmailer']['smtp.auth'] = 'true'; // options are 'true' or 'false'
$conf['settings']['phpmailer']['smtp.username'] = '[email protected]';
$conf['settings']['phpmailer']['smtp.password'] = 'your-password';
$conf['settings']['phpmailer']['sendmail.path'] = '/usr/sbin/sendmail';
$conf['settings']['phpmailer']['smtp.debug'] = 'false';
/**
* Plugin configuration. For more on plugins, see readme_installation.html
*/
$conf['settings']['plugins']['Authentication'] = '';
$conf['settings']['plugins']['Authorization'] = '';
$conf['settings']['plugins']['Permission'] = '';
$conf['settings']['plugins']['PostRegistration'] = '';
$conf['settings']['plugins']['PreReservation'] = '';
$conf['settings']['plugins']['PostReservation'] = '';
/**
* Installation settings
*/
$conf['settings']['install.password'] = ''; //just to automated instalation
/**
* Pages
*/
$conf['settings']['pages']['enable.configuration'] = 'true';
/**
* API
*/
$conf['settings']['api']['enabled'] = 'false';
/**
* ReCaptcha
*/
$conf['settings']['recaptcha']['enabled'] = 'false';
$conf['settings']['recaptcha']['public.key'] = '';
$conf['settings']['recaptcha']['private.key'] = '';
/**
*/
$conf['settings']['email']['default.from.address'] = 'your-email-address';
$conf['settings']['email']['default.from.name'] = 'your-system-name';
/**
* Reports
*/
$conf['settings']['reports']['allow.all.users'] = 'false';
/**
* Account Password Rules
*/
$conf['settings']['password']['minimum.letters'] = '6';
$conf['settings']['password']['minimum.numbers'] = '0';
$conf['settings']['password']['upper.and.lower'] = 'false';
/**
* Label display settings
*/
$conf['settings']['reservation.labels']['ics.summary'] = '{title}';
$conf['settings']['reservation.labels']['ics.my.summary'] = '{title}';
$conf['settings']['reservation.labels']['rss.description'] = '<div><span>Start</span> {startdate}</div><div><span>End</span> {enddate}</div><div><span>Organizer</span> {name}</div><div><span>Description</span> {description}</div>';
$conf['settings']['reservation.labels']['my.calendar'] = '{resourcename} {title}';
$conf['settings']['reservation.labels']['resource.calendar'] = '{name}';
$conf['settings']['reservation.labels']['reservation.popup'] = ''; // Format for what to display in reservation popups. Possible values: {name} {dates} {title} {resources} {participants} {accessories} {description} {attributes}. Custom attributes can be added using att with the attribute id. For example {att1}
/**
* Security header settings
*/
$conf['settings']['security']['security.headers'] = 'false'; // Enable the following options
$conf['settings']['security']['security.strict-transport'] = 'true';
$conf['settings']['security']['security.x-frame'] = 'deny';
$conf['settings']['security']['security.x-xss'] = '1; mode=block';
$conf['settings']['security']['security.x-content-type'] = 'nosniff';
$conf['settings']['security']['security.content-security-policy'] = "default-src 'self'"; // Requires careful tuning (know what your doing)
/**
* Google Analytics settings
*/
$conf['settings']['google.analytics']['tracking.id'] = ''; // if set, Google Analytics tracking code will be added to every page in Booked
$conf['settings']['authentication']['allow.facebook.login'] = 'true';
$conf['settings']['authentication']['allow.google.login'] = 'true';
$conf['settings']['authentication']['required.email.domains'] = '';
/**
* Credits functionality
*/
$conf['settings']['credits']['enabled'] = 'false';
Konfiguriere das Booked Scheduler WebInterface
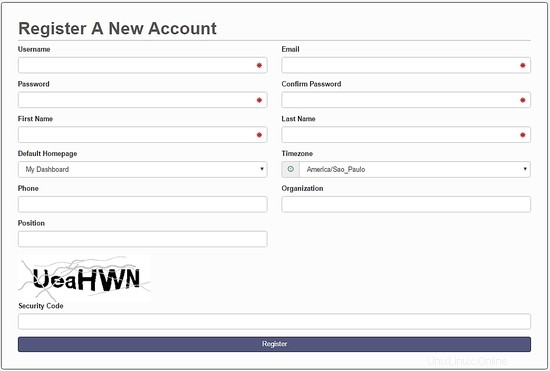
Access the following address http://your-ipaddress/Web/index.php, if everything is working fine, you will see the following screen:
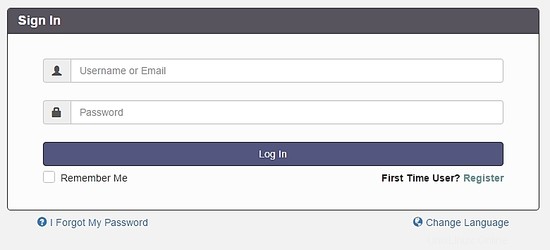
Select the option Register to create an admin account, remember, use the e-mail address previously configured at the file config.php.
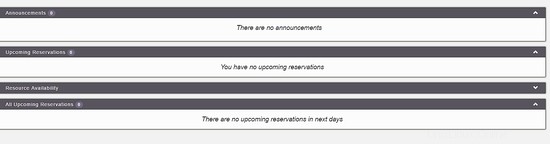
After creating your account, go to the login screen and authenticate. A dashboard will be load, like this image:
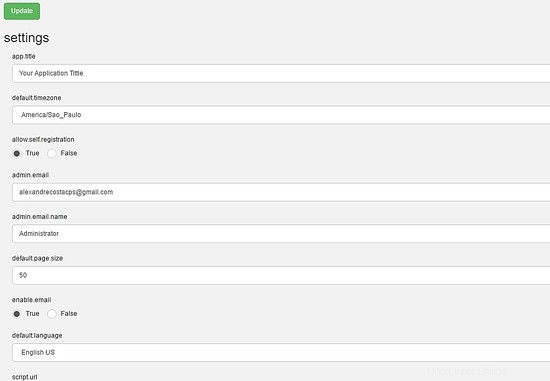
On the main menu, you can config all system, select Application Management :

Through this menu, you can configure all resources of Booked Scheduler, to change the config.php, select the Application Configuration :
This article is a small overview about Booked Scheduler, this software has a lot of amazing features who can help any environment to provide a rational use of resources.
I hope this article can introduce you to the software, in case you have any problem with the installation, feel free to ask questions. If you want to get more information about Booked Scheduler access http://www.bookedscheduler.com/.