In diesem Artikel geht es um das Layer-2-Tunneling-Protokoll (L2TP) mit IPsec zur Bereitstellung einer Ende-zu-Ende-Verschlüsselung im Layer-2-VPN, da Sicherheitsfunktionen in L2TP nicht verfügbar sind. Die Open-Source-Implementierungen von IPsec sind StrongSwan und OpenSwan, beide werden von allen Linux-Distributionen unterstützt. In diesem Tutorial wird OpenSwan verwendet, um den Sicherheitskanal für L2TP VPN bereitzustellen. Freeradius ist ein bekanntes Open-Source-Tool, das verschiedene Arten der Authentifizierung für Benutzer bereitstellt. Freeradius wird verwendet, um den L2TP-VPN-Benutzer zu authentifizieren, bevor ein sicherer Kanal eingerichtet wird. Für den L2TP-basierten sicheren Tunnel wird ein Android-basierter Client verwendet.
Installation erforderlicher Pakete
Die folgenden wichtigen Pakete werden auf Ubuntu 16.04 LTS installiert.
- Freeradius-Server/Client
- Poptop-Server
- xl2tpd
- Openswan für IPsec
- MySQL-Server/Client
- Bison &Flex
- GMP-Entwicklungsbibliothek
Wie unten gezeigt, sind die meisten der erforderlichen Pakete alle im Ubuntu 16.04 LTS-Repository verfügbar.
apt-get update

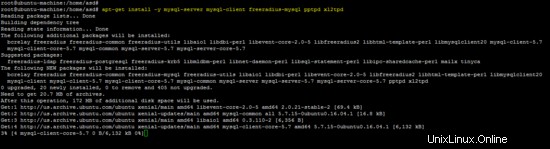
apt-get install -y mysql-server mysql-client freeradius-mysql pptpd xl2tpd
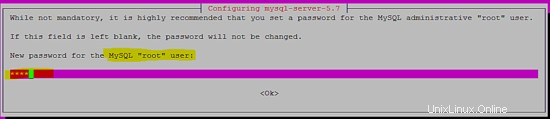
Der folgende Screenshot zeigt, wie das Passwort für den Benutzer „root“ des MySQL-Datenbankservers während des Installationsvorgangs gesetzt wird.
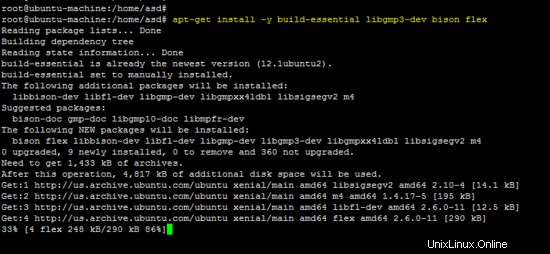
Die folgenden Pakete sind für die OpenSwan-Installation von der Quelle auf der Ubuntu 16.04-Plattform erforderlich.
apt-get install -y build-essential libgmp3-dev bison flex
Die Freeradius-Client- und OpenSwan-Pakete sind nicht im Repository verfügbar, daher wurden beide Tools aus den Quellen installiert.
Installation des Freeradius-Clients
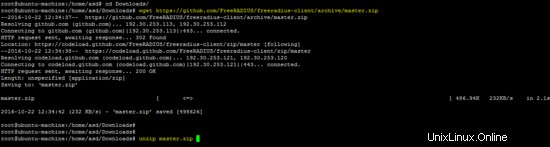
Laden Sie den neuesten Freeradius-Client über den folgenden Link herunter:
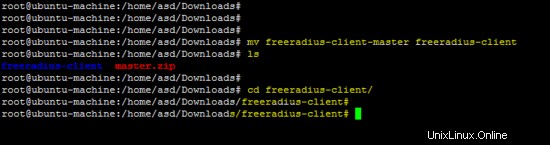
wget https://github.com/FreeRADIUS/freeradius-client/archive/master.zip
unzip master.zip
mv freeradius-client-master freeradius-client
cd freeradius-client
Führen Sie zuerst das Konfigurationsskript mit dem Präfix-Schalter aus und installieren Sie die Software mit dem Befehl make.
./configure --prefix=/
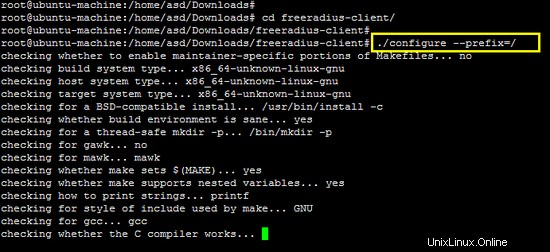
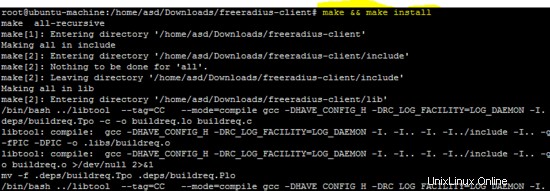
make && make install
Installation von OpenSwan
Der Quellcode des OpenSwan-IPsec-Tools ist unter folgendem Link verfügbar. Laden Sie das Archiv herunter und entpacken Sie es.
wget https://download.openswan.org/openswan/openswan-latest.tar.gz
tar -xzf openswan-latest.tar.gz
cd openswan-*

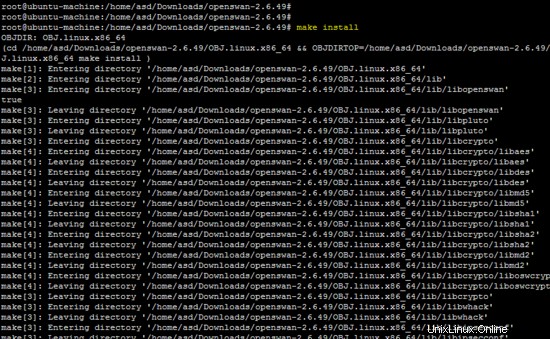
Führen Sie den folgenden Befehl aus, um OpenSwan zu kompilieren und zu installieren.
make programs
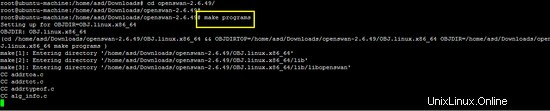
make install
Konfiguration
Bevor wir mit der Konfiguration der installierten Pakete beginnen, sind folgende Basiskonfigurationen (iptables und sysctl) auf der Ubuntu-Plattform erforderlich.
Geben Sie die folgenden iptables-Regeln für beide Netzwerke (10.20.30.0/24 &10.10.10.0/24) auf dem Terminal ein.
iptables -t nat -I POSTROUTING -s 10.20.30.0/24 -j SNAT --to 192.168.15.4
iptables -t nat -I POSTROUTING -s 10.10.10.0/24 -j SNAT --to 192.168.15.4

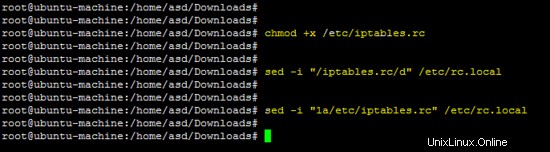
Obige Regeln sollten in der Datei /etc/iptables.rc gespeichert werden Datei, um sie beim Booten anzuwenden.

chmod +x /etc/iptables.rc
sed -i "/iptables.rc/d" /etc/rc.local
sed -i "1a/etc/iptables.rc" /etc/rc.local
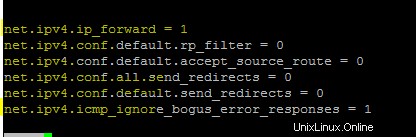
Fügen Sie die folgenden Zeilen in /etc/sysctl.conf hinzu Datei, um die Weiterleitung auf dem Linux-Rechner zu aktivieren.
net.ipv4.ip_forward = 1
net.ipv4.conf.default.rp_filter = 0
net.ipv4.conf.default.accept_source_route = 0
net.ipv4.conf.all.send_redirects = 0
net.ipv4.conf.default.send_redirects = 0
net.ipv4.icmp_ignore_bogus_error_responses = 1
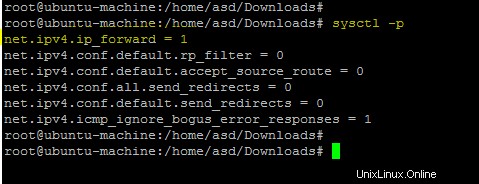
Führen Sie den folgenden Befehl aus, um Änderungen zu übernehmen.
sysctl -p
Konfiguration des Freeradius-Servers
Führen Sie den folgenden Befehl aus, um das Passwort für Freeradius zu ändern.
sed -i "s/PASSWORD('radpass')/PASSWORD('test')/g" /etc/freeradius/sql/mysql/admin.sql
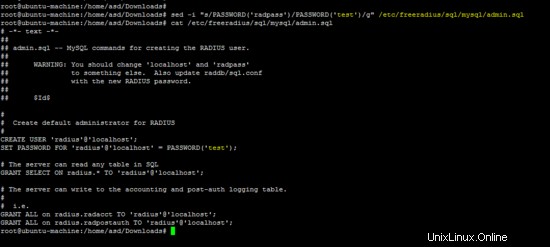
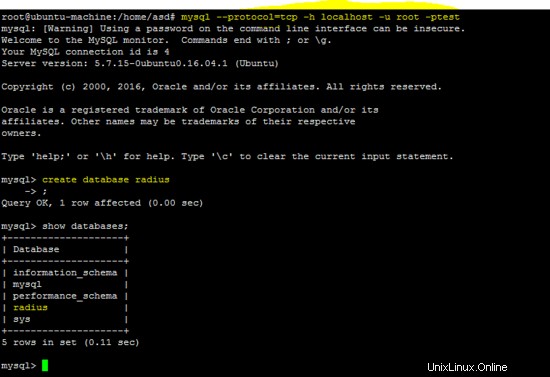
Die folgenden MySQL-Befehle konfigurieren den Freeradius-Server auf Ubuntu.
mysql --protocol=tcp -h localhost -u root -ptest
create database radius # create DB radius
mysql --protocol=tcp -h localhost -u root -ptest radius

mysql --protocol=tcp -h localhost -u root -ptest radius < /etc/freeradius/sql/mysql/cui.sql

Hinzufügen eines richtigen Datums, um das Problem mit dem ungültigen Standardwert in /etc/freeradius/sql/mysql/cui.sql zu beheben .
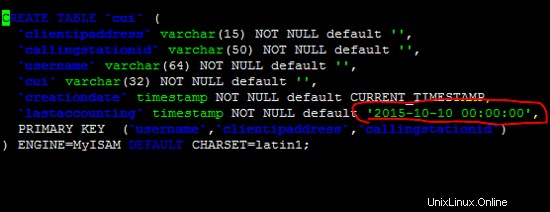
Nach Korrektur in der /etc/freeradius/sql/mysql/cui.sql Datei und führen Sie den obigen Befehl erneut aus, um den obigen Fehler zu beheben.

mysql --protocol=tcp -h localhost -u root -ptest radius < /etc/freeradius/sql/mysql/ippool.sql

mysql --protocol=tcp -h localhost -u root -ptest radius < /etc/freeradius/sql/mysql/nas.sql

mysql --protocol=tcp -h localhost -u root -ptest radius < /etc/freeradius/sql/mysql/schema.sql

mysql --protocol=tcp -h localhost -u root -ptest radius < /etc/freeradius/sql/mysql/wimax.sql

Führen Sie den folgenden sed-Befehl aus, um das Standardkennwort des Benutzers „radius“ zu ändern. In diesem Tutorial lautet das Passwort für den Benutzer „radius“ „test“. Wählen Sie ein sicheres Passwort auf Ihrem Server.
sed -i "s/password = \"radpass\"/password = \"test\"/g" /etc/freeradius/sql.conf
Erstellen eines Softlinks für die SQL-Konfiguration im Modulverzeichnis des Freeradius-Servers.
ln -sf /etc/freeradius/sql.conf /etc/freeradius/modules/sql

Folgende Dateien sind auf Ubuntu 16.04 nicht vorhanden, erstellen Sie daher alle erforderlichen Dateien mit dem beschriebenen Inhalt .
- /etc/freeradius/modules/hourlylytraffic
- /etc/freeradius/modules/dailytraffic
- /etc/freeradius/modules/monthlytraffic
/etc/freeradius/modules/hourlytraffic
sqlcounter hourlytrafficcounter {
    counter-name = Hourly-Traffic
    check-name = Hourly-Traffic
    sqlmod-inst = sql
    key = User-Name
    reset = 1h
    query = "SELECT SUM(acctinputoctets + acctoutputoctets) DIV 1048576 FROM radacct WHERE UserName='%{%k}' AND UNIX_TIMESTAMP(AcctStartTime) > '%b'"
}

/etc/freeradius/modules/dailytraffic
sqlcounter dailytrafficcounter {
    counter-name = Daily-Traffic
    check-name = Daily-Traffic
    sqlmod-inst = sql
    key = User-Name
    reset = daily
    query = "SELECT SUM(acctinputoctets + acctoutputoctets) DIV 1048576 FROM radacct WHERE UserName='%{%k}' AND UNIX_TIMESTAMP(AcctStartTime) > '%b'"
}

/etc/freeradius/modules/monthlytraffic
sqlcounter monthlytrafficcounter {
    counter-name = Monthly-Traffic
    check-name = Monthly-Traffic
    sqlmod-inst = sql
    key = User-Name
    reset = monthly
    query = "SELECT SUM(acctinputoctets + acctoutputoctets) DIV 1048576 FROM radacct WHERE UserName='%{%k}' AND UNIX_TIMESTAMP(AcctStartTime) > '%b'"
}

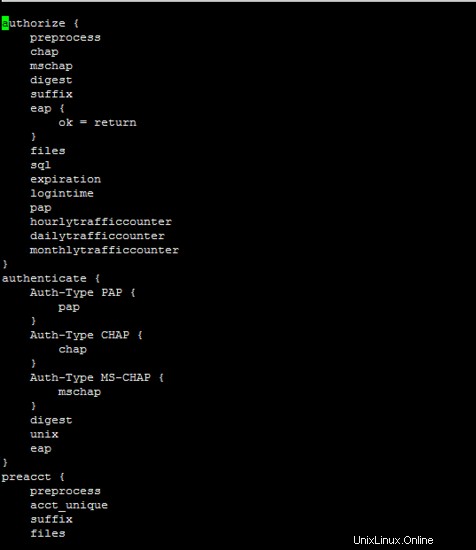
Die folgende Datei ist wichtig für die Konfiguration des Freeradius-Servers. Unsere laufenden Konfigurationen sind unten angegeben.
/etc/freeradius/sites-enabled/default
authorize {
    preprocess
    chap
    mschap
    digest
    suffix
    eap {
        ok = return
    }
    files
    sql
    expiration
    logintime
    pap
    hourlytrafficcounter
    dailytrafficcounter
    monthlytrafficcounter
}
authenticate {
    Auth-Type PAP {
        pap
    }
    Auth-Type CHAP {
        chap
    }
    Auth-Type MS-CHAP {
        mschap
    }
    digest
    unix
    eap
}
preacct {
    preprocess
    acct_unique
    suffix
    files
}
accounting {
    detail
    unix
    radutmp
    sql
    exec
    attr_filter.accounting_response
}
session {
    radutmp
    sql
}
post-auth {
    sql
    exec
    Post-Auth-Type REJECT {
        attr_filter.access_reject
    }
}
pre-proxy {
}
post-proxy {
    eap
}
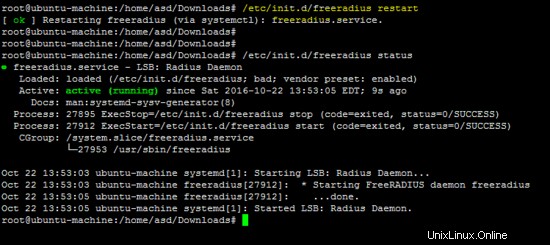
Verwenden Sie den folgenden Befehl, um den Freeradius-Server neu zu starten und die Konfiguration zu überprüfen.
/etc/init.d/freeradius restart
Konfiguration des Freeradius-Clients
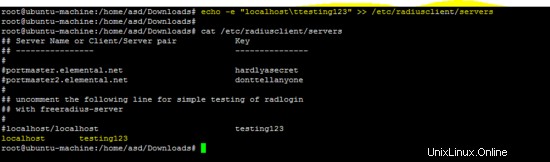
Der folgende Befehl setzt den Hostnamen und das Geheimnis in der Datei "servers" des Freeradius-Clients.
echo -e "localhost\ttesting123" >> /etc/radiusclient/servers
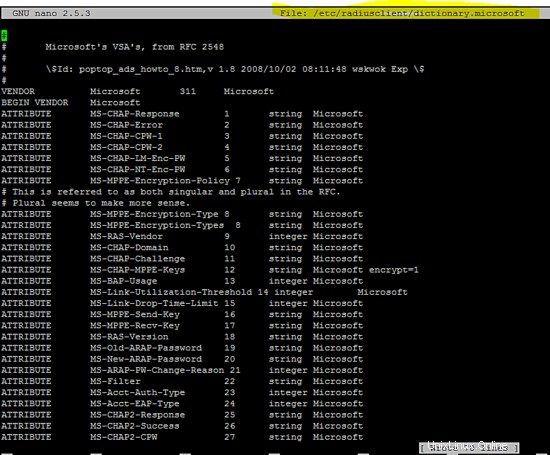
Erstellen Sie die Konfigurationsdatei dictionary.microsoft für Windows-basierte Clients.
vi /etc/radiusclient/dictionary.microsoft
#
#       Microsoft's VSA's, from RFC 2548
#
#       \$Id: poptop_ads_howto_8.htm,v 1.8 2008/10/02 08:11:48 wskwok Exp \$
#
VENDOR          Microsoft       311     Microsoft
BEGIN VENDOR    Microsoft
ATTRIBUTE       MS-CHAP-Response        1       string  Microsoft
ATTRIBUTE       MS-CHAP-Error           2       string  Microsoft
ATTRIBUTE       MS-CHAP-CPW-1           3       string  Microsoft
ATTRIBUTE       MS-CHAP-CPW-2           4       string  Microsoft
ATTRIBUTE       MS-CHAP-LM-Enc-PW       5       string  Microsoft
ATTRIBUTE       MS-CHAP-NT-Enc-PW       6       string  Microsoft
ATTRIBUTE       MS-MPPE-Encryption-Policy 7     string  Microsoft
# This is referred to as both singular and plural in the RFC.
# Plural seems to make more sense.
ATTRIBUTE       MS-MPPE-Encryption-Type 8       string  Microsoft
ATTRIBUTE       MS-MPPE-Encryption-Types  8     string  Microsoft
ATTRIBUTE       MS-RAS-Vendor           9       integer Microsoft
ATTRIBUTE       MS-CHAP-Domain          10      string  Microsoft
ATTRIBUTE       MS-CHAP-Challenge       11      string  Microsoft
ATTRIBUTE       MS-CHAP-MPPE-Keys       12      string  Microsoft encrypt=1
ATTRIBUTE       MS-BAP-Usage            13      integer Microsoft
ATTRIBUTE       MS-Link-Utilization-Threshold 14 integer        Microsoft
ATTRIBUTE       MS-Link-Drop-Time-Limit 15      integer Microsoft
ATTRIBUTE       MS-MPPE-Send-Key        16      string  Microsoft
ATTRIBUTE       MS-MPPE-Recv-Key        17      string  Microsoft
ATTRIBUTE       MS-RAS-Version          18      string  Microsoft
ATTRIBUTE       MS-Old-ARAP-Password    19      string  Microsoft
ATTRIBUTE       MS-New-ARAP-Password    20      string  Microsoft
ATTRIBUTE       MS-ARAP-PW-Change-Reason 21     integer Microsoft
ATTRIBUTE       MS-Filter               22      string  Microsoft
ATTRIBUTE       MS-Acct-Auth-Type       23      integer Microsoft
ATTRIBUTE       MS-Acct-EAP-Type        24      integer Microsoft
ATTRIBUTE       MS-CHAP2-Response       25      string  Microsoft
ATTRIBUTE       MS-CHAP2-Success        26      string  Microsoft
ATTRIBUTE       MS-CHAP2-CPW            27      string  Microsoft
ATTRIBUTE       MS-Primary-DNS-Server   28      ipaddr
ATTRIBUTE       MS-Secondary-DNS-Server 29      ipaddr
ATTRIBUTE       MS-Primary-NBNS-Server  30      ipaddr Microsoft
ATTRIBUTE       MS-Secondary-NBNS-Server 31     ipaddr Microsoft
#ATTRIBUTE      MS-ARAP-Challenge       33      string  Microsoft
#
#       Integer Translations
#
#       MS-BAP-Usage Values
VALUE           MS-BAP-Usage            Not-Allowed     0
VALUE           MS-BAP-Usage            Allowed         1
VALUE           MS-BAP-Usage            Required        2
#       MS-ARAP-Password-Change-Reason Values
VALUE   MS-ARAP-PW-Change-Reason        Just-Change-Password            1
VALUE   MS-ARAP-PW-Change-Reason        Expired-Password                2
VALUE   MS-ARAP-PW-Change-Reason        Admin-Requires-Password-Change  3
VALUE   MS-ARAP-PW-Change-Reason        Password-Too-Short              4
#       MS-Acct-Auth-Type Values
VALUE           MS-Acct-Auth-Type       PAP             1
VALUE           MS-Acct-Auth-Type       CHAP            2
VALUE           MS-Acct-Auth-Type       MS-CHAP-1       3
VALUE           MS-Acct-Auth-Type       MS-CHAP-2       4
VALUE           MS-Acct-Auth-Type       EAP             5
#       MS-Acct-EAP-Type Values
VALUE           MS-Acct-EAP-Type        MD5             4
VALUE           MS-Acct-EAP-Type        OTP             5
VALUE           MS-Acct-EAP-Type        Generic-Token-Card      6
VALUE           MS-Acct-EAP-Type        TLS             13
END-VENDOR Microsoft
vi /etc/radiusclient/dictionary.merit
#
#       Experimental extensions, configuration only (for check-items)
#       Names/numbers as per the MERIT extensions (if possible).
#
ATTRIBUTE       NAS-Identifier          32      string
ATTRIBUTE       Proxy-State             33      string
ATTRIBUTE       Login-LAT-Service       34      string
ATTRIBUTE       Login-LAT-Node          35      string
ATTRIBUTE       Login-LAT-Group         36      string
ATTRIBUTE       Framed-AppleTalk-Link   37      integer
ATTRIBUTE       Framed-AppleTalk-Network 38     integer
ATTRIBUTE       Framed-AppleTalk-Zone   39      string
ATTRIBUTE       Acct-Input-Packets      47      integer
ATTRIBUTE       Acct-Output-Packets     48      integer
# 8 is a MERIT extension.
VALUE           Service-Type            Authenticate-Only       8
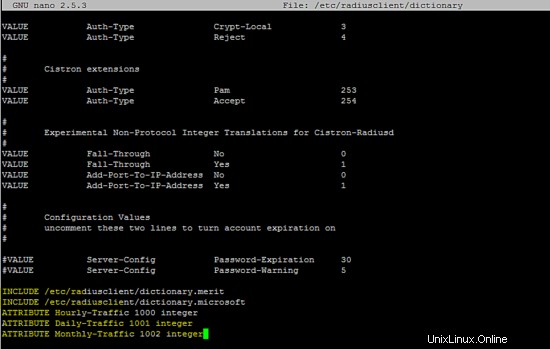
Fügen Sie die folgenden Zeilen zum /etc/radiusclient/dictionary hinzu Datei.
INCLUDE /etc/radiusclient/dictionary.merit
INCLUDE /etc/radiusclient/dictionary.microsoft
ATTRIBUTE Hourly-Traffic 1000 integer
ATTRIBUTE Daily-Traffic 1001 integer
ATTRIBUTE Monthly-Traffic 1002 integer
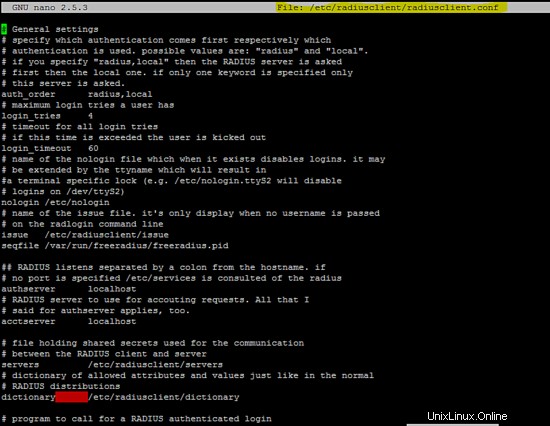
Das Folgende ist die Laufkonfiguration des Radius-Clients.
/etc/radiusclient/radiusclient.conf
# General settings
# specify which authentication comes first respectively which
# authentication is used. possible values are: "radius" and "local".
# if you specify "radius,local" then the RADIUS server is asked
# first then the local one. if only one keyword is specified only
# this server is asked.
auth_order    radius,local
# maximum login tries a user has
login_tries    4
# timeout for all login tries
# if this time is exceeded the user is kicked out
login_timeout    60
# name of the nologin file which when it exists disables logins. it may
# be extended by the ttyname which will result in
#a terminal specific lock (e.g. /etc/nologin.ttyS2 will disable
# logins on /dev/ttyS2)
nologin /etc/nologin
# name of the issue file. it's only display when no username is passed
# on the radlogin command line
issue    /etc/radiusclient/issue
seqfile /var/run/freeradius/freeradius.pid

## RADIUS listens separated by a colon from the hostname. if
# no port is specified /etc/services is consulted of the radius
authserver     localhost
# RADIUS server to use for accouting requests. All that I
# said for authserver applies, too.
acctserver     localhost

# file holding shared secrets used for the communication
# between the RADIUS client and server
servers        /etc/radiusclient/servers
# dictionary of allowed attributes and values just like in the normal
# RADIUS distributions
dictionary     /etc/radiusclient/dictionary

# program to call for a RADIUS authenticated login
login_radius    /sbin/login.radius
# file which specifies mapping between ttyname and NAS-Port attribute
mapfile        /etc/radiusclient/port-id-map
# default authentication realm to append to all usernames if no
# realm was explicitly specified by the user
default_realm

# time to wait for a reply from the RADIUS server
radius_timeout    10
# resend request this many times before trying the next server
radius_retries    3
# local address from which radius packets have to be sent
bindaddr *
# program to execute for local login
# it must support the -f flag for preauthenticated login
login_local    /bin/login
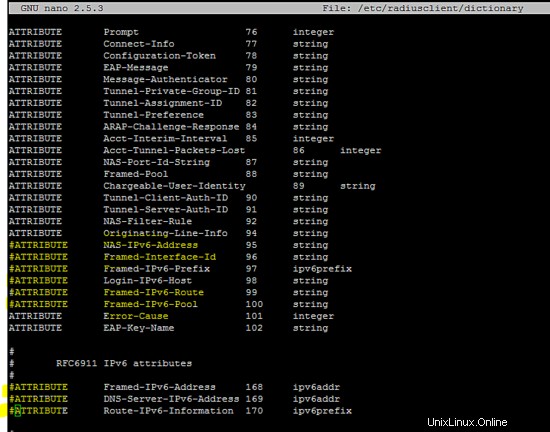
Folgende Konfiguration (die sich auf IPv6 bezieht) in der /etc/radiusclient/dictionary-Datei sollte sein auskommentiert, um den Radius-Client auszuführen.
ATTRIBUTE       NAS-Filter-Rule         92      string
ATTRIBUTE       Originating-Line-Info   94      string
ATTRIBUTE       NAS-IPv6-Address        95      string
ATTRIBUTE       Framed-Interface-Id     96      string
ATTRIBUTE       Framed-IPv6-Prefix      97      ipv6prefix
ATTRIBUTE       Login-IPv6-Host         98      string
ATTRIBUTE       Framed-IPv6-Route       99      string
ATTRIBUTE       Framed-IPv6-Pool        100     string
ATTRIBUTE       Error-Cause             101     integer
ATTRIBUTE       EAP-Key-Name            102     string
#
#       RFC6911 IPv6 attributes
#
ATTRIBUTE       Framed-IPv6-Address     168     ipv6addr
ATTRIBUTE       DNS-Server-IPv6-Address 169     ipv6addr
ATTRIBUTE       Route-IPv6-Information  170     ipv6prefix
Konfiguration des Poptop-Servers
Fügen Sie die folgende Konfiguration in der /etc/pptpd.conf hinzu Datei.
localip 10.20.30.1
remoteip 10.20.30.2-254

Führen Sie den folgenden sed-Befehl für die /etc/ppp/pptpd-options aus Datei.
sed -i "/^ms-dns/d" /etc/ppp/pptpd-options
sed -i -e "/radius.so/d" -e "/radattr.so/d" /etc/ppp/pptpd-options

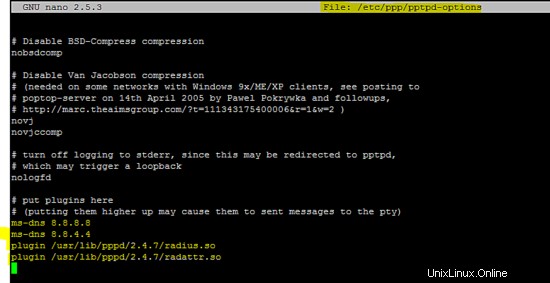
Fügen Sie die folgenden Zeilen in /etc/ppp/pptpd-options hinzu Datei.
ms-dns 8.8.8.8
ms-dns 8.8.4.4
plugin /usr/lib/pppd/2.4.7/radius.so
plugin /usr/lib/pppd/2.4.7/radattr.so
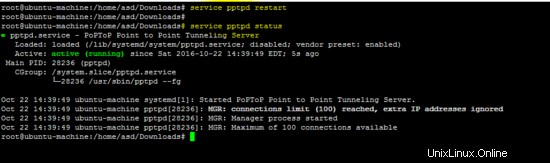
Starten Sie den pptpd-Dienst neu, um die oben genannten Änderungen zu übernehmen.
service pptpd restart
Konfiguration von xl2tp
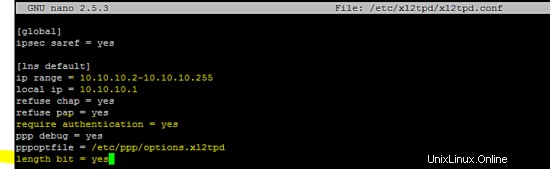
Fügen Sie die folgenden Konfigurationszeilen in die /etc/xl2tpd/xl2tpd.conf ein Datei wie in der folgenden Abbildung gezeigt.
[global]
ipsec saref = yes

[lns default]
ip range = 10.10.10.2-10.10.10.255
local ip = 10.10.10.1
refuse chap = yes
refuse pap = yes
require authentication = yes
ppp debug = yes
pppoptfile = /etc/ppp/options.xl2tpd
length bit = yes
Konfiguration von OpenSwan
Fügen Sie die folgende Einstellung der geheimen ipsec-Datei in /etc/ipsec.secrets hinzu .
192.168.15.4 %any 0.0.0.0: PSK "test"

Die IPsec-Konfiguration für den L2TP-Tunnel ist in /etc/ipsec.conf enthalten Datei.
version 2.0

config setup
        nat_traversal=yes
        virtual_private=%v4:192.168.0.0/16,%v4:10.0.0.0/8,%v4:172.16.0.0/12,%v4:25.0.0.0/8,%v4:!10.254.253.0/24
        protostack=netkey
        #protostack=mast  # used for SAref + MAST only
        interfaces="%defaultroute"
        oe=off

conn psk-l2tp
        pfs=no
        auto=add
        rekey=no
        # overlapip=yes   # for SAref + MAST
        # sareftrack=yes  # for SAref + MAST
        type=transport
        left=192.168.15.4
        leftprotoport=17/1701
        right=%any
        rightprotoport=17/%any
        rightsubnet=vhost:%priv,%no
        authby=secret
Konfiguration des PPP-Servers
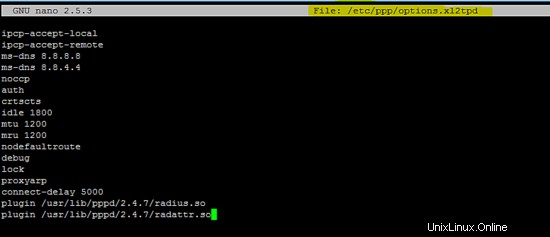
Fügen Sie die folgende Konfiguration in /etc/ppp/options.xl2tpd hinzu Datei.
ipcp-accept-local
ipcp-accept-remote
ms-dns 8.8.8.8
ms-dns 8.8.4.4
noccp
auth
crtscts
idle 1800
mtu 1200
mru 1200
nodefaultroute
debug
lock
proxyarp
connect-delay 5000
plugin /usr/lib/pppd/2.4.7/radius.so
plugin /usr/lib/pppd/2.4.7/radattr.so
Nach erfolgreicher Konfiguration aller erforderlichen Pakete starten Sie nun alle Dienste neu, um L2TP VPN zu testen.
Neustart von IPsec- und xl2tp-Diensten.

Die folgende Abbildung zeigt, dass der Freeradius-Server im Daemon-Modus ausgeführt wird, was hilfreich ist, um festzustellen, ob der Server funktioniert.

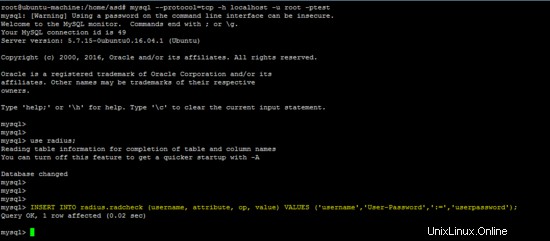
Fügen Sie ein Benutzerkonto in der MySQL-Datenbank ein, um die Konfiguration zu testen.
INSERT INTO radius.radcheck (username, attribute, op, value) VALUES ('username','User-Password',':=','userpassword');
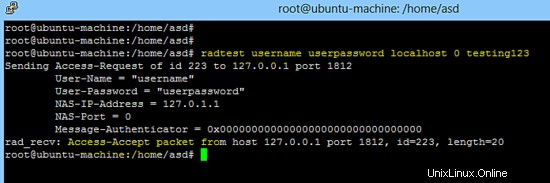
Der folgende Befehl prüft, ob der Freeradius-Server auf localhost funktioniert.
radtest username userpassword localhost 0 testing123
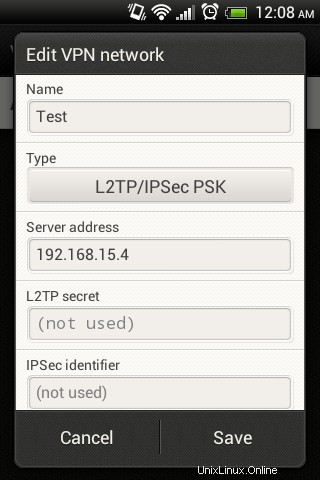
Konfiguration des L2TP-Android-Clients
Gehen Sie zu Einstellungen ==> Mehr ==> VPN ==>VPN-Netzwerk hinzufügen auf einem Android-Telefon und erstellen Sie ein neues L2TP PSK VPN wie unten gezeigt.
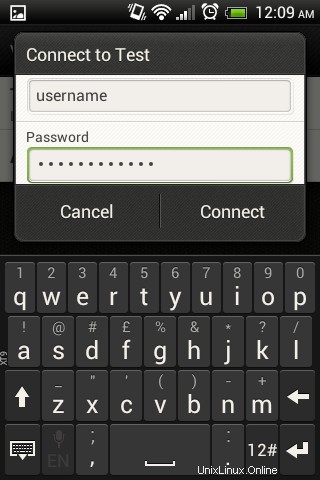
Klicken Sie nach der Erstellung des neuen L2TP-VPN darauf und geben Sie den Benutzernamen/das Passwort ein (konfiguriert auf dem Freeradius-Server).
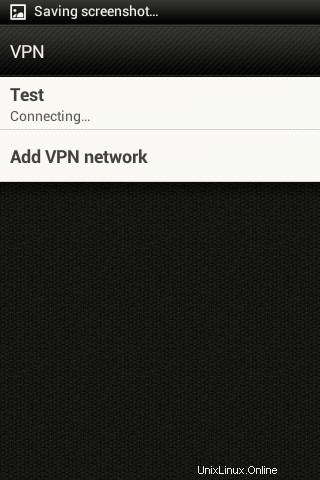
Die folgende Abbildung zeigt, dass L2TP VPN eine Verbindung herstellt.
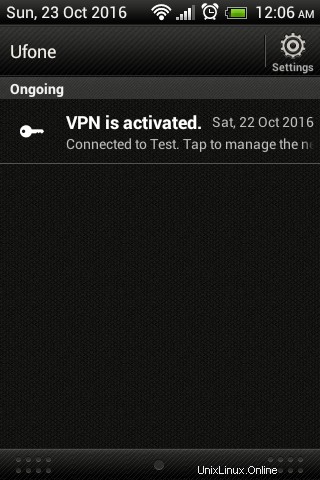
Die folgenden Bildschirme zeigen, dass L2TP VPN erfolgreich mit einem Android-Client verbunden wurde.
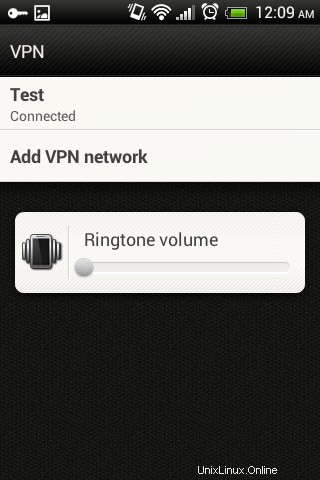
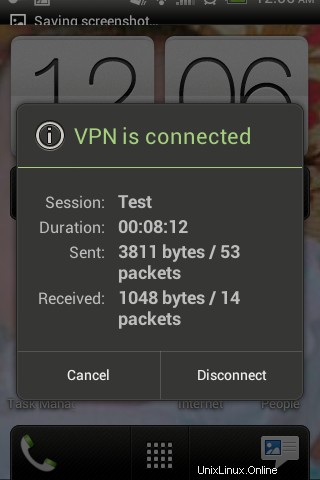
L2TP-VPN-Status
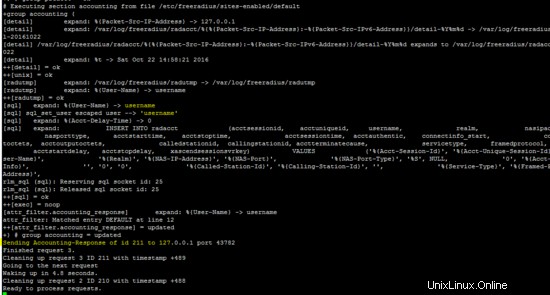
Freeradius zeigt die erfolgreiche Authentifizierung des L2TP-Android-Clients.
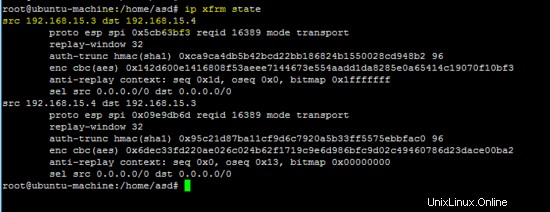
Der folgende Befehl zeigt den Status des IPsec-Tunnels
ip xfrm state
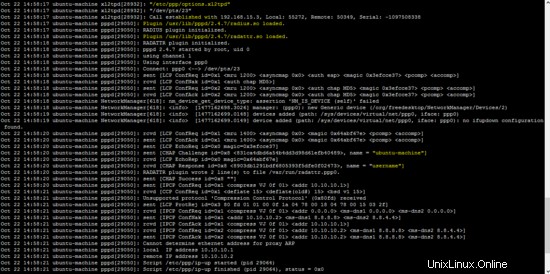
OpenSwan-Protokoll (/var/log/auth.log ) und xl2tp-Protokoll (/var/log/syslog ) zeigt auch den Status von L2TP VPN an.
tail -f /var/log/auth.log
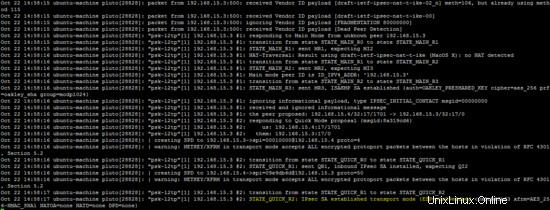
tail -f /var/log/syslog
In diesem Lernprogramm wird das Layer-2-Tunneling-Protokoll mit IPSec und Freeradius verwendet, um Sicherheits- und Authentifizierungsmechanismen bereitzustellen. Ein Android-basierter Client wird verwendet, um die Funktionsweise von L2TP über IPsec zu demonstrieren.