Einführung
Subversion ist ein Open-Source-Versionskontrollsystem. Das Subversion-Projekt und die Software wurden im Jahr 2000 von CollabNet, Inc. gegründet und haben in den letzten zehn Jahren einen unglaublichen Erfolg erlebt. Subversion erfreut sich und genießt weiterhin eine breite Akzeptanz sowohl in der Open-Source-Arena als auch in der Unternehmenswelt.
Benutzerfreundliches USVN ist eine in PHP geschriebene Webschnittstelle zur Konfiguration von Subversion-Repositories. Ziel ist es, die Erstellung neuer Projekte zu vereinfachen, ohne die Befehlszeilenschnittstelle verwenden zu müssen, also möglicherweise ohne privilegierten Zugriff auf den Server. USVN generiert dann die Liste der Benutzer, denen der Zugriff auf Ihren Quellcode gestattet ist. Dies ermöglicht die Delegierung von Rechten zur Verwaltung von Subversion-Repositories.
Installieren Sie Apache Subversion (SVN)
USVN erforderte einen Webserver für die Bereitstellung. Also werden wir Apache HTTP Server installieren.
# yum install -y httpdStarten und aktivieren Sie httpd Dienst.
# systemctl start httpd
# systemctl enable httpd
Deaktivieren Sie die Willkommensseite von Apache HTTP Server.
# mv /etc/httpd/conf.d/welcome.conf /etc/httpd/conf.d/welcome.conf.orgDeaktivieren Sie Verzeichnisindizes in Apache HTTP Server-Konfigurationen starten Sie dann den httpd-Dienst mit den folgenden Befehlen neu:
# cp /etc/httpd/conf/httpd.conf /etc/httpd/conf/httpd.conf.org
# sed -i "s/Options Indexes FollowSymLinks/Options FollowSymLinks/" /etc/httpd/conf/httpd.conf
# systemctl restart httpd
Dann müssen Sie den http-Dienst durch den Firewall-Dienst mit den Befehlen zulassen:
# firewall-cmd --permanent --add-service=http
# firewall-cmd --reload
Auch USVN benötigt eine MySQL-Datenbank als Backend-Datenbank. Also werden wir mariadb installieren Datenbank und php .
# yum install php mariadb-server php-mysql -yStarten und aktivieren Sie mariadb Dienst.
# systemctl start mariadb
# systemctl enable mariadb
Konfigurieren Sie den Mariadb-Server mit dem Befehl:
[root@unixcop ~]# mysql_secure_installation
NOTE: RUNNING ALL PARTS OF THIS SCRIPT IS RECOMMENDED FOR ALL MariaDB
SERVERS IN PRODUCTION USE! PLEASE READ EACH STEP CAREFULLY!
In order to log into MariaDB to secure it, we'll need the current
password for the root user. If you've just installed MariaDB, and
you haven't set the root password yet, the password will be blank,
so you should just press enter here.
Enter current password for root (enter for none):
OK, successfully used password, moving on...
Setting the root password ensures that nobody can log into the MariaDB
root user without the proper authorisation.
Set root password? [Y/n] Y
New password:
Re-enter new password:
Password updated successfully!
Reloading privilege tables..
... Success!
By default, a MariaDB installation has an anonymous user, allowing anyone
to log into MariaDB without having to have a user account created for
them. This is intended only for testing, and to make the installation
go a bit smoother. You should remove them before moving into a
production environment.
Remove anonymous users? [Y/n] Y
... Success!
Normally, root should only be allowed to connect from 'localhost'. This
ensures that someone cannot guess at the root password from the network.
Disallow root login remotely? [Y/n] Y
... Success!
By default, MariaDB comes with a database named 'test' that anyone can
access. This is also intended only for testing, and should be removed
before moving into a production environment.
Remove test database and access to it? [Y/n] Y
- Dropping test database...
... Success!
- Removing privileges on test database...
... Success!
Reloading the privilege tables will ensure that all changes made so far
will take effect immediately.
Reload privilege tables now? [Y/n] Y
... Success!
Cleaning up...
All done! If you've completed all of the above steps, your MariaDB
installation should now be secure.
Thanks for using MariaDB!
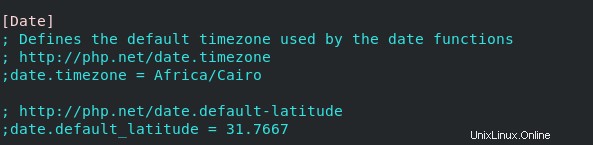
[root@unixcop ~]#Bearbeiten Sie auch die Zeitzone in den PHP-Einstellungen:
# vim /etc/php.iniUnd fügen Sie dieser Zeile die Zeitzone hinzu
date.timezone = So
date.timezone = Africa/Cairo
Installieren Sie Apache Subversion und das Apache HTTP-Servermodul
Sie können sie mit diesem Befehl unten herunterladen:
# yum install -y subversion mod_dav_svnInstallieren Sie benutzerfreundliches SVN (USVN)
Laden Sie USVN auf Apache HTTP Server herunter und extrahieren Sie es. Befolgen Sie einfach die Befehle in den folgenden Schritten:
# cd /var/www/html[root@unixcop html]# wget https://github.com/usvn/usvn/archive/1.0.7.tar.gz
--2021-08-24 07:28:42-- https://github.com/usvn/usvn/archive/1.0.7.tar.gz
Resolving github.com (github.com)... 192.30.255.113
Connecting to github.com (github.com)|192.30.255.113|:443... connected.
HTTP request sent, awaiting response... 302 Found
Location: https://codeload.github.com/usvn/usvn/tar.gz/1.0.7 [following]
--2021-08-24 07:28:42-- https://codeload.github.com/usvn/usvn/tar.gz/1.0.7
Resolving codeload.github.com (codeload.github.com)... 192.30.255.120
Connecting to codeload.github.com (codeload.github.com)|192.30.255.120|:443... connected.
HTTP request sent, awaiting response... 200 OK
Length: unspecified [application/x-gzip]
Saving to: ‘1.0.7.tar.gz’
[ <=> ] 4,577,871 5.77MB/s in 0.8s
2021-08-24 07:28:43 (5.77 MB/s) - ‘1.0.7.tar.gz’ saved [4577871]
[root@unixcop html]#Extrahieren Sie die heruntergeladene Tar-Datei:
[root@unixcop html]# tar xvf 1.0.7.tar.gz Benennen Sie die extrahierte Datei in usvn:
um[root@unixcop html]# mv usvn-1.0.7 usvnGehen Sie dann in das usvn-Verzeichnis und erstellen Sie ein Dateiverzeichnis, indem Sie einige erforderliche Ordnerberechtigungen mit den folgenden Befehlen festlegen:
[root@unixcop html]# cd usvn
[root@unixcop usvn]# mkdir files
[root@unixcop usvn]# chmod -R g+w {public,files,config}
[root@unixcop usvn]# chgrp -R apache /var/www/html/usvn
[root@unixcop usvn]# restorecon -R /var/www/html/usvn
Konfigurieren Sie schließlich die USVN-Anwendung auf Apache Server.
[root@unixcop usvn]# vim /etc/httpd/conf.d/usvn.conf Fügen Sie dann Folgendes hinzu:
<Directory /var/www/html/usvn/>
AllowOverride All
Require all granted
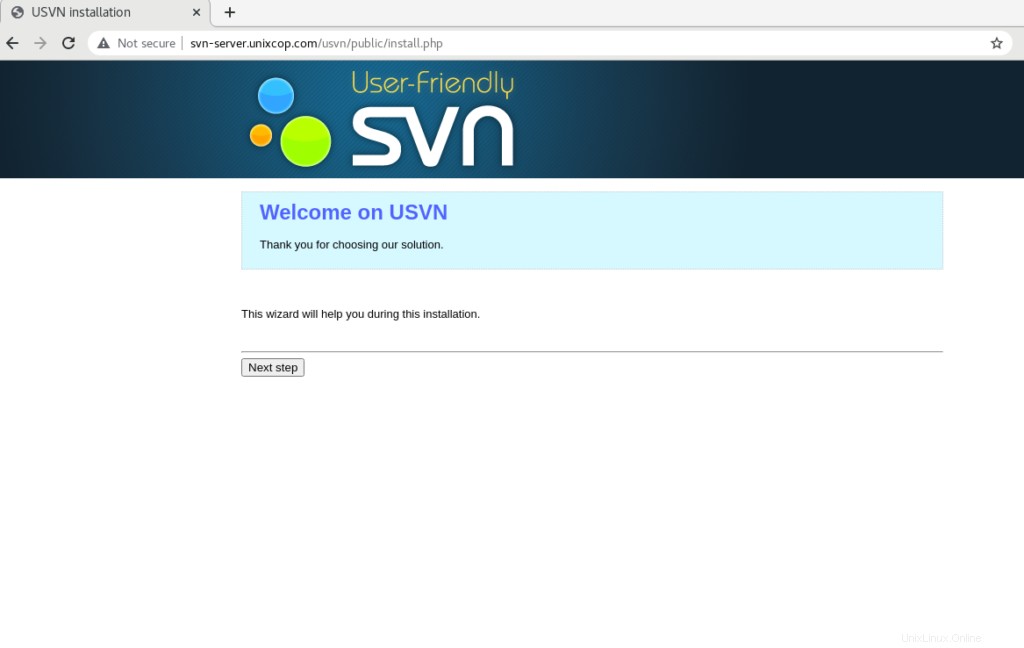
</Directory>Öffnen Sie im Browser http://ip_address/usvn/public/install.php um die Installation zu starten.
Oder öffnen Sie http://svn-server.unixcop.com/usvn/public/install.php , und starten Sie die USVN-Installation.
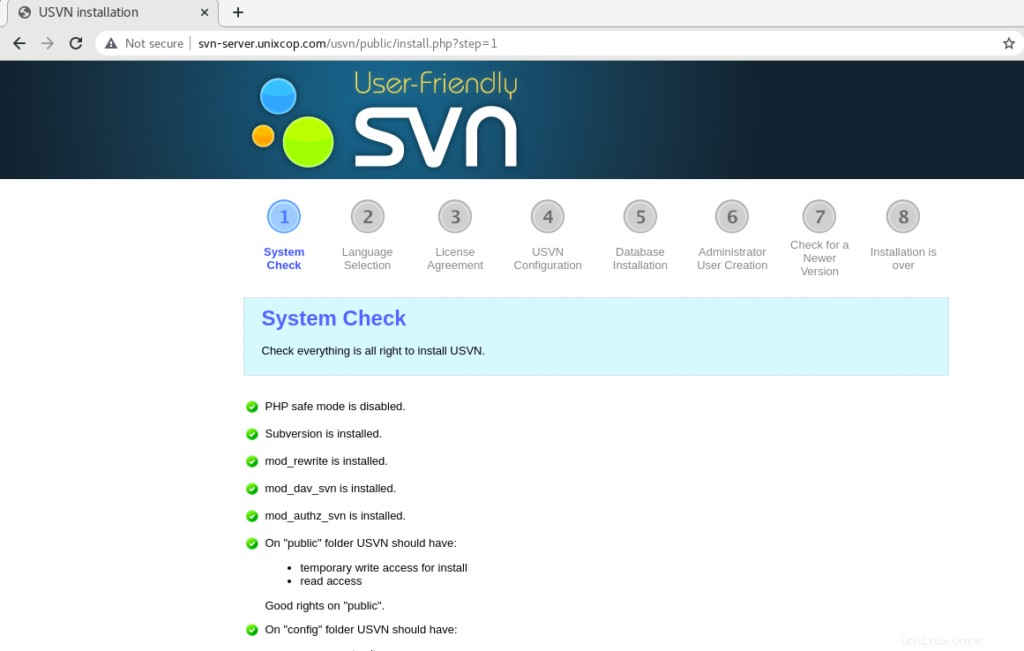
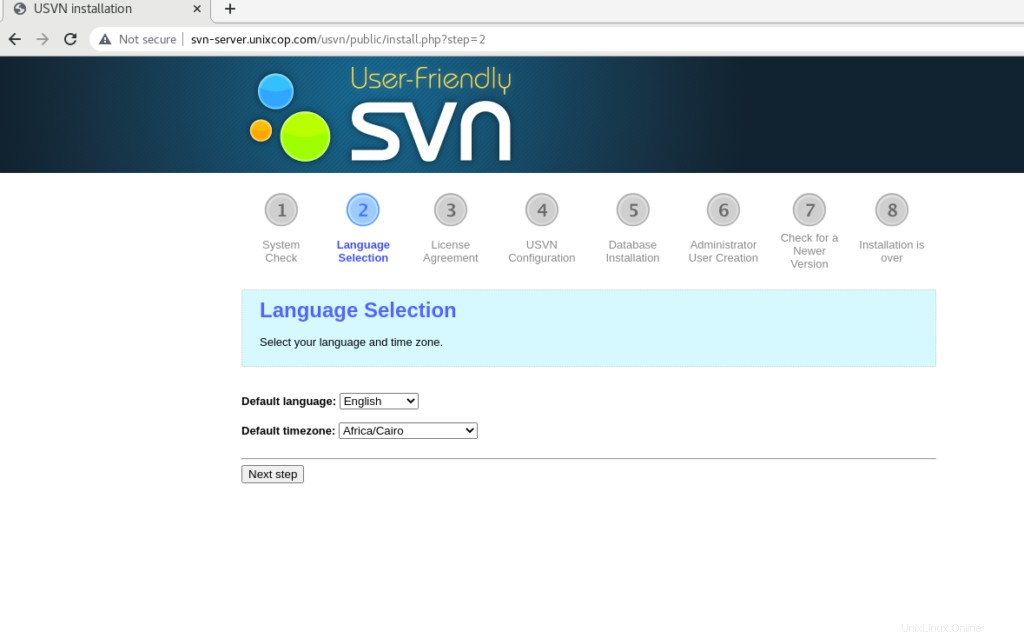
Wählen Sie Ihre Sprache und Zeitzone aus.
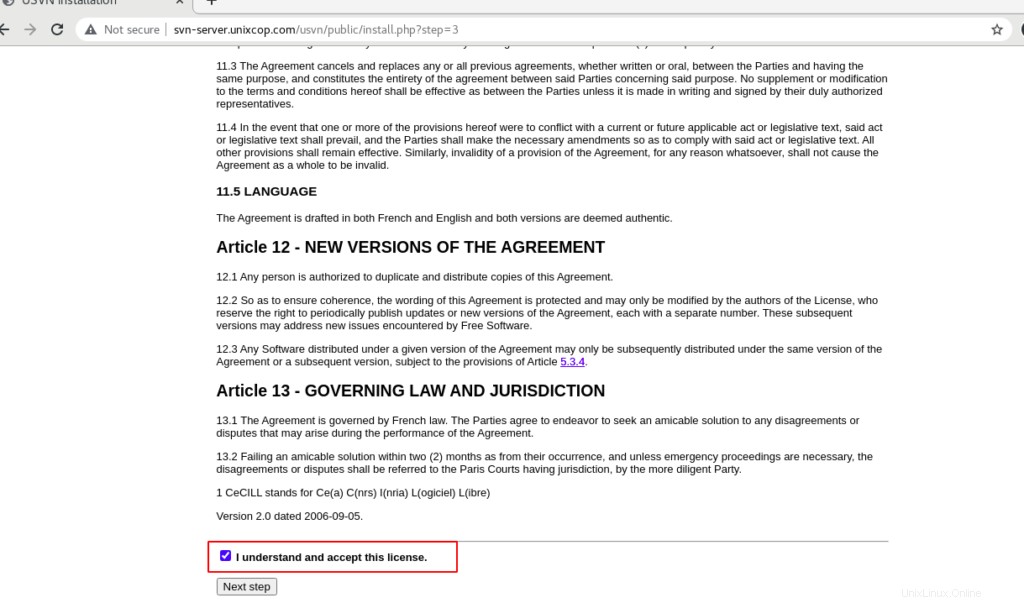
Aktivieren Sie Ich verstehe und akzeptiere diese Lizenz Klicken Sie dann auf Nächster Schritt .
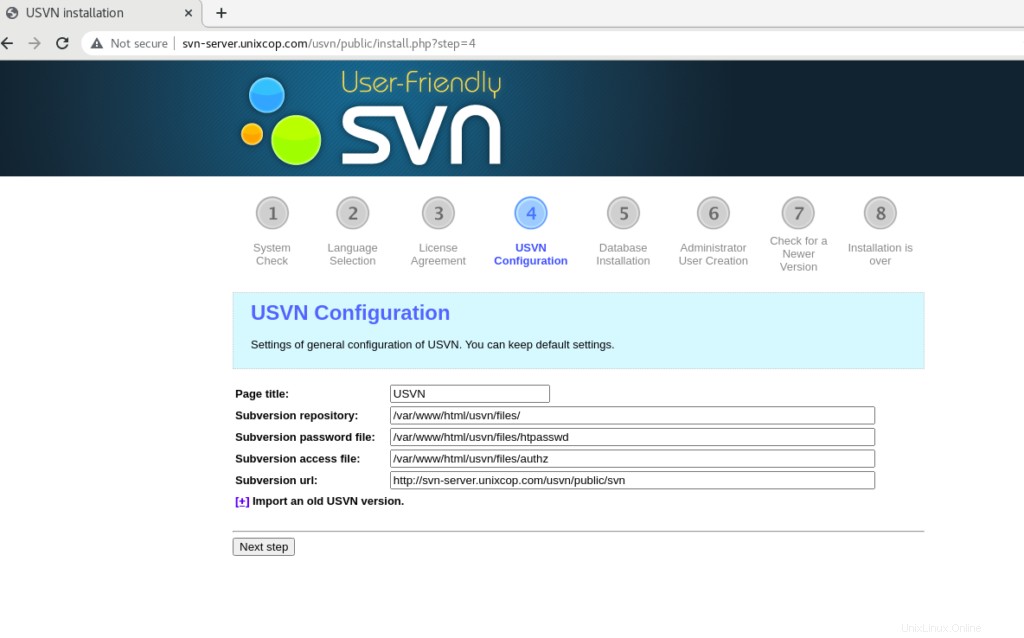
Klicken Sie auf Nächster Schritt .
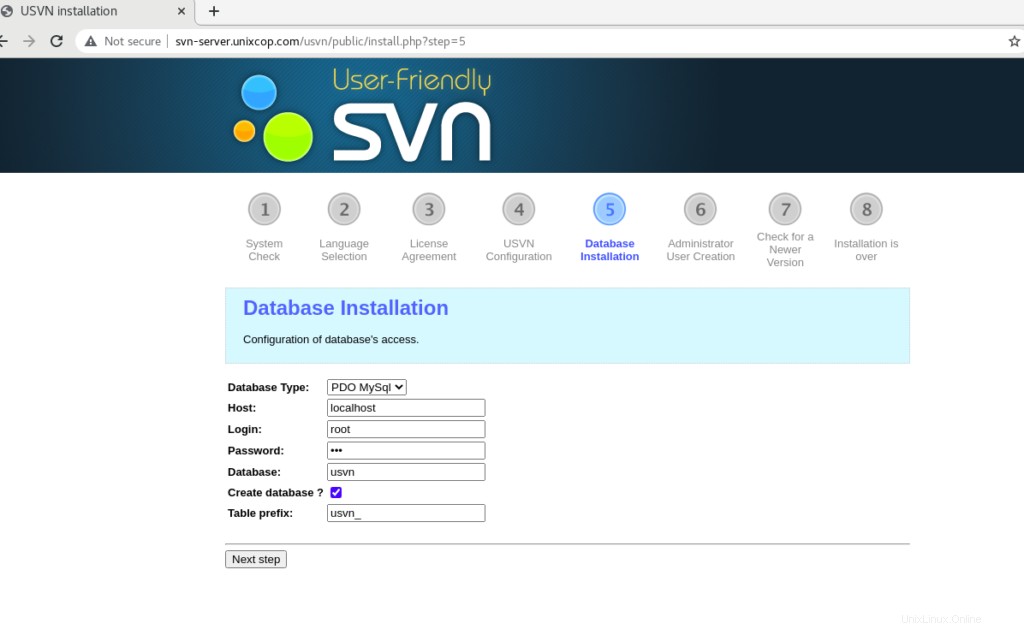
Geben Sie das Datenbankpasswort ein und aktivieren Sie Datenbank erstellen? Klicken Sie dann auf Weiter .
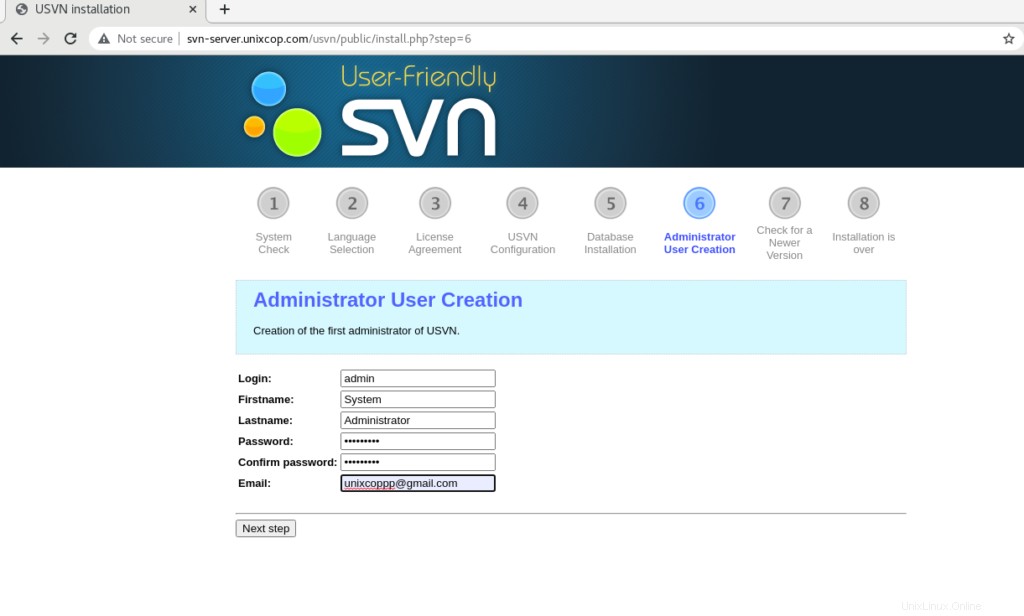
Erstellen Sie einen USVN-Administrator und klicken Sie dann auf „Nächster Schritt“.
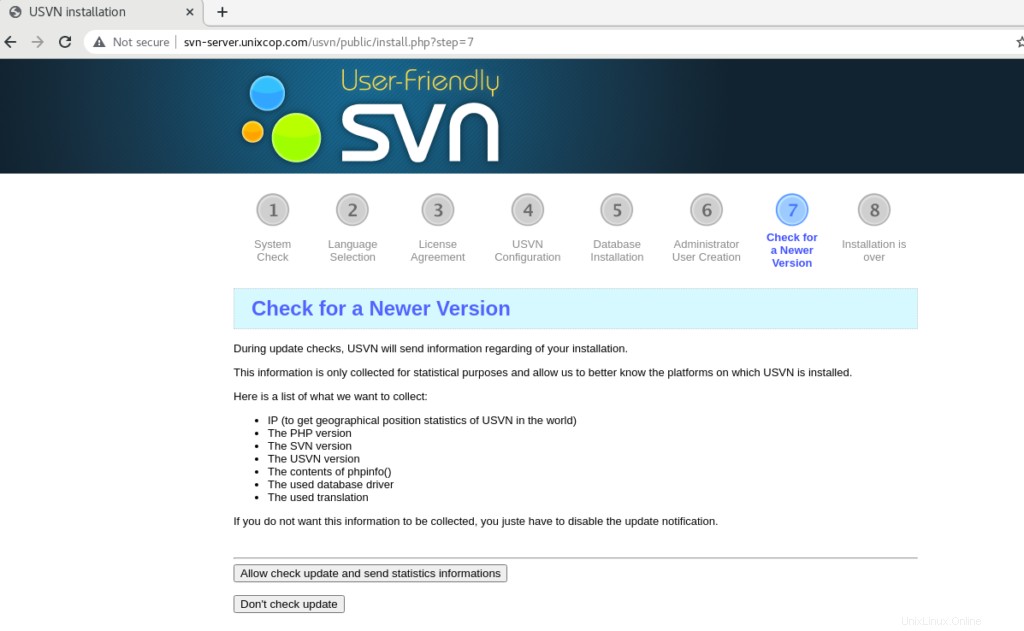
Deaktivieren Sie die automatische Suche nach aktualisierten Versionen von USVN oder lassen Sie sie zu.
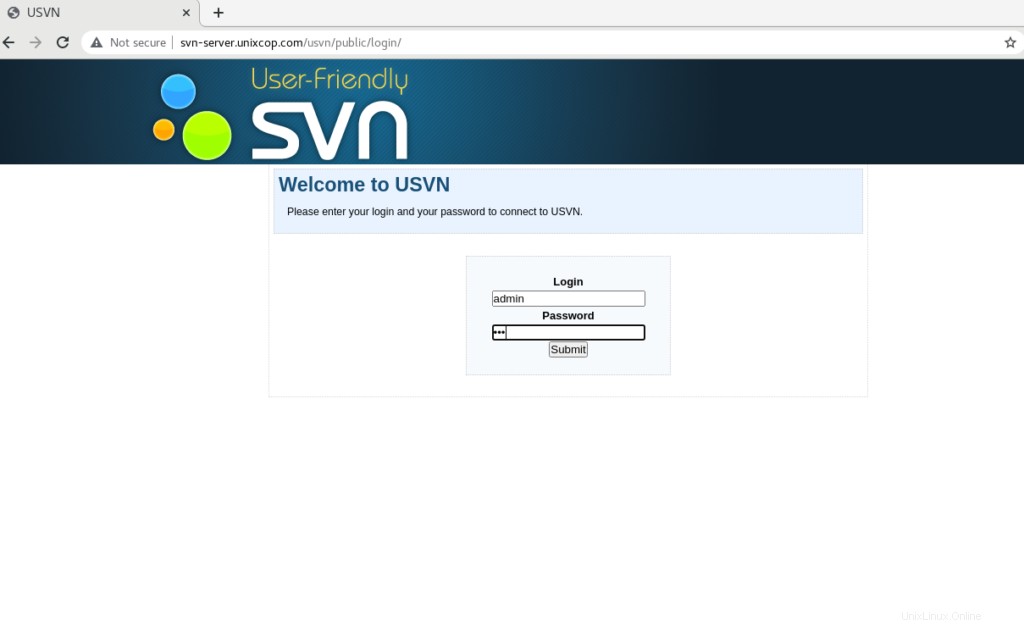
Sie werden zur Anmeldeseite mit dem Administratorbenutzer weitergeleitet. Geben Sie also bitte den Benutzernamen (admin) und das richtige Passwort ein, das Sie gerade erstellt haben.
Schlussfolgerung
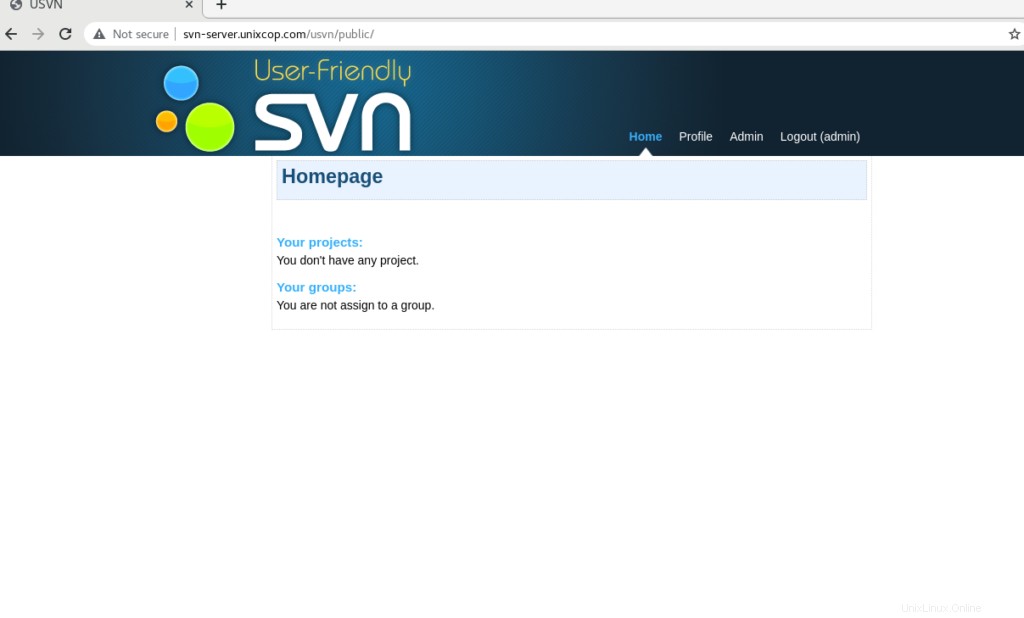
Wir haben also (USVN) Application und Apache Subversion (SVN) erfolgreich installiert.
In diesem Tutorial erfahren Sie, wie Sie Subversion und USVN (Apache SVN) unter CentOS 8 installieren.