Nginx (ausgesprochen „Engine x“) ist ein kostenloser, hochleistungsfähiger Open-Source-HTTP-Server. Nginx ist bekannt für seine Stabilität, seinen umfangreichen Funktionsumfang, seine einfache Konfiguration und seinen geringen Ressourcenverbrauch. Dieses Tutorial zeigt, wie Sie Nginx auf einem CentOS 7-Server mit PHP-Unterstützung (über PHP-FPM) und MySQL (Mariadb)-Unterstützung installieren können.
1 Vorbemerkung
In diesem Tutorial verwende ich den Hostnamen server1.example.com mit der IP-Adresse 192.168.1.105. Diese Einstellungen können für Sie abweichen, daher müssen Sie sie gegebenenfalls ersetzen.
2 Aktivieren zusätzlicher Repositories
Nginx ist nicht in den offiziellen CentOS-Repositorys verfügbar, daher schließen wir das Repository des Nginx-Projekts ein, um es zu installieren:
vi /etc/yum.repos.d/nginx.repo
 [nginx]
     name=nginx repo
     baseurl=http://nginx.org/packages/centos/$releasever/$basearch/
     gpgcheck=0
     enabled=1
3 Installation von MySQL
Zuerst installieren wir Mariadb. Mariadb ist ein kostenloser Fork von MySQL. Führen Sie diesen Befehl auf der Shell aus:
yum install mariadb mariadb-server net-tools
Dann erstellen wir die Systemstart-Links für MySQL (damit MySQL automatisch startet, wenn das System hochfährt) und starten den MySQL-Server:
systemctl enable mariadb.service
systemctl start mariadb.service
Überprüfen Sie nun, ob das Netzwerk aktiviert ist. Ausführen
netstat -tap | grep mysql
Es sollte etwa so aussehen:
[[email protected] ~]# netstat -tap | grep mysql
tcp 0 0 0.0.0.0:mysql 0.0.0.0:* LISTEN 10623/mysqld
Ausführen
mysql_secure_installation
um ein Passwort für den Benutzer root festzulegen (ansonsten kann jeder auf Ihre MySQL-Datenbank zugreifen!):
[[email protected] ~]# mysql_secure_installation
/usr/bin/mysql_secure_installation: line 379: find_mysql_client: command not found
NOTE: RUNNING ALL PARTS OF THIS SCRIPT IS RECOMMENDED FOR ALL MariaDB
SERVERS IN PRODUCTION USE! PLEASE READ EACH STEP CAREFULLY!
In order to log into MariaDB to secure it, we'll need the current
password for the root user. If you've just installed MariaDB, and
you haven't set the root password yet, the password will be blank,
so you should just press enter here.
Enter current password for root (enter for none):
OK, successfully used password, moving on...
Setting the root password ensures that nobody can log into the MariaDB
root user without the proper authorisation.
Set root password? [Y/n] <-- ENTER
New password: <-- yourrootsqlpassword
Re-enter new password: <-- yourrootsqlpassword
Password updated successfully!
Reloading privilege tables..
... Success!
By default, a MariaDB installation has an anonymous user, allowing anyone
to log into MariaDB without having to have a user account created for
them. This is intended only for testing, and to make the installation
go a bit smoother. You should remove them before moving into a
production environment.
Remove anonymous users? [Y/n] <-- ENTER
... Success!
Normally, root should only be allowed to connect from 'localhost'. This
ensures that someone cannot guess at the root password from the network.
Disallow root login remotely? [Y/n] <-- ENTER
... Success!
By default, MariaDB comes with a database named 'test' that anyone can
access. This is also intended only for testing, and should be removed
before moving into a production environment.
Remove test database and access to it? [Y/n] <-- ENTER
- Dropping test database...
... Success!
- Removing privileges on test database...
... Success!
Reloading the privilege tables will ensure that all changes made so far
will take effect immediately.
Reload privilege tables now? [Y/n] <-- ENTER
... Success!
Cleaning up...
All done! If you've completed all of the above steps, your MariaDB
installation should now be secure.
Thanks for using MariaDB!
[[email protected] ~]#
[[E-Mail-geschützt] ~]# mysql_secure_installation
4 Installieren von Nginx
Nginx ist als Paket von nginx.org erhältlich, das wir wie folgt installieren können:
yum install nginx
Dann erstellen wir die Systemstartlinks für nginx und starten es:
systemctl enable nginx.service
systemctl start nginx.service
Es besteht die Möglichkeit, dass Sie eine Fehlermeldung erhalten, wie z. B. Port 80 wird bereits verwendet. Die Fehlermeldung sieht folgendermaßen aus
[[email protected] ~]# service nginx start
Starting nginx: nginx: [emerg] bind() to 0.0.0.0:80 failed (98: Address already in use)
nginx: [emerg] bind() to 0.0.0.0:80 failed (98: Address already in use)
nginx: [emerg] bind() to 0.0.0.0:80 failed (98: Address already in use)
nginx: [emerg] bind() to 0.0.0.0:80 failed (98: Address already in use)
nginx: [emerg] bind() to 0.0.0.0:80 failed (98: Address already in use)
nginx: [emerg] still could not bind()
                                                           [FAILED]
[[email protected] ~]#
Dann bedeutet dies, dass dort die Möglichkeit besteht, dass der Apache-Dienst ausgeführt wird. Stoppen Sie den Dienst und starten Sie den Dienst für NGINX wie folgt weiter
systemctl stop httpd.service
yum remove httpd
systemctl disable httpd.service
systemctl enable nginx.service
systemctl start nginx.service
Und öffnen Sie die http- und https-Ports in der Firewall
firewall-cmd --permanent --zone=public --add-service=http
firewall-cmd --permanent --zone=public --add-service=https
firewall-cmd --reload
Die resultierende Ausgabe auf der Shell sieht folgendermaßen aus:
[[email protected] ~]# firewall-cmd --permanent --zone=public --add-service=http
success
[[email protected] ~]# firewall-cmd --permanent --zone=public --add-service=https
success
[[email protected] ~]# firewall-cmd --reload
success
[[email protected] ~]#
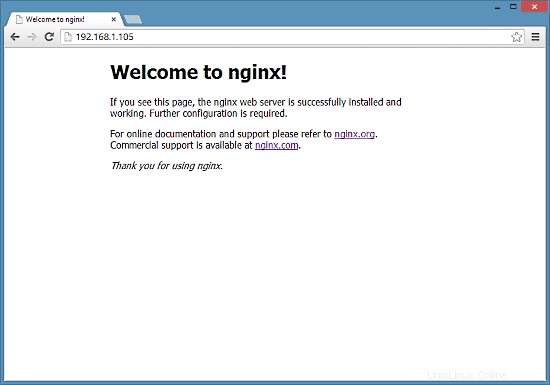
Geben Sie die IP-Adresse oder den Hostnamen Ihres Webservers in einen Browser ein (z. B. http://192.168.1.105), und Sie sollten die Willkommensseite von nginx sehen: