In dieser Installationsanleitung zeigen wir Ihnen, wie Sie InvoicePlane auf Ubuntu-Systemen installieren
InvoicePlane ist eine selbst gehostete Open-Source-Anwendung zur Verwaltung Ihrer Angebote, Rechnungen, Kunden und Zahlungen.
Es wurde speziell für Geschäftsinhaber entwickelt, um ihre Rechnungen und Kundenzahlungen zu erstellen und zu verwalten.
InvoicePlane installieren
Befolgen Sie einfach die folgenden Schritte:
- LAMP-Server installieren.
- Installieren Sie PHP-Module.
apt install php-gd php-json php-mbstring php-mysqli php-xmlrpc php libapache2-mod-php php-common php-mbstring php-xmlrpc php-soap php-gd php-xml php-intl php libapache2-mod-php php-mysql php-mysql wget unzip php-cli php-zip php-curl -y- Installieren Sie den Apache-Webserver und die Maria-Datenbank wie unten gezeigt:
apt install apache2
apt install mariadb-server-10.3- Starten und aktivieren Sie Apache und Mariadb.
systemctl start apache2 mariadb
systemctl enable apache2 mariadb
systemctl status apache2 mariadb- Konfigurieren und sichern Sie MariaDB wie folgt:
mysql_secure_installation

NOTE: RUNNING ALL PARTS OF THIS SCRIPT IS RECOMMENDED FOR ALL MariaDB
      SERVERS IN PRODUCTION USE!  PLEASE READ EACH STEP CAREFULLY!

In order to log into MariaDB to secure it, we'll need the current
password for the root user.  If you've just installed MariaDB, and
you haven't set the root password yet, the password will be blank,
so you should just press enter here.

Enter current password for root (enter for none):
OK, successfully used password, moving on...

Setting the root password ensures that nobody can log into the MariaDB
root user without the proper authorisation.

Set root password? [Y/n] y
New password:
Re-enter new password:
Password updated successfully!
Reloading privilege tables..
 ... Success!


By default, a MariaDB installation has an anonymous user, allowing anyone
to log into MariaDB without having to have a user account created for
them.  This is intended only for testing, and to make the installation
go a bit smoother.  You should remove them before moving into a
production environment.

Remove anonymous users? [Y/n] y
 ... Success!

Normally, root should only be allowed to connect from 'localhost'.  This
ensures that someone cannot guess at the root password from the network.

Disallow root login remotely? [Y/n] y
 ... Success!

By default, MariaDB comes with a database named 'test' that anyone can
access.  This is also intended only for testing, and should be removed
before moving into a production environment.

Remove test database and access to it? [Y/n] y
 - Dropping test database...
 ... Success!
 - Removing privileges on test database...
 ... Success!

Reloading the privilege tables will ensure that all changes made so far
will take effect immediately.

Reload privilege tables now? [Y/n] y
 ... Success!

Cleaning up...

All done!  If you've completed all of the above steps, your MariaDB
installation should now be secure.

Thanks for using MariaDB!- Melden Sie sich bei der MariaDB-Shell an:
mysql -u root -pCREATE DATABASE invplane_db;
CREATE USER 'invplane'@'localhost' IDENTIFIED BY 'password';
GRANT ALL PRIVILEGES ON invplane_db.* TO 'invplane'@'localhost';
FLUSH PRIVILEGES;
EXIT- Laden Sie die neueste Version von InvoicePlane herunter mit dem folgenden Befehl:
wget -c -O v1.5.11.zip https://invoiceplane.com/download/v1.5.11- Entpacken Sie die heruntergeladene Datei.
mkdir /var/www/html/invoiceplane
unzip v1.5.11.zip -d /var/www/html/invoiceplane- Wechseln Sie das Verzeichnis in das InvoicePlane-Verzeichnis und kopieren Sie die erforderlichen Dateien in das Apache-Stammverzeichnis
cd /var/www/html/invoiceplane
sudo cp ipconfig.php.example ipconfig.php
sudo cp htaccess .htaccess- Legen Sie die richtigen Berechtigungen für die Rechnungsebene fest Verzeichnis:
sudo chown -R www-data:www-data /var/www/html/invoiceplane/
sudo chmod -R 755 /var/www/html/invoiceplane/
find /var/www/html/invoiceplane/ -type f -exec chmod -v 0644 '{}' \;- Erstellen Sie eine virtuelle Apache-Hostdatei für InvoicePlane
vim /etc/apache2/sites-available/invoiceplane.conf- Fügen Sie dann Folgendes hinzu
<VirtualHost *:80>
     ServerAdmin admin@example.com
     DocumentRoot /var/www/html/invoiceplane
     ServerName example.com

     <Directory /var/www/html/invoiceplane/>
          Options +FollowSymlinks
          AllowOverride All
          Require all granted
     </Directory>

     ErrorLog ${APACHE_LOG_DIR}/error.log
     CustomLog ${APACHE_LOG_DIR}/access.log combined

</VirtualHost>- Virtuelle Apache-Hostdatei aktivieren und Modul umschreiben
sudo a2ensite invoiceplane.conf
sudo a2enmod rewrite- Starten Sie den Apache-Dienst neu, um alle Änderungen zu übernehmen
systemctl restart apache2- Greifen Sie auf InvoicePlane zu, indem Sie Ihren Webbrowser öffnen und die URL http://example.com eingeben ODER http://IP_Address/invoiceplane/index.php/welcome
Sie werden wie folgt weitergeleitet:
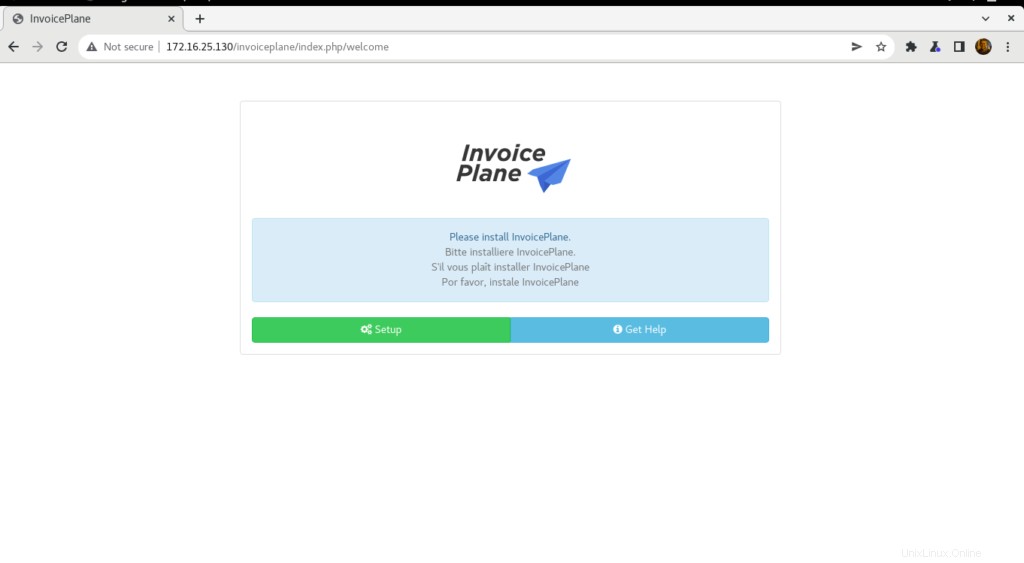
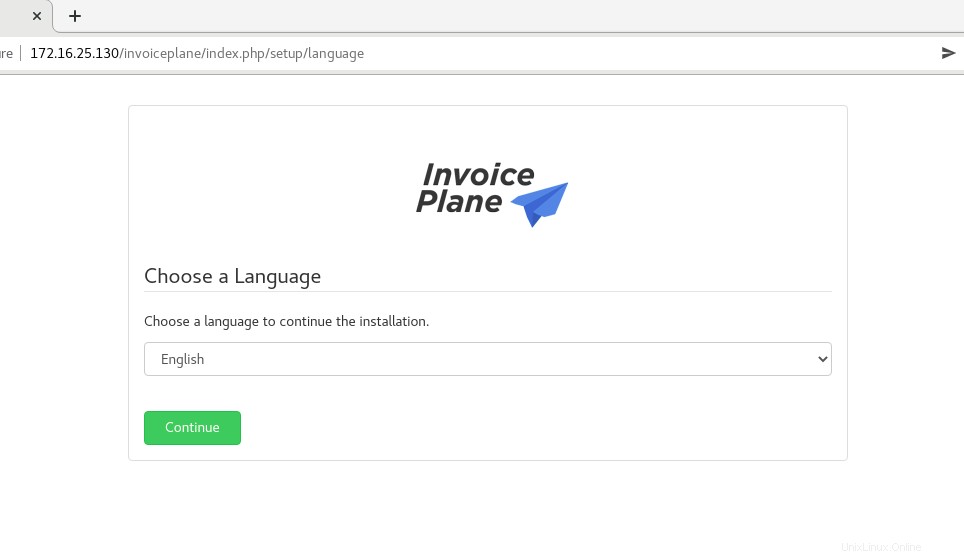
- Klicken Sie auf Einrichtung Wählen Sie dann eine Sprache aus und klicken Sie dann auf Weiter
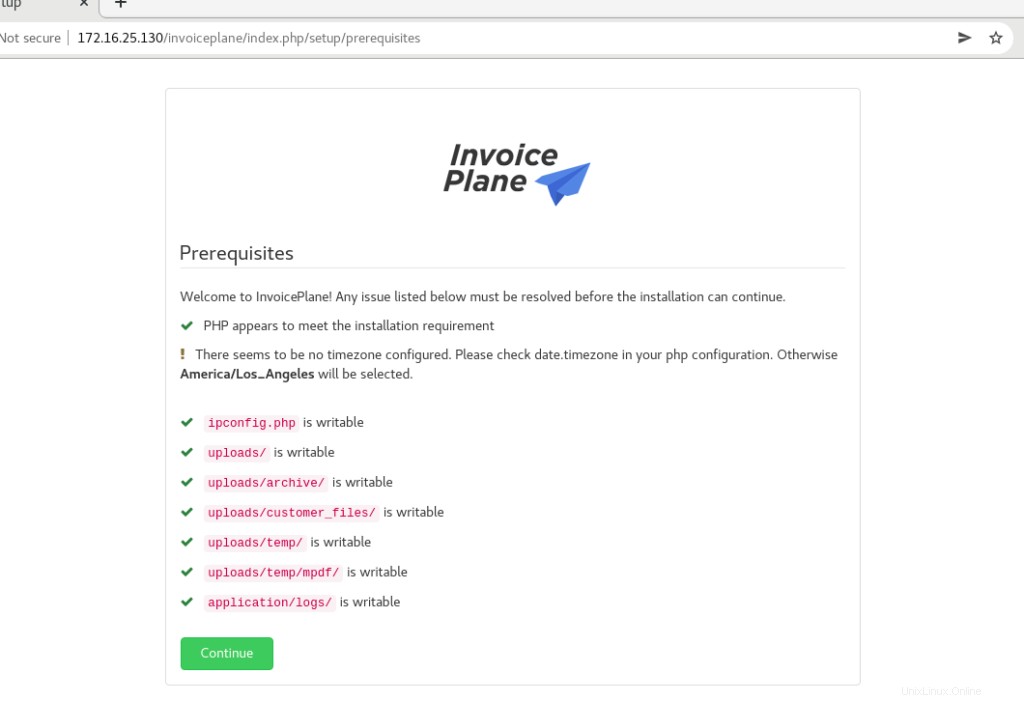
- Klicken Sie dann auf Weiter
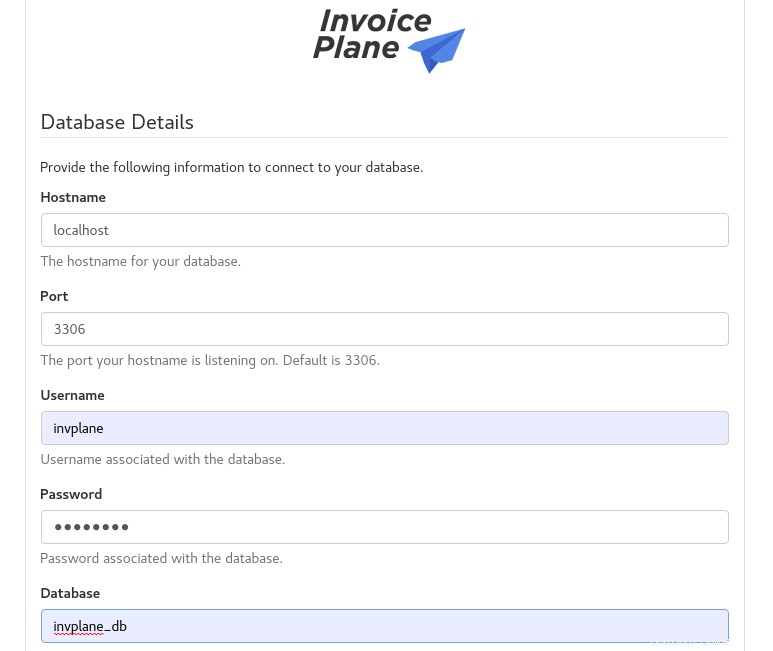
- Geben Sie Ihre Datenbankdetails an und klicken Sie auf Erneut versuchen
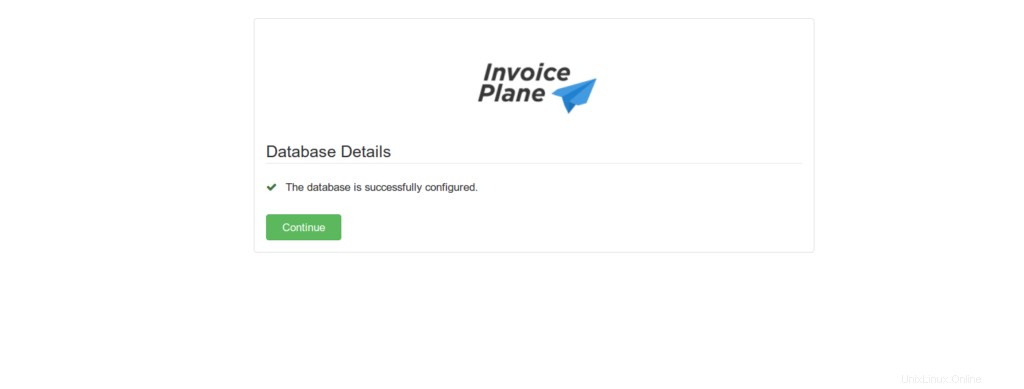
- Die Datenbank wurde wie unten gezeigt erfolgreich konfiguriert. Klicken Sie auf Weiter
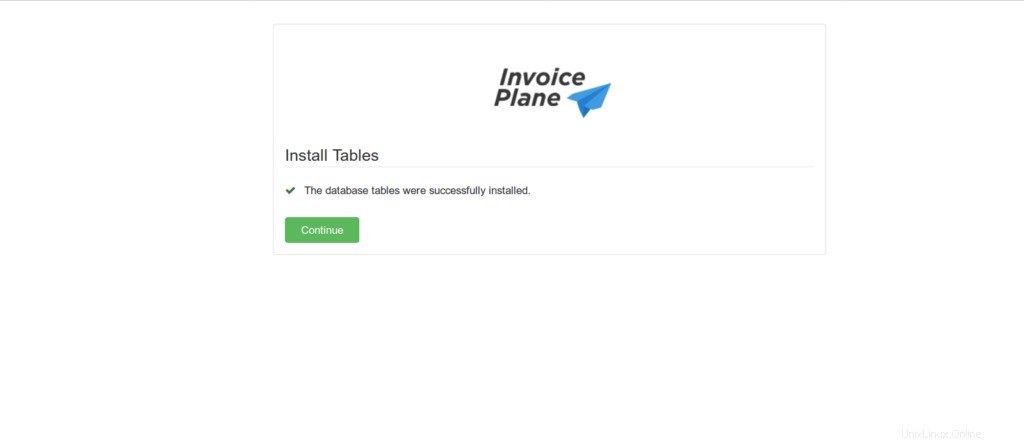
- Klicken Sie auch auf Weiter .
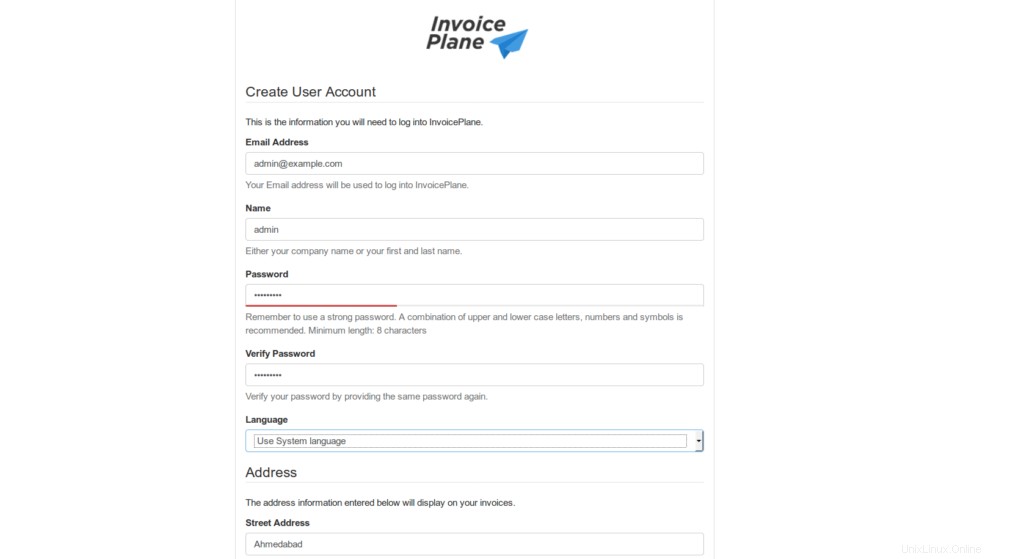
- Geben Sie alle erforderlichen Details an und klicken Sie dann auf Weiter wie unten gezeigt.
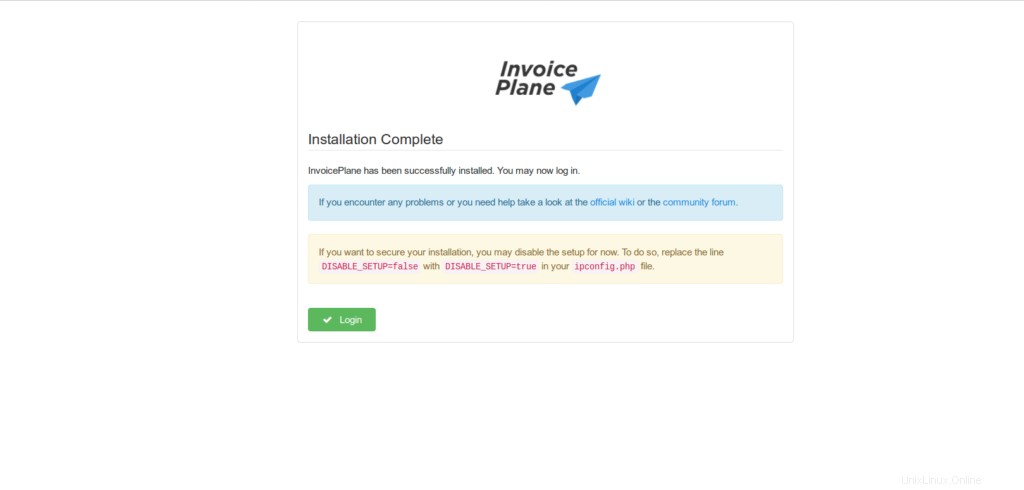
- Installation abgeschlossen, also klicken Sie auf Anmelden
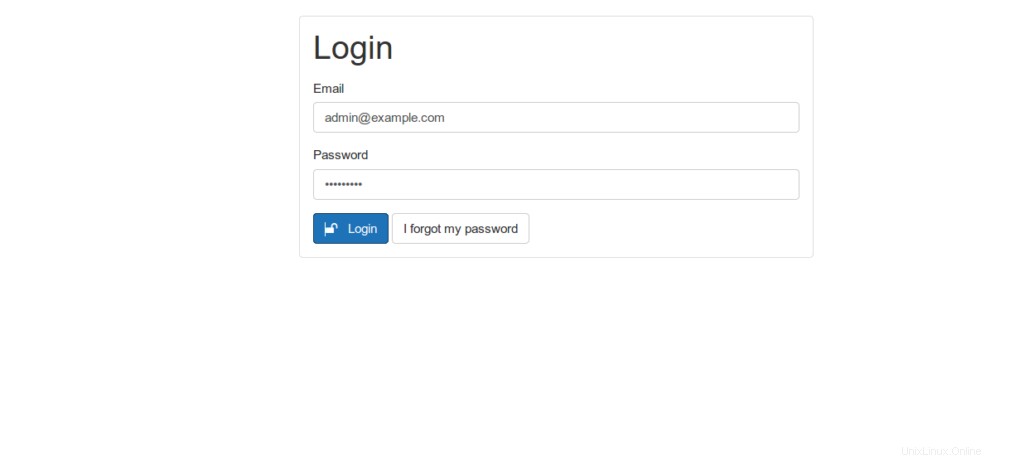
- Geben Sie Ihren Admin-Benutzernamen und Ihr Passwort ein und klicken Sie dann auf Anmelden
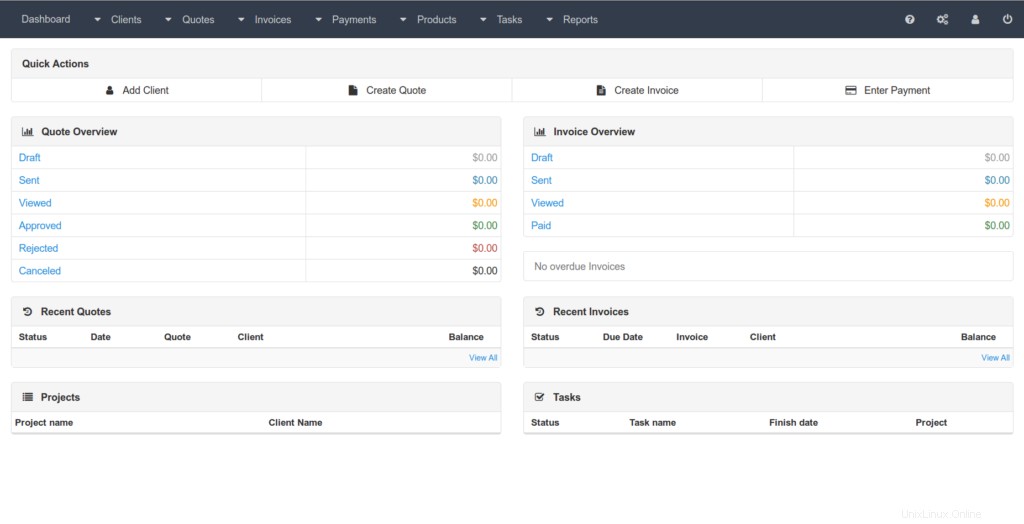
- Sie werden wie unten gezeigt zum InvoicePlane-Dashboard weitergeleitet.
Fazit
Das ist es
In diesem Artikel haben wir gezeigt, wie Sie Invoiceplan installieren und konfigurieren in Ubuntu 20.04
Danke