Eine Kombination aus Linux, Apache, MySQL und PHP ist als LAMP-Stack bekannt und die beliebte Webhosting-Umgebung für die PHP-basierte Anwendung. Hier ist Linux ein Betriebssystem, Apache ist der beliebte Webserver, der von der Apache Foundation entwickelt wurde, MySQL ist ein relationales Datenbankverwaltungssystem, das zum Speichern von Daten verwendet wird, und PHP ist die weit verbreitete Programmiersprache.
Dieser Artikel hilft Ihnen bei der Installation von Apache 2.4, MySQL 8.0 und PHP 7.4 auf einem Ubuntu 20.04 LTS (Focal Fossa)-System. Beginnen wir mit der Installation von LAMP Stack auf Ihrem Ubuntu-Rechner.
Voraussetzungen
Sie müssen root- oder sudo-privilegierten Benutzerzugriff auf Ihr Ubuntu 20.04-System haben. Melden Sie sich bei Ihrem Ubuntu-System mit GUI für Desktop und SSH für die Server-Edition an.
ssh [email protected]
Aktualisieren Sie jetzt aktuelle Pakete auf die neueste Version.
sudo apt update && sudo apt upgrade
Befolgen Sie die Anweisungen zur Ersteinrichtung des Servers, um Ihr System betriebsbereit zu machen.
Schritt 1 – Apache2 installieren
Apache2 ist eine leistungsstarke Webserver-Software, die von einer großen Anzahl von Websites verwendet wird. Dies ist die erste Komponente, die installiert werden muss, um LAMP auf einem Ubuntu 20.04-System einzurichten.
Um das Apache2-Paket zu installieren, geben Sie Folgendes ein:
sudo apt update && sudo apt install apache2
Sobald die Installation des Apache2-Pakets abgeschlossen ist, überprüfen Sie den Dienststatus:
sudo systemctl status apache2
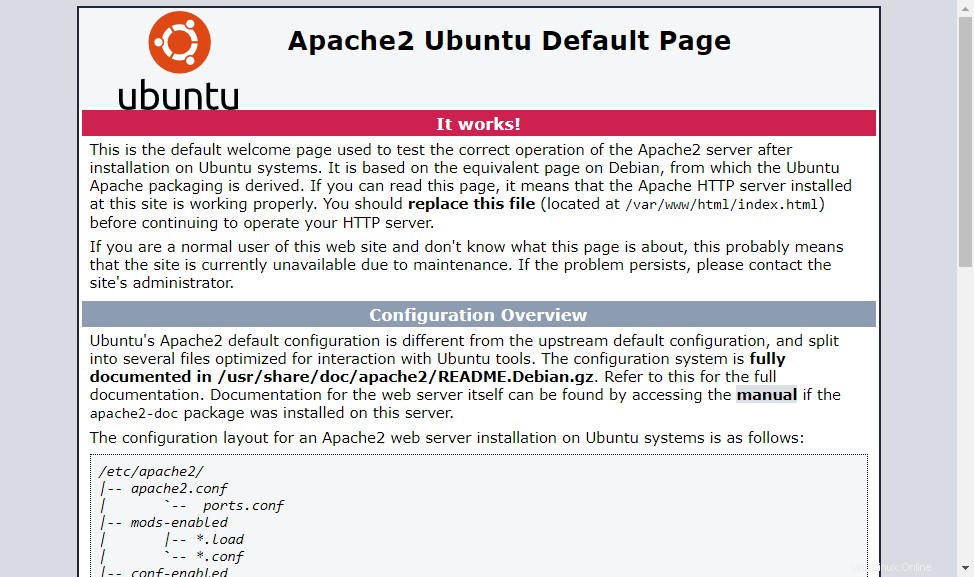
Der Apache-Dienst ist aktiv und wird ausgeführt. Öffnen Sie nun einen Webbrowser und geben Sie die IP-Adresse Ihres Servers ein. Sie sehen die Standard-Apache-Webseite
Alle Konfigurationsdateien werden im Verzeichnis /etc/apache2 gespeichert. Um zusätzliche virtuelle Hosts zu erstellen, besuchen Sie dieses Tutorial.
Schritt 2 – Installation von PHP
PHP 7.4-Pakete sind unter den standardmäßigen Apt-Repositories auf Ubuntu 20.04 LTS verfügbar. Um PHP auf Ihrem System zu installieren, aktualisieren Sie apt index und installieren Sie es dann auf Ihrem System.
sudo apt install -y php libapache2-mod-php
Installieren Sie auch zusätzliche PHP-Module, die für Ihre Anwendung erforderlich sind.
sudo apt install php-curl php-gd php-json php-mbstring php-xml
Schritt 3 – MySQL-Server installieren
Die standardmäßigen apt-Repositories von Ubuntu 20.04 enthalten MySQL Server 8.0. Installieren Sie schließlich mysql-server-Pakete für die MySQL-Datenbank. Installieren Sie außerdem das Paket php-mysql, um die MySQL-Unterstützung mit PHP zu nutzen. Verwenden Sie den folgenden Befehl, um es zu installieren.
sudo apt install mysql-server php-mysql
Das Installationsprogramm fordert Sie zur Eingabe des Root-Passworts auf. Dieses Passwort funktioniert für Ihren MySQL-Root-Benutzer. Führen Sie nach der Installation von MySQL den folgenden Befehl für die Anfangseinstellungen des MySQL-Servers aus. Sie werden sehen, dass das Skript nach mehr Einstellungen fragt als frühere MySQL-Versionen, wie z. B. Richtlinien zur Kennwortvalidierung usw.
sudo mysql_secure_installation
Securing the MySQL server deployment. Connecting to MySQL using a blank password. VALIDATE PASSWORD COMPONENT can be used to test passwords and improve security. It checks the strength of password and allows the users to set only those passwords which are secure enough. Would you like to setup VALIDATE PASSWORD component? Press y|Y for Yes, any other key for No: yThere are three levels of password validation policy: LOW Length >= 8 MEDIUM Length >= 8, numeric, mixed case, and special characters STRONG Length >= 8, numeric, mixed case, special characters and dictionary file Please enter 0 = LOW, 1 = MEDIUM and 2 = STRONG: 2Please set the password for root here. New password: Re-enter new password:Estimated strength of the password: 100 Do you wish to continue with the password provided?(Press y|Y for Yes, any other key for No) : y By default, a MySQL installation has an anonymous user, allowing anyone to log into MySQL without having to have a user account created for them. This is intended only for testing, and to make the installation go a bit smoother. You should remove them before moving into a production environment. Remove anonymous users? (Press y|Y for Yes, any other key for No) : ySuccess. Normally, root should only be allowed to connect from 'localhost'. This ensures that someone cannot guess at the root password from the network. Disallow root login remotely? (Press y|Y for Yes, any other key for No) : ySuccess. By default, MySQL comes with a database named 'test' that anyone can access. This is also intended only for testing, and should be removed before moving into a production environment. Remove test database and access to it? (Press y|Y for Yes, any other key for No) : y- Dropping test database... Success. - Removing privileges on test database... Success. Reloading the privilege tables will ensure that all changes made so far will take effect immediately. Reload privilege tables now? (Press y|Y for Yes, any other key for No) : ySuccess. All done!
Schritt 4 – Installation von phpMyAdmin (optional)
phpMyAdmin bietet eine benutzerfreundliche Weboberfläche zur Verwaltung des MySQL-Datenbankservers. Sie können phpMyAdmin unter Ubuntu 20.04 installieren, indem Sie den folgenden Befehl ausführen:
sudo apt install phpmyadmin
Der Installationsvorgang fordert Sie auf, den zu konfigurierenden Webserver auszuwählen. Wählen Sie „Apache“ als Webserver, um phpMyAdmin auszuführen.
Als Nächstes werden Sie aufgefordert, eine Datenbank für phpMyAdmin zu erstellen und die Zugangsdaten des administrativen Benutzers einzugeben. Führen Sie alle Schritte aus, um die Installation von phpMyAdmin abzuschließen.
Schritt 5 – Dienste verwalten
Wir haben die Installation des LAMP-Stacks auf dem Ubuntu 20.04 LTS-System abgeschlossen. Die folgenden Befehle helfen Ihnen beim Starten/Stoppen oder Neustarten von Apache- und MySQL-Diensten, die mit systemd ausgeführt werden.
Um Apache- und MySQL-Dienste neu zu starten, geben Sie Folgendes ein:
sudo systemctl restart apache2sudo systemctl restart mysql
Geben Sie zum Starten von Apache- und MySQL-Diensten Folgendes ein:
sudo systemctl start apache2sudo systemctl start mysql
Geben Sie Folgendes ein, um Apache- und MySQL-Dienste zu stoppen:
sudo systemctl stop apache2sudo systemctl stop mysql
Schritt 6 – Anpassen der Firewall-Regeln
Sie können direkt einen Dienstnamen wie „http“ oder „https“ zulassen. Der Firewall verwendet die Datei /etc/services, um den entsprechenden Port des Dienstes zu ermitteln.
sudo firewall-cmd --permanent --add-service=httpsudo firewall-cmd --permanent --add-service=httpssudo firewall-cmd --reload
Schritt 7 – Einrichtung testen
Nach Abschluss aller Einstellungen. Lassen Sie uns eine info.php erstellen Datei-Website-Dokument-Root mit folgendem Inhalt.
sudo echo "<?php phpinfo(); ?>" > /var/www/html/info.php
Greifen Sie nun im Webbrowser auf diese Datei zu. Sie sehen den Bildschirm wie unten mit allen Details von PHP auf dem Server.
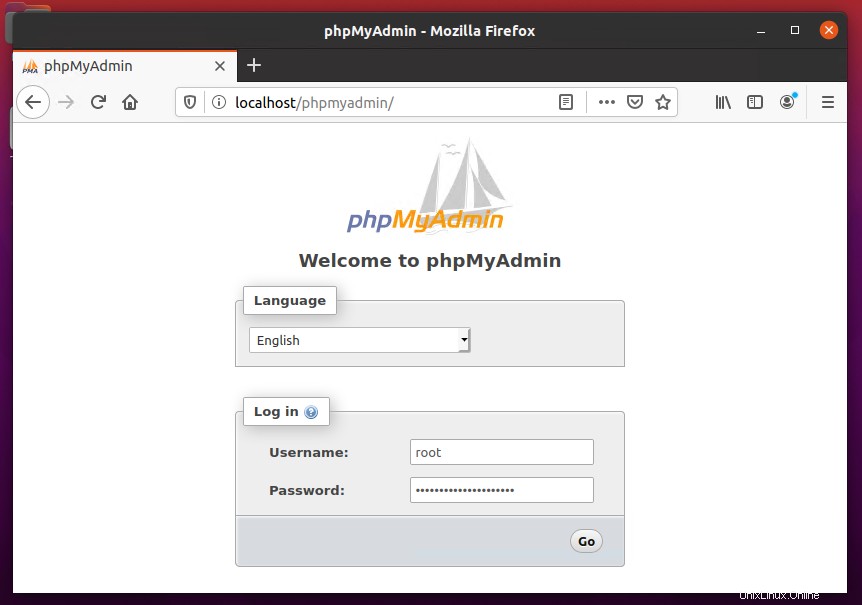
Greifen Sie auch auf phpMyAdmin
zu