MySQL ist ein Open-Source-Datenbankverwaltungssystem, das häufig in Webanwendungsstapeln verwendet wird, um Aufzeichnungen und Informationen zu speichern und abzurufen.
MySQL war bis MariaDB die primäre Datenbankanwendung für das Linux-Betriebssystem , ein Fork von MySQL, kam ins Bild. MySQL wurde zuerst von MYSQL AB entwickelt, das jetzt im Besitz der Oracle Corporation ist.
In dieser Anleitung sehen wir uns die Schritte zum Installieren von MySQL 8 unter Ubuntu 18.04.
an
Was ist neu in MySQL 8.0
- MySQL enthält jetzt ein Wörterbuch für Transaktionsdaten
- Unterstützt Rollen, eine Sammlung von Privilegien.
- Speichert den Passwortverlauf
- Der Standardzeichensatz wurde von latin1 zu utf8mb4 geändert.
- Verbesserungen in InnoDB und JSON
- Besseres Ressourcenmanagement
- Fehlerprotokollierung wurde umgeschrieben, um die MySQL-Komponentenarchitektur zu verwenden
- Verbesserungen der MySQL-Replikation
Installieren Sie MySQL 8.0 auf Ubuntu 18.04
Wie Sie bereits wissen, wird der MySQL-Server aufgrund von Lizenzierungsproblemen nicht mehr über das Basisbetriebssystem-Image oder Betriebssystem-Repositories vertrieben.
Als ersten Schritt richten wir nun das offizielle MySQL-Repository auf dem System ein.
wget https://dev.mysql.com/get/mysql-apt-config_0.8.10-1_all.deb
Installieren Sie das Repository-Paket mit dpkg Befehl.
sudo dpkg -i mysql-apt-config_0.8.10-1_all.deb
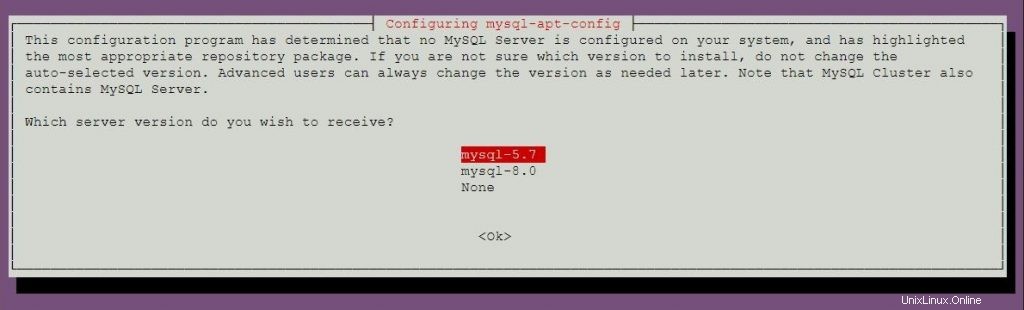
Das MySQL-Installationsprogramm fordert Sie auf, das MySQL-Repository auszuwählen. Basierend auf Ihrer Auswahl konfiguriert das Installationsprogramm Repositorys auf dem System, um die entsprechende Version von MySQL zu erhalten.
Hier wähle ich MySQL 8.0 das ist die Standardeinstellung. Wählen Sie dann OK und drücken Sie die Eingabetaste.
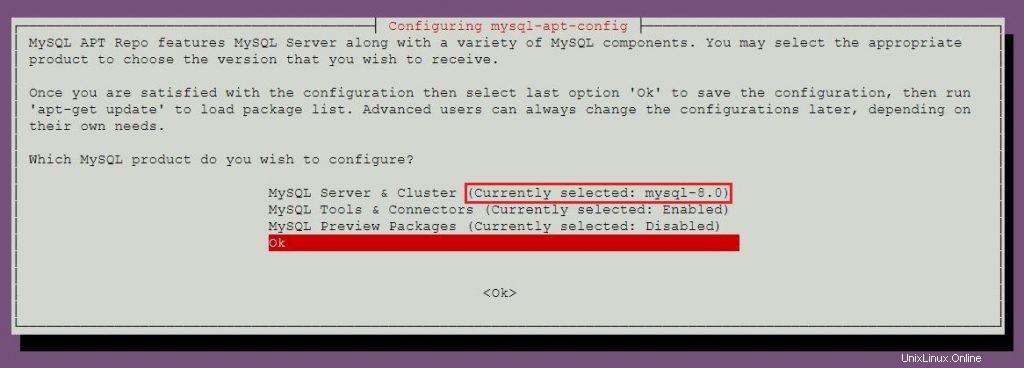
Um MySQL 5.7 zu installieren, gehen Sie zum Abschnitt Installation von MySQL 5.7, um mehr über die Auswahl des MySQL 5.7-Repositorys zu erfahren.
Aktualisieren Sie den Repository-Index mit apt-get update Befehl.
sudo apt-get update
Verwenden Sie das apt Befehl, um die neueste stabile Version von MySQL zu installieren .
sudo apt-get -y install mysql-server
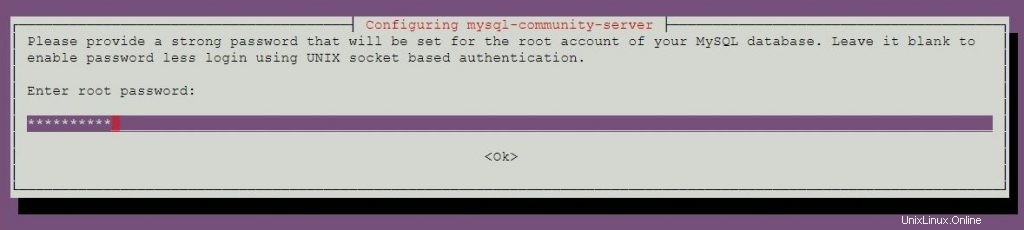
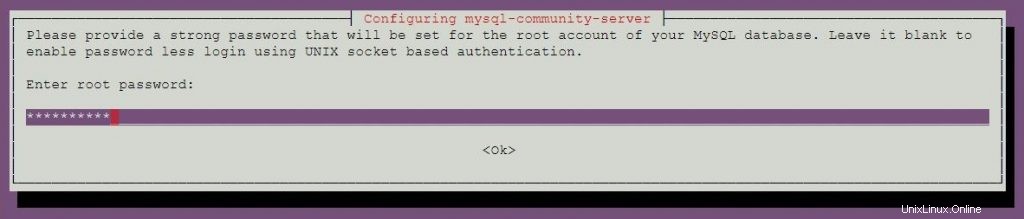
Das Paketinstallationsprogramm fordert Sie auf, das MySQL-Root-Passwort festzulegen.
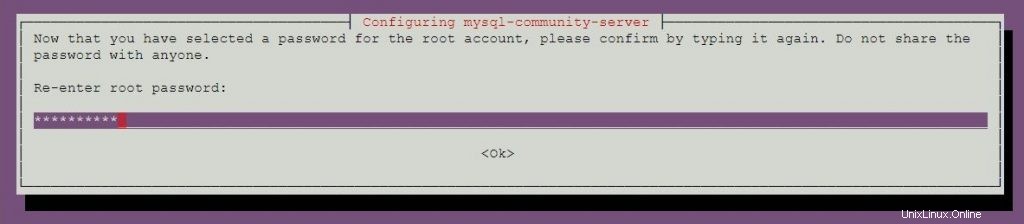
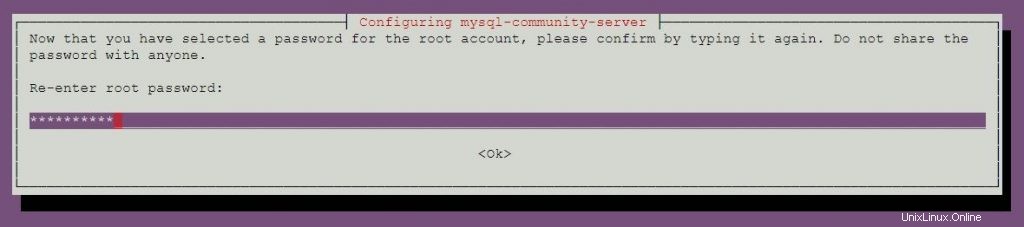
Geben Sie das Passwort erneut ein.
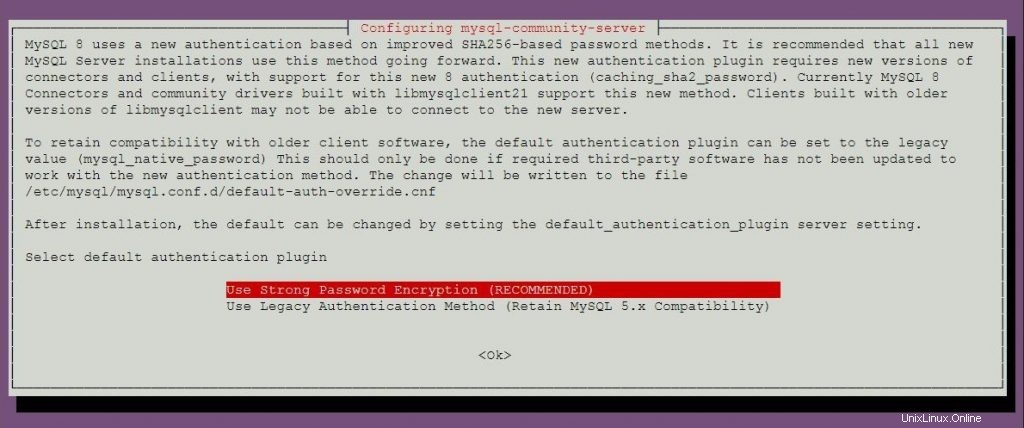
MySQL 8.0 verwendet eine neue Authentifizierung basierend auf verbesserten SHA 256-Passwortmethoden. Wenn Sie diese Option wählen, können alte Clients möglicherweise keine Verbindung zum Server herstellen. Sie können die Standardauthentifizierung jederzeit ändern, indem Sie default-authentication-plugin = mysql_native_password setzen in der Konfigurationsdatei.
Wählen Sie das Standard-Authentifizierungs-Plugin aus.
Installieren Sie MySQL 5.7 auf Ubuntu 18.04
Wir werden nun das offizielle MySQL-Repository auf dem System einrichten.
wget https://dev.mysql.com/get/mysql-apt-config_0.8.10-1_all.deb
Installieren Sie das Repository-Paket mit dpkg Befehl.
sudo dpkg -i mysql-apt-config_0.8.10-1_all.deb
ODER
Falls das System bereits über das MySQL-Repository-Paket verfügt und Sie MySQL 5.7 auf dem System installieren möchten.
sudo dpkg-reconfigure mysql-apt-config
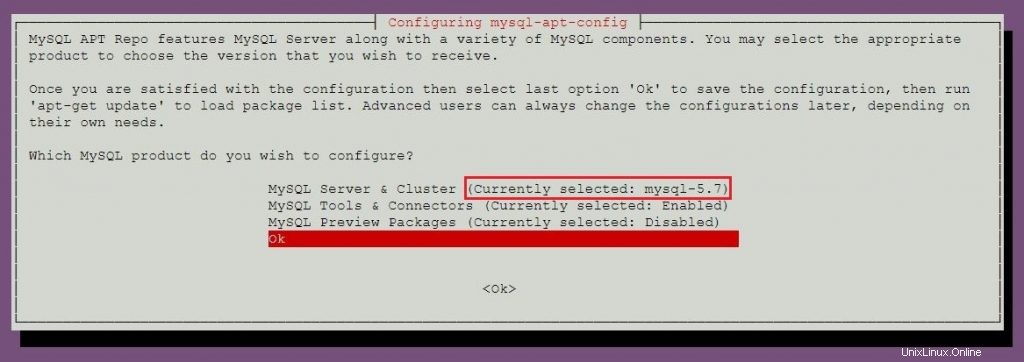
Das MySQL-Paketinstallationsprogramm fordert Sie auf, das MySQL-Repository auszuwählen. Basierend auf Ihrer Auswahl konfiguriert das Installationsprogramm Repositorys, um die entsprechende Version von MySQL zu erhalten.
Drücken Sie die Eingabetaste, um die MySQL-Version in diesem Fenster zu ändern.

Wählen Sie mysql-5.7 und drücken Sie dann die Eingabetaste.
Wählen Sie OK und drücken Sie dann die Eingabetaste.
Aktualisieren Sie den Repository-Index mit dem apt-Befehl.
sudo apt-get update
Führen Sie den folgenden Befehl aus, um MySQL 5.7 auf Ihrem Computer zu installieren.
sudo apt-get -y install mysql-server
Das Paketinstallationsprogramm fordert Sie auf, das MySQL-Root-Passwort festzulegen.
Geben Sie das Passwort erneut ein.
MySQL-Server starten
Nach der Installation von MySQL können Sie den MySQL-Server mit dem folgenden Befehl starten.
sudo systemctl start mysql
MySQL-Server beim Systemstart aktivieren.
sudo systemctl enable mysql
Überprüfen Sie mit dem folgenden Befehl, ob der MySQL-Serverdienst gestartet wurde.
sudo systemctl status mysql
Ausgabe:
● mysql.service - MySQL Community Server
   Loaded: loaded (/lib/systemd/system/mysql.service; enabled; vendor preset: enabled)
   Active: active (running) since Mon 2018-05-14 11:15:52 UTC; 27min ago
 Main PID: 3269 (mysqld)
    Tasks: 27 (limit: 1997)
   CGroup: /system.slice/mysql.service
           └─3269 /usr/sbin/mysqld --daemonize --pid-file=/var/run/mysqld/mysqld.pid

May 14 11:15:51 mysqlub18 systemd[1]: Starting MySQL Community Server...
May 14 11:15:52 mysqlub18 systemd[1]: Started MySQL Community Server.
Sicherer MySQL-Server
Als ersten Schritt nach der Installation müssen wir das sichere MySQL-Skript ausführen, das mit dem Paket geliefert wird, um diese MySQL-Instanz sicherer zu machen.
sudo mysql_secure_installation
Dieser Befehl erfordert das MySQL-Root-Passwort.
Securing the MySQL server deployment.

Enter password for user root: <-- Enter MySQL root password

VALIDATE PASSWORD PLUGIN can be used to test passwords
and improve security. It checks the strength of password
and allows the users to set only those passwords which are
secure enough. Would you like to setup VALIDATE PASSWORD plugin?

Press y|Y for Yes, any other key for No: n <-- N for not to validate the password
Using existing password for root.
Change the password for root ? ((Press y|Y for Yes, any other key for No) : no <-- No, as we have already set root password

 ... skipping.
By default, a MySQL installation has an anonymous user,
allowing anyone to log into MySQL without having to have
a user account created for them. This is intended only for
testing, and to make the installation go a bit smoother.
You should remove them before moving into a production
environment.

Remove anonymous users? (Press y|Y for Yes, any other key for No) : y <-- Remove anonymous users
Success.


Normally, root should only be allowed to connect from
'localhost'. This ensures that someone cannot guess at
the root password from the network.

Disallow root login remotely? (Press y|Y for Yes, any other key for No) : y <-- Disallow root login
Success.

By default, MySQL comes with a database named 'test' that
anyone can access. This is also intended only for testing,
and should be removed before moving into a production
environment.


Remove test database and access to it? (Press y|Y for Yes, any other key for No) : y <-- Remove test database
 - Dropping test database...
Success.

 - Removing privileges on test database...
Success.

Reloading the privilege tables will ensure that all changes
made so far will take effect immediately.

Reload privilege tables now? (Press y|Y for Yes, any other key for No) : y <-- Reload privilege table
Success.

All done!
Mit MySQL-Server arbeiten
Melden Sie sich mit dem Benutzer root und dem Passwort, das Sie während der MySQL-Installation festgelegt haben, beim MySQL-Server an.
mysql -u root -p
MySQL 8.0:
Enter password:
Welcome to the MySQL monitor.  Commands end with ; or \g.
Your MySQL connection id is 8
Server version: 8.0.11 MySQL Community Server - GPL

Copyright (c) 2000, 2018, Oracle and/or its affiliates. All rights reserved.

Oracle is a registered trademark of Oracle Corporation and/or its
affiliates. Other names may be trademarks of their respective
owners.

Type 'help;' or '\h' for help. Type '\c' to clear the current input statement.

mysql>
MySQL 5.7:
Enter password:
Welcome to the MySQL monitor.  Commands end with ; or \g.
Your MySQL connection id is 4
Server version: 5.7.21 MySQL Community Server (GPL)

Copyright (c) 2000, 2018, Oracle and/or its affiliates. All rights reserved.

Oracle is a registered trademark of Oracle Corporation and/or its
affiliates. Other names may be trademarks of their respective
owners.

Type 'help;' or '\h' for help. Type '\c' to clear the current input statement.

mysql>
Das ist alles.