LiteCart ist eine leichtgewichtige Open-Source-E-Commerce-Plattform, die in PHP, HTML 5 und CSS 3 geschrieben ist. Sie ist einfach, leicht zu bedienen und hat ein elegantes und einfaches Admin-Panel. LiteCart ist schneller als 99 % aller Websites weltweit. Es verfügt über eine Vielzahl von Funktionen, darunter innovativ, leistungsstark, Plug-and-Play-Add-Ons, SEO-freundlich, Checkout in einem Schritt, Unterstützung mehrerer Zeichensätze und vieles mehr.
In diesem Tutorial zeigen wir Ihnen, wie Sie die LiteCart-Warenkorbplattform unter Ubuntu 20.04 installieren.
Voraussetzungen
- Ein Server mit Ubuntu 20.04.
- Ein gültiger Domainname, der auf Ihren Server verweist.
- Auf Ihrem Server ist ein Root-Passwort konfiguriert.
Erste Schritte
Bevor Sie beginnen, wird empfohlen, Ihr System mit der neuesten stabilen Version zu aktualisieren. Sie können es mit dem folgenden Befehl aktualisieren:
apt-get update -y
apt-get upgrade -y
Sobald Ihr System auf dem neuesten Stand ist, starten Sie es neu, um die Änderungen zu übernehmen:
LAMP-Server installieren
Zuerst müssen Sie den Apache-Webserver, den MariaDB-Server, PHP und andere erforderliche PHP-Bibliotheken in Ihrem System installieren. Sie können alle mit dem folgenden Befehl installieren:
apt-get install apache2 mariadb-server php7.4 libapache2-mod-php7.4 php7.4-common php7.4-mbstring php7.4-xmlrpc php7.4-soap php7.4-gd php7.4-xml php7.4-intl php7.4-mysql php7.4-cli php7.4-zip php7.4-curl php7.4-soap unzip -y
Sobald alle Pakete installiert sind, bearbeiten Sie die Datei php.ini und passen Sie einige gewünschte Einstellungen an:
nano /etc/php/7.4/apache2/php.ini
Ändern Sie die folgenden Zeilen:
memory_limit = 256M
upload_max_filesize = 150M
max_execution_time = 360
date.timezone = Asia/Kolkata
Speichern und schließen Sie die Datei, wenn Sie fertig sind. Starten Sie dann den Apache-Dienst neu, um die Änderungen zu übernehmen:
systemctl restart apache2
MariaDB-Datenbank konfigurieren
Zuerst müssen Sie die MariaDB sichern und das MariaDB-Root-Passwort festlegen. Sie können dies mit dem folgenden Befehl tun:
mysql_secure_installation
Beantworten Sie alle Fragen wie unten gezeigt:
   Enter current password for root (enter for none):
    Set root password? [Y/n]: N
    Remove anonymous users? [Y/n]: Y
    Disallow root login remotely? [Y/n]: Y
    Remove test database and access to it? [Y/n]:  Y
    Reload privilege tables now? [Y/n]:  Y
Wenn Sie fertig sind, melden Sie sich mit dem folgenden Befehl bei der MariaDB-Shell an:
mysql -u root -p
Geben Sie Ihr Root-Passwort ein, wenn Sie dazu aufgefordert werden, und erstellen Sie dann mit dem folgenden Befehl eine Datenbank und einen Benutzer für LiteCart:
MariaDB [(none)]> CREATE DATABASE litecartdb;
MariaDB [(none)]> CREATE USER 'litecart'@'localhost' IDENTIFIED BY 'password';
Als nächstes erteilen Sie der litecartdb alle Privilegien mit dem folgenden Befehl:
MariaDB [(none)]> GRANT ALL PRIVILEGES ON litecartdb.* TO 'litecart'@'localhost' IDENTIFIED BY 'password' WITH GRANT OPTION;
Leeren Sie als Nächstes die Berechtigungen und beenden Sie die MariaDB-Shell mit dem folgenden Befehl:
MariaDB [(none)]> FLUSH PRIVILEGES;
MariaDB [(none)]> EXIT;
Sobald Ihre Datenbank konfiguriert ist, können Sie mit dem nächsten Schritt fortfahren.
LiteCart herunterladen
Zum Zeitpunkt der Erstellung dieses Tutorials ist die neueste Version von LiteCart 2.2.3. Sie können es von der offiziellen Website herunterladen. Extrahieren Sie nach dem Herunterladen die heruntergeladene Datei mit dem folgenden Befehl in das Apache-Web-Root-Verzeichnis:
mkdir /var/www/html/litecart
unzip litecart-2.2.3.1.zip -d /var/www/html/litecart
Ändern Sie als Nächstes den Besitz des Litecart-Verzeichnisses in www-data und erteilen Sie die entsprechenden Berechtigungen mit dem folgenden Befehl:
chown -R www-data:www-data /var/www/html/litecart/
chmod -R 755 /var/www/html/litecart/
Wenn Sie fertig sind, können Sie mit dem nächsten Schritt fortfahren.
Apache für LiteCart konfigurieren
Erstellen Sie zunächst mit dem folgenden Befehl eine neue Konfigurationsdatei für den virtuellen Apache-Host:
nano /etc/apache2/sites-available/litecart.conf
Fügen Sie die folgenden Zeilen hinzu:
<VirtualHost *:80>
     ServerAdmin [email protected]
     ServerName litecart.linuxbuz.com
     DocumentRoot /var/www/html/litecart/public_html/

     <Directory /var/www/html/litecart/>
        AllowOverride All
        allow from all
     </Directory>

     ErrorLog /var/log/apache2/litecart_error.log
     CustomLog /var/log/apache2/litecart_access.log combined
</VirtualHost>
Speichern und schließen Sie die Datei, wenn Sie fertig sind. Aktivieren Sie dann das LiteCart-Site-, Rewrite- und Header-Modul mit dem folgenden Befehl:
a2ensite litecart.conf
a2enmod rewrite
a2enmod headers
Starten Sie abschließend den Apache-Dienst neu, um die Änderungen zu übernehmen:
systemctl restart apache2
An diesem Punkt ist Ihr Apache-Webserver so konfiguriert, dass er LiteCart bedient.
Sichere LiteCart mit Let's Encrypt SSL
Es wird empfohlen, die LiteCart-Website mit dem kostenlosen SSL von Let's Encrypt zu sichern. Installieren Sie dazu den Certbot Let's Encrypt Client mit dem folgenden Befehl:
apt-get install certbot python3-certbot-apache -y
Führen Sie nach der Installation von Certbot den folgenden Befehl aus, um Let's Encrypt SSL für Ihre Domain zu installieren:
certbot --apache -d litecart.linuxbuz.com
Sie müssen Ihre E-Mail-Adresse angeben und die Nutzungsbedingungen wie unten gezeigt akzeptieren:
Saving debug log to /var/log/letsencrypt/letsencrypt.log
Plugins selected: Authenticator apache, Installer apache
Enter email address (used for urgent renewal and security notices) (Enter 'c' to
cancel): [email protected]

- - - - - - - - - - - - - - - - - - - - - - - - - - - - - - - - - - - - - - - -
Please read the Terms of Service at
https://letsencrypt.org/documents/LE-SA-v1.2-November-15-2017.pdf. You must
agree in order to register with the ACME server at
https://acme-v02.api.letsencrypt.org/directory
- - - - - - - - - - - - - - - - - - - - - - - - - - - - - - - - - - - - - - - -
(A)gree/(C)ancel: A

- - - - - - - - - - - - - - - - - - - - - - - - - - - - - - - - - - - - - - - -
Would you be willing to share your email address with the Electronic Frontier
Foundation, a founding partner of the Let's Encrypt project and the non-profit
organization that develops Certbot? We'd like to send you email about our work
encrypting the web, EFF news, campaigns, and ways to support digital freedom.
- - - - - - - - - - - - - - - - - - - - - - - - - - - - - - - - - - - - - - - -
(Y)es/(N)o: Y
Obtaining a new certificate
Performing the following challenges:
http-01 challenge for litecart.linuxbuz.com
Waiting for verification...
Cleaning up challenges
Created an SSL vhost at /etc/apache2/sites-available/litecart-le-ssl.conf
Enabled Apache socache_shmcb module
Enabled Apache ssl module
Deploying Certificate to VirtualHost /etc/apache2/sites-available/litecart-le-ssl.conf
Enabling available site: /etc/apache2/sites-available/litecart-le-ssl.conf
Als Nächstes müssen Sie auswählen, ob Sie HTTP-Verkehr auf HTTPS umleiten möchten oder nicht, wie unten gezeigt:
Please choose whether or not to redirect HTTP traffic to HTTPS, removing HTTP access.
- - - - - - - - - - - - - - - - - - - - - - - - - - - - - - - - - - - - - - - -
1: No redirect - Make no further changes to the webserver configuration.
2: Redirect - Make all requests redirect to secure HTTPS access. Choose this for
new sites, or if you're confident your site works on HTTPS. You can undo this
change by editing your web server's configuration.
- - - - - - - - - - - - - - - - - - - - - - - - - - - - - - - - - - - - - - - -
Select the appropriate number [1-2] then [enter] (press 'c' to cancel): 2
Wählen Sie Option 2 und drücken Sie die Eingabetaste, um die Installation wie unten gezeigt abzuschließen:
Redirecting vhost in /etc/apache2/sites-enabled/litecart.conf to ssl vhost in /etc/apache2/sites-available/litecart-le-ssl.conf

- - - - - - - - - - - - - - - - - - - - - - - - - - - - - - - - - - - - - - - -
Congratulations! You have successfully enabled https://litecart.linuxbuz.com

You should test your configuration at:
https://www.ssllabs.com/ssltest/analyze.html?d=litecart.linuxbuz.com
- - - - - - - - - - - - - - - - - - - - - - - - - - - - - - - - - - - - - - - -

IMPORTANT NOTES:
 - Congratulations! Your certificate and chain have been saved at:
   /etc/letsencrypt/live/litecart.linuxbuz.com/fullchain.pem
   Your key file has been saved at:
   /etc/letsencrypt/live/litecart.linuxbuz.com/privkey.pem
   Your cert will expire on 2020-09-12. To obtain a new or tweaked
   version of this certificate in the future, simply run certbot again
   with the "certonly" option. To non-interactively renew *all* of
   your certificates, run "certbot renew"
 - Your account credentials have been saved in your Certbot
   configuration directory at /etc/letsencrypt. You should make a
   secure backup of this folder now. This configuration directory will
   also contain certificates and private keys obtained by Certbot so
   making regular backups of this folder is ideal.
 - If you like Certbot, please consider supporting our work by:

   Donating to ISRG / Let's Encrypt:   https://letsencrypt.org/donate
   Donating to EFF:                    https://eff.org/donate-le
Zu diesem Zeitpunkt ist Ihre LiteCart-Website mit Let's Encrypt SSL gesichert. Sie können jetzt mit dem nächsten Schritt fortfahren.
Zugriff auf LiteCart
Öffnen Sie nun Ihren Webbrowser und geben Sie die URL https://litecart.linuxbuz.com ein. Sie werden auf die folgende Seite weitergeleitet:
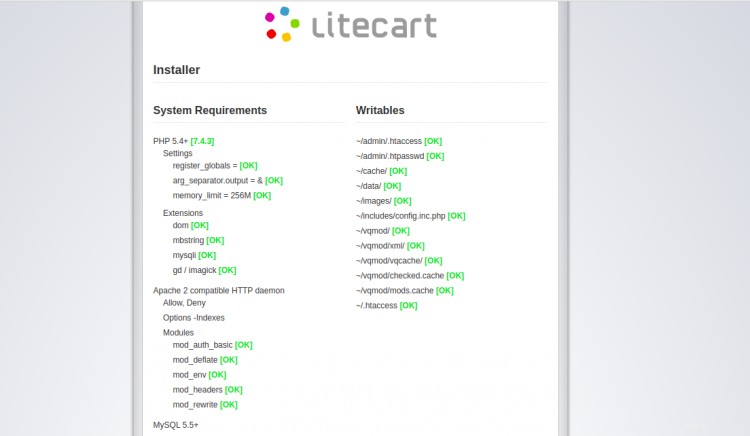
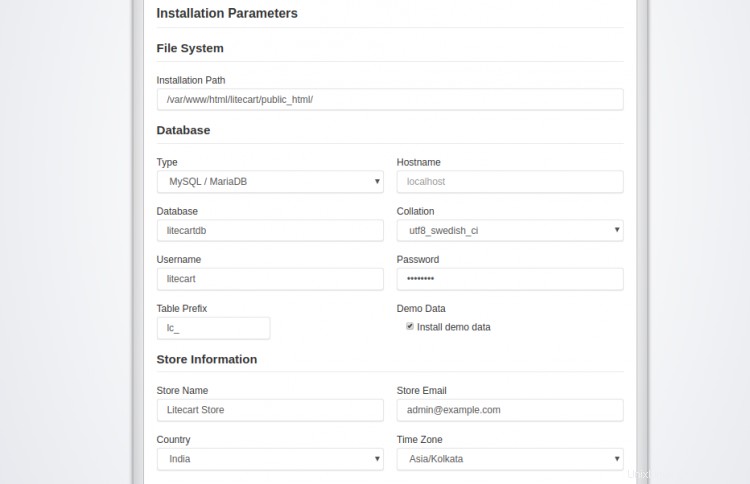
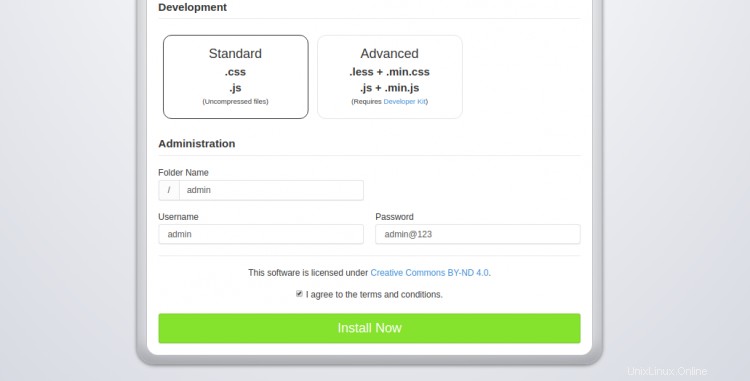
Geben Sie Ihren Installationspfad, Datenbankdetails, Store-Informationen, Administrator-Benutzernamen und Passwort ein und klicken Sie auf Installieren Jetzt Taste. Sobald die Installation erfolgreich abgeschlossen wurde, sollten Sie die folgende Seite sehen:
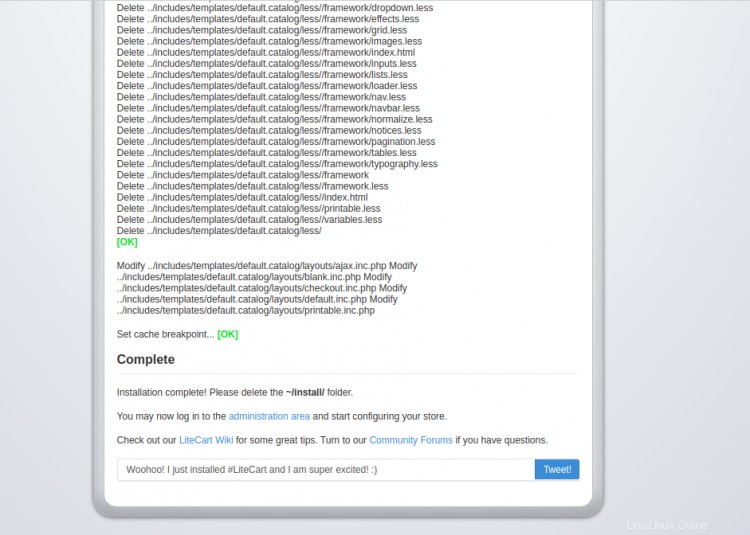
Entfernen Sie als Nächstes das Installationsverzeichnis mit dem folgenden Befehl:
rm -rf /var/www/html/litecart/public_html/install/
Klicken Sie auf die Verwaltung Bereich Taste. Sie werden wie unten gezeigt zur Anmeldeseite von LiteCart weitergeleitet:
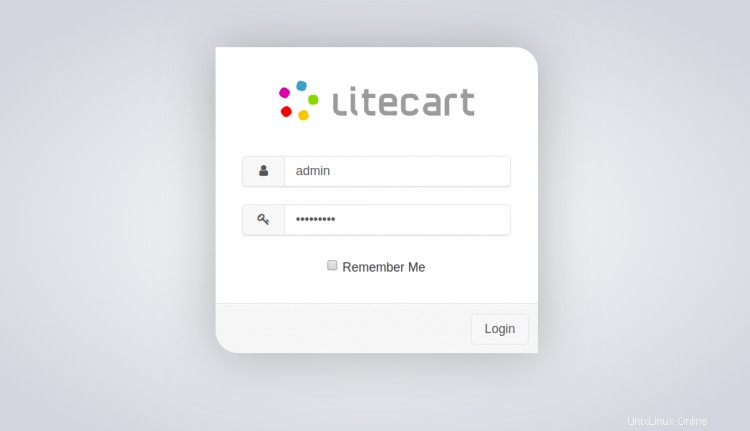
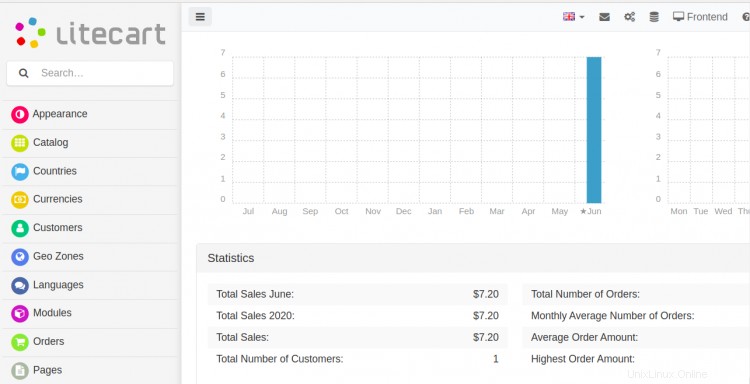
Geben Sie Ihren Admin-Benutzernamen und Ihr Passwort ein und klicken Sie auf Anmelden Taste. Sie sollten das LiteCart-Dashboard auf der folgenden Seite sehen:
Schlussfolgerung
In der obigen Anleitung haben Sie gelernt, wie Sie den LiteCart-Einkaufswagen unter Ubuntu 20.04 installieren und sichern. Sie haben auch gelernt, wie Sie es mit Let's Encrypt Free SSL sichern können. Ich hoffe, Sie können jetzt Ihre eigene Warenkorbanwendung mit LiteCart hosten.