Der perfekte Server - Ubuntu 12.10 (Apache2, BIND, Dovecot, ISPConfig 3)
Dieses Tutorial zeigt, wie man einen Ubuntu 12.10 (Quantal Quetzal) Server (mit Apache2, BIND, Dovecot) für die Installation von ISPConfig 3 vorbereitet und wie man ISPConfig 3 installiert. ISPConfig 3 ist ein Webhosting Control Panel, mit dem Sie Folgendes konfigurieren können Dienste über einen Webbrowser:Apache- oder Nginx-Webserver, Postfix-Mailserver, Courier- oder Dovecot-IMAP/POP3-Server, MySQL-, BIND- oder MyDNS-Nameserver, PureFTPd, SpamAssassin, ClamAV und viele mehr. Dieses Setup umfasst Apache (anstelle von nginx), BIND (anstelle von MyDNS) und Dovecot (anstelle von Courier).
Bitte beachten Sie, dass dieses Setup nicht für ISPConfig 2 funktioniert ! Es gilt nur für ISPConfig 3!
Ich gebe keine Garantie dafür, dass dies bei Ihnen funktioniert!
ISPConfig 3 Handbuch
Um zu lernen, wie man ISPConfig 3 verwendet, empfehle ich dringend, das ISPConfig 3-Handbuch herunterzuladen.
Auf mehr als 300 Seiten behandelt es das Konzept hinter ISPConfig (Admin, Wiederverkäufer, Kunden), erklärt, wie ISPConfig 3 installiert und aktualisiert wird, enthält eine Referenz für alle Formulare und Formularfelder in ISPConfig zusammen mit Beispielen für gültige Eingaben und bietet Tutorials für die häufigsten Aufgaben in ISPConfig 3. Es beschreibt auch, wie Sie Ihren Server sicherer machen können, und enthält am Ende einen Abschnitt zur Fehlerbehebung.
ISPConfig Monitor-App für Android
Mit der ISPConfig Monitor App können Sie Ihren Serverstatus überprüfen und herausfinden, ob alle Dienste wie erwartet laufen. Sie können TCP- und UDP-Ports überprüfen und Ihre Server anpingen. Darüber hinaus können Sie diese App verwenden, um Details von Servern anzufordern, auf denen ISPConfig installiert ist (Bitte beachten Sie, dass die installierte Mindestversion von ISPConfig 3 mit Unterstützung für die ISPConfig Monitor App 3.0.3.3 ist! ); Diese Details umfassen alles, was Sie aus dem Monitor-Modul im ISPConfig Control Panel wissen (z. B. Dienste, Mail- und Systemprotokolle, Mail-Warteschlange, CPU- und Speicherinformationen, Festplattennutzung, Quote, Betriebssystemdetails, RKHunter-Protokoll usw.) und natürlich , da ISPConfig Multiserver-fähig ist, können Sie alle Server überprüfen, die von Ihrem ISPConfig-Masterserver gesteuert werden.
Anweisungen zum Herunterladen und zur Verwendung finden Sie unter http://www.ispconfig.org/ispconfig-3/ispconfig-monitor-app-for-android/.
1 Voraussetzungen
Um ein solches System zu installieren, benötigen Sie Folgendes:
- die Ubuntu 12.10 Server-CD, erhältlich hier:http://releases.ubuntu.com/releases/12.10/ubuntu-12.10-server-i386.iso (i386) oder http://releases.ubuntu.com/releases /12.10/ubuntu-12.10-server-amd64.iso (x86_64)
- eine schnelle Internetverbindung.
2 Vorbemerkung
In diesem Tutorial verwende ich den Hostnamen server1.example.com mit der IP-Adresse 192.168.0.100 und dem Gateway 192.168.0.1. Diese Einstellungen können für Sie abweichen, daher müssen Sie sie gegebenenfalls ersetzen.
3 Das Basissystem
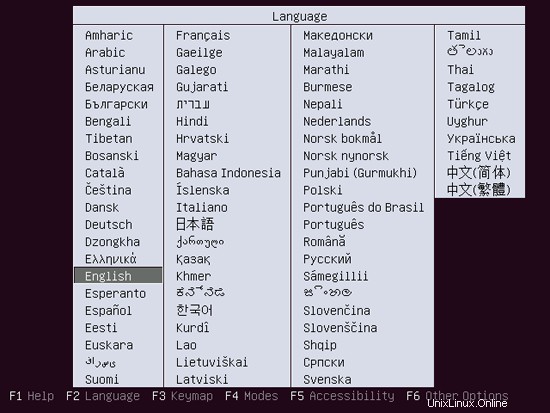
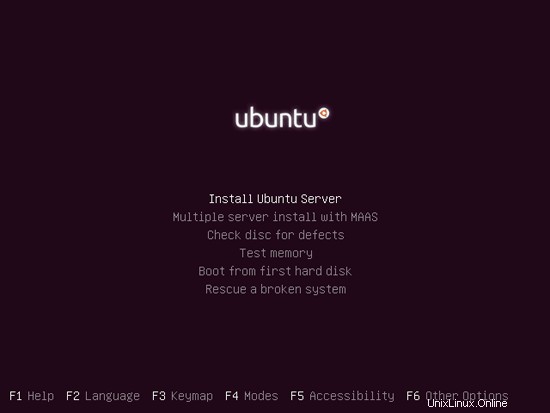
Legen Sie Ihre Ubuntu-Installations-CD in Ihr System ein und booten Sie davon. Wählen Sie Ihre Sprache:
Wählen Sie dann Ubuntu Server installieren:
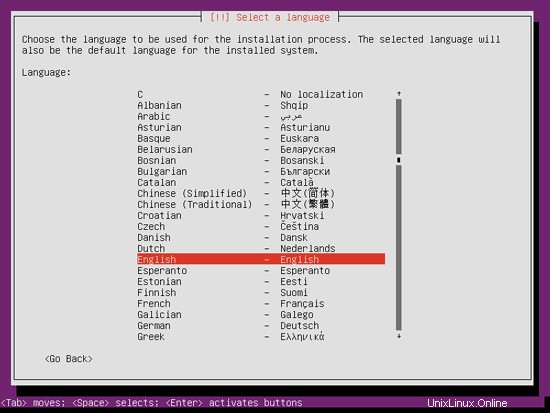
Wählen Sie Ihre Sprache erneut (?):
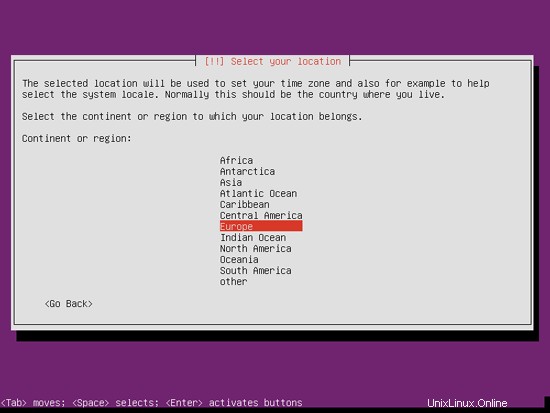
Wählen Sie dann Ihren Standort aus:
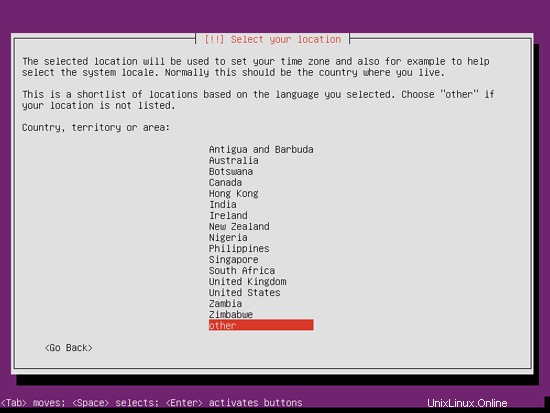
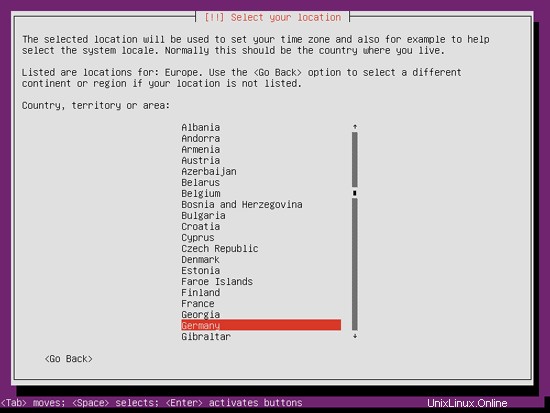
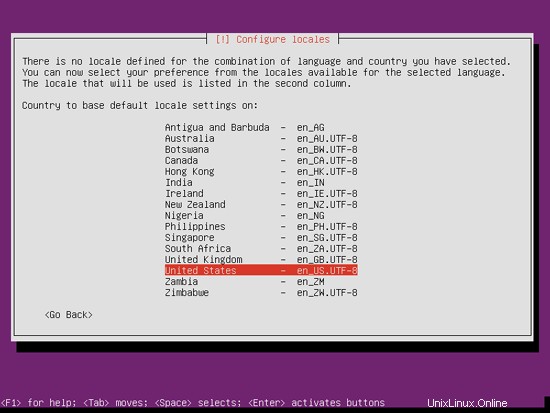
Wenn Sie eine ungewöhnliche Kombination aus Sprache und Ort ausgewählt haben (z. B. Englisch als Sprache und Deutschland als Ort, wie in meinem Fall), teilt Ihnen das Installationsprogramm möglicherweise mit, dass für diese Kombination kein Gebietsschema definiert ist. in diesem Fall müssen Sie das Gebietsschema manuell auswählen. Ich wähle hier en_US.UTF-8 aus:
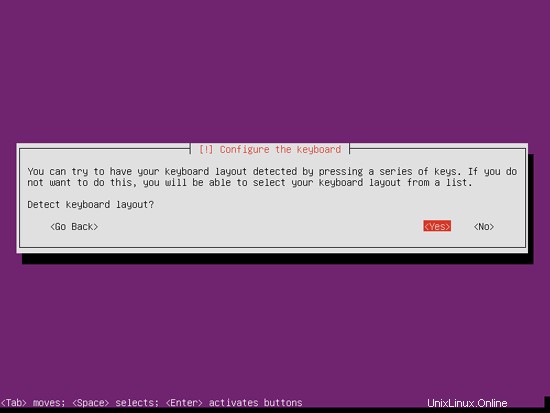
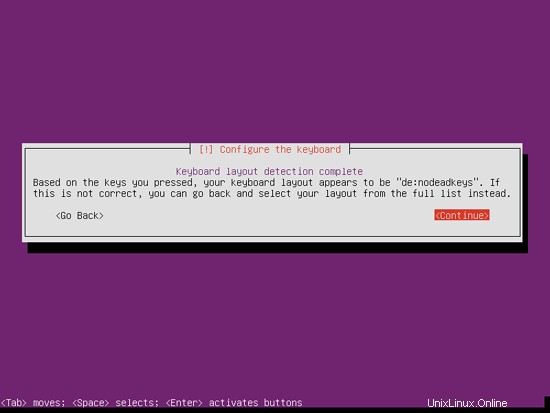
Wählen Sie ein Tastaturlayout (Sie werden aufgefordert, ein paar Tasten zu drücken, und das Installationsprogramm versucht, Ihr Tastaturlayout anhand der gedrückten Tasten zu erkennen):
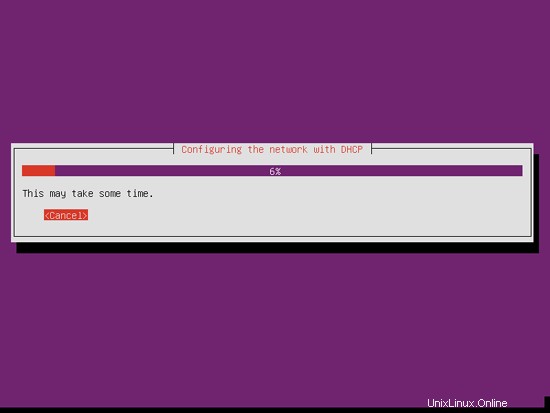
Der Installer überprüft die Installations-CD, Ihre Hardware und konfiguriert das Netzwerk mit DHCP, falls sich ein DHCP-Server im Netzwerk befindet:
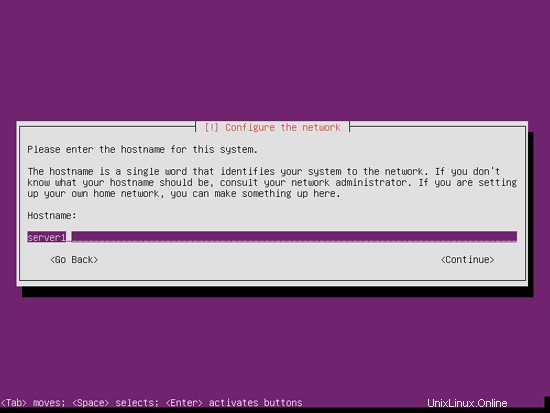
Geben Sie den Hostnamen ein. In diesem Beispiel heißt mein System server1.example.com , also gebe ich server1 ein :
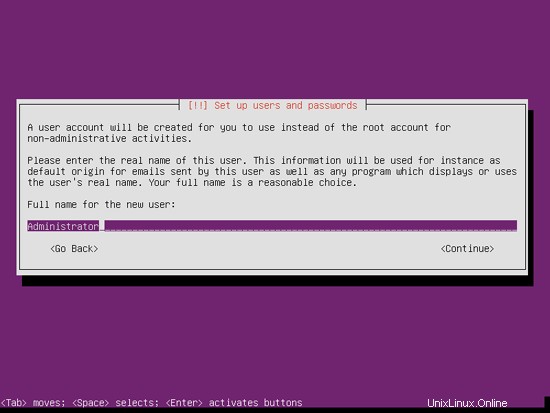
Erstellen Sie einen Benutzer, zum Beispiel den Benutzer Administrator mit dem Benutzernamen administrator (verwenden Sie nicht den Benutzernamen admin, da er ein reservierter Name unter Ubuntu 12.10 ist):

Der perfekte Server – Ubuntu 12.10 (Apache2, BIND, Dovecot, ISPConfig 3) – Seite 2
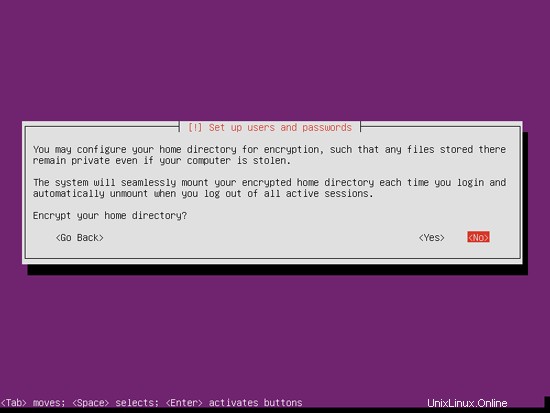
Ich brauche kein verschlüsseltes privates Verzeichnis, also wähle ich hier Nein:
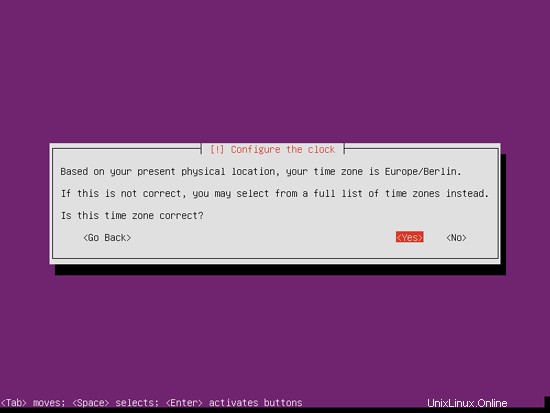
Bitte prüfen Sie, ob der Installer Ihre Zeitzone korrekt erkannt hat. Wenn ja, wählen Sie Ja, andernfalls Nein:
Jetzt müssen Sie Ihre Festplatte partitionieren. Der Einfachheit halber wähle ich Guided - use whole disk and set up LVM - dies erstellt eine Volume-Gruppe mit zwei logischen Volumes, eines für das /-Dateisystem und eines für Swap (die Partitionierung ist natürlich ganz Ihnen überlassen - wenn Sie wissen, was Sie tun, Sie können Ihre Partitionen auch manuell einrichten).

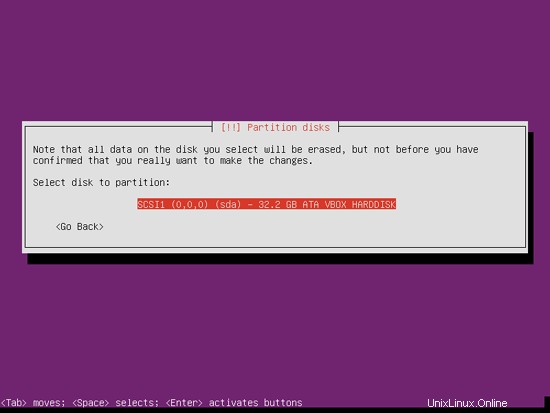
Wählen Sie die Festplatte aus, die Sie partitionieren möchten:
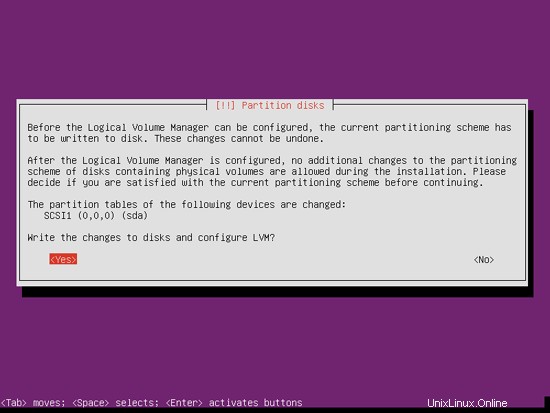
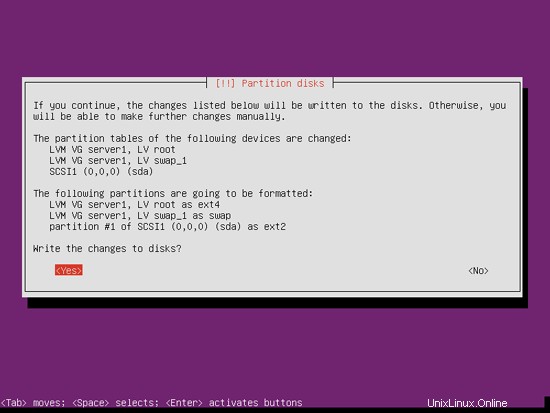
Wenn Sie gefragt werden, ob Änderungen auf Festplatten geschrieben und LVM konfiguriert werden sollen, wählen Sie Ja:
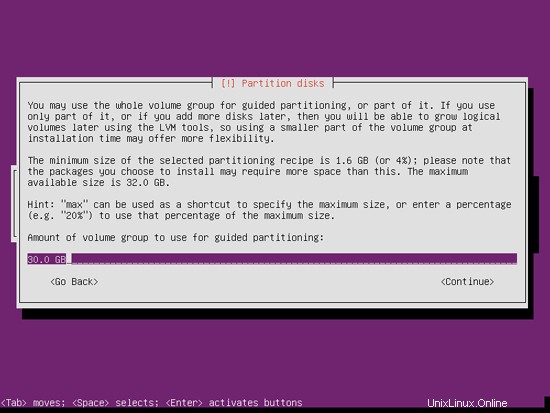
Wenn Sie Geführt – Gesamte Festplatte verwenden und LVM eingerichtet haben, erstellt der Partitionierer eine große Datenträgergruppe, die den gesamten Festplattenspeicher belegt. Sie können jetzt angeben, wie viel von diesem Speicherplatz von den logischen Volumes für / und Swap verwendet werden soll. Es ist sinnvoll, etwas Platz ungenutzt zu lassen, damit Sie später Ihre bestehenden logischen Volumes erweitern oder neue erstellen können - das gibt Ihnen mehr Flexibilität.
Wenn Sie fertig sind, klicken Sie auf Ja, wenn Sie gefragt werden, ob Änderungen auf die Festplatte geschrieben werden sollen:
Anschließend werden Ihre neuen Partitionen erstellt und formatiert.
Jetzt wird das Basissystem installiert:
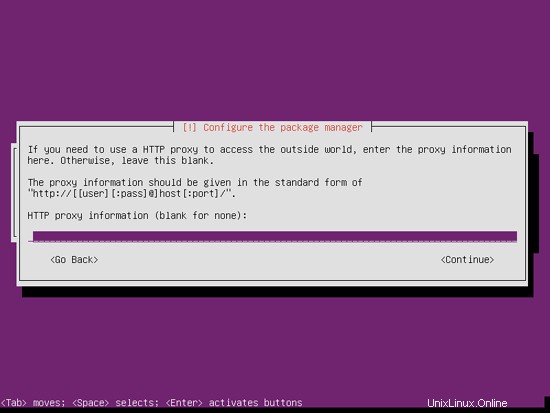
Als nächstes wird der Paketmanager apt konfiguriert. Lassen Sie die HTTP-Proxy-Zeile leer, es sei denn, Sie verwenden einen Proxy-Server, um sich mit dem Internet zu verbinden:
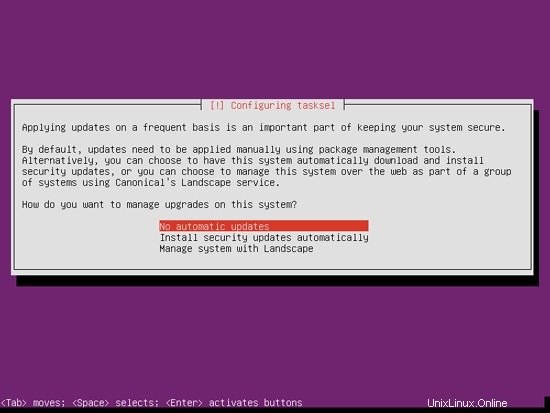
Ich bin ein bisschen altmodisch und aktualisiere meine Server gerne manuell, um mehr Kontrolle zu haben, daher wähle ich Keine automatischen Updates. Was Sie hier auswählen, bleibt natürlich Ihnen überlassen:
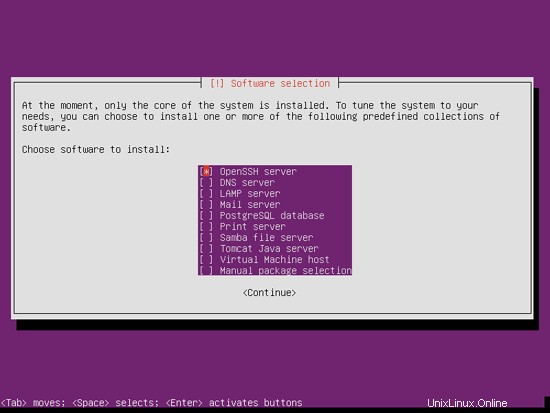
Wir brauchen einen DNS-, Mail- und LAMP-Server, aber trotzdem wähle ich jetzt keinen davon aus, weil ich gerne die volle Kontrolle darüber habe, was auf meinem System installiert wird. Wir werden die benötigten Pakete später manuell installieren. Als einziges Element wähle ich hier OpenSSH-Server aus, damit ich mich nach Abschluss der Installation sofort mit einem SSH-Client wie PuTTY mit dem System verbinden kann:
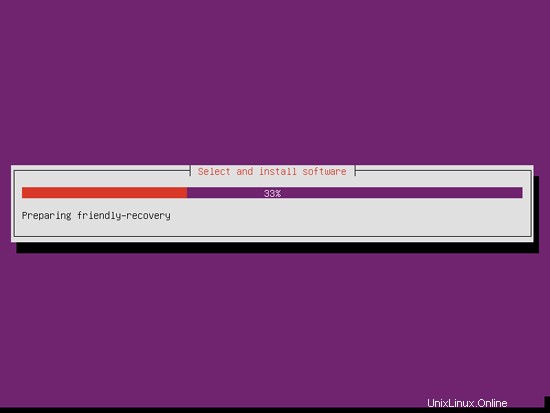
Die Installation wird fortgesetzt:
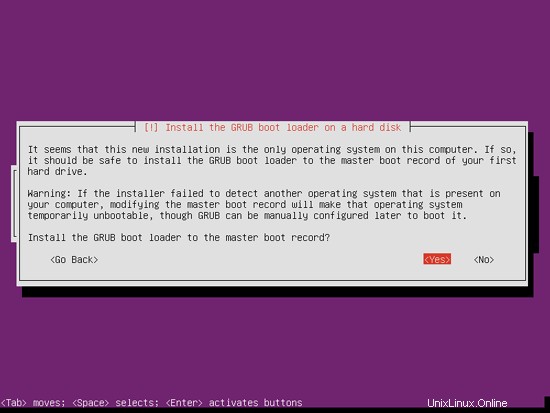
Der GRUB-Bootloader wird installiert:
Wählen Sie Ja, wenn Sie gefragt werden, ob Sie den GRUB-Bootloader in den Master-Boot-Datensatz installieren?:
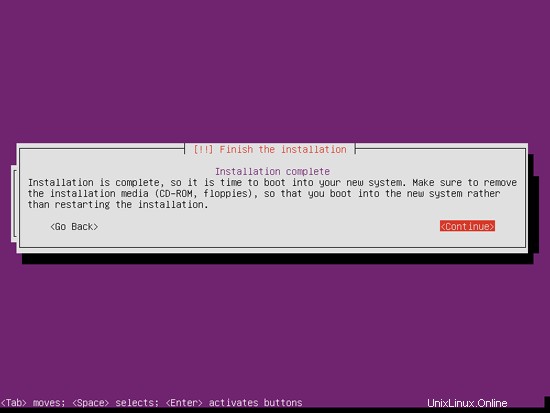
Die Installation des Basissystems ist nun abgeschlossen. Entfernen Sie die Installations-CD aus dem CD-Laufwerk und klicken Sie auf Weiter, um das System neu zu starten:
Auf zum nächsten Schritt...
Der perfekte Server – Ubuntu 12.10 (Apache2, BIND, Dovecot, ISPConfig 3) – Seite 3
4 Root-Privilegien erhalten
Nach dem Neustart können Sie sich mit Ihrem zuvor erstellten Benutzernamen (z. B. Administrator) anmelden. Da wir alle Schritte aus diesem Tutorial mit Root-Rechten ausführen müssen, können wir entweder allen Befehlen in diesem Tutorial die Zeichenfolge sudo voranstellen oder wir werden sofort root, indem wir
eingebensudo su
(Sie können die Root-Anmeldung auch aktivieren, indem Sie
ausführensudo passwd root
und root ein Passwort geben. Sie können sich dann direkt als root anmelden, was jedoch von den Ubuntu-Entwicklern und der Community aus verschiedenen Gründen verpönt ist. Siehe http://ubuntuforums.org/showthread.php?t=765414.)
5 Installieren Sie den SSH-Server (optional)
Wenn Sie den OpenSSH-Server nicht während der Systeminstallation installiert haben, können Sie dies jetzt tun:
apt-get install ssh openssh-server
Von nun an können Sie einen SSH-Client wie PuTTY verwenden und sich von Ihrer Workstation mit Ihrem Ubuntu 12.10-Server verbinden und die verbleibenden Schritte aus diesem Tutorial befolgen.
6 vim-nox installieren (optional)
In diesem Tutorial verwende ich vi als Texteditor. Das standardmäßige vi-Programm zeigt unter Ubuntu und Debian ein seltsames Verhalten; Um dies zu beheben, installieren wir vim-nox:
apt-get install vim-nox
(Sie müssen dies nicht tun, wenn Sie einen anderen Texteditor wie Joe oder Nano verwenden.)
7 Konfigurieren Sie das Netzwerk
Da der Ubuntu-Installer unser System so konfiguriert hat, dass es seine Netzwerkeinstellungen über DHCP bezieht, müssen wir das jetzt ändern, da ein Server eine statische IP-Adresse haben sollte. Bearbeiten Sie /etc/network/interfaces und passen Sie es an Ihre Bedürfnisse an (in diesem Beispiel-Setup verwende ich die IP-Adresse 192.168.0.100 und die DNS-Server 8.8.8.8 und 8.8.4.4 - ab Ubuntu 12.04 können Sie /etc/resolv.conf nicht mehr direkt bearbeiten, sondern müssen Ihre Nameserver in Ihrer Netzwerkkonfiguration angeben - siehe
man resolvconf
für weitere Details):
vi /etc/network/interfaces
# This file describes the network interfaces available on your system
# and how to activate them. For more information, see interfaces(5).

# The loopback network interface
auto lo
iface lo inet loopback

# The primary network interface
auto eth0
iface eth0 inet static
        address 192.168.0.100
        netmask 255.255.255.0
        network 192.168.0.0
        broadcast 192.168.0.255
        gateway 192.168.0.1
dns-nameservers 8.8.8.8 8.8.4.4 |
Starten Sie dann Ihr Netzwerk neu:
/etc/init.d/networking restart
Bearbeiten Sie dann /etc/hosts. Lass es so aussehen:
vi /etc/hosts
127.0.0.1 localhost.localdomain localhost 192.168.0.100 server1.example.com server1 # The following lines are desirable for IPv6 capable hosts ::1 ip6-localhost ip6-loopback fe00::0 ip6-localnet ff00::0 ip6-mcastprefix ff02::1 ip6-allnodes ff02::2 ip6-allrouters |
Jetzt ausführen
echo server1.example.com > /etc/hostname
 /etc/init.d/hostname restart
Führen Sie anschließend
aushostname
hostname -f
Beide sollten jetzt server1.example.com anzeigen.
8 Bearbeiten Sie /etc/apt/sources.list und aktualisieren Sie Ihre Linux-Installation
Bearbeiten Sie /etc/apt/sources.list. Kommentieren Sie die Installations-CD aus oder entfernen Sie sie aus der Datei und stellen Sie sicher, dass die Universe- und Multiverse-Repositories aktiviert sind. Es sollte so aussehen:
vi /etc/apt/sources.list
# # deb cdrom:[Ubuntu-Server 12.10 _Quantal Quetzal_ - Release amd64 (20121017.2)]/ quantal main restricted #deb cdrom:[Ubuntu-Server 12.10 _Quantal Quetzal_ - Release amd64 (20121017.2)]/ quantal main restricted # See http://help.ubuntu.com/community/UpgradeNotes for how to upgrade to # newer versions of the distribution. deb http://de.archive.ubuntu.com/ubuntu/ quantal main restricted deb-src http://de.archive.ubuntu.com/ubuntu/ quantal main restricted ## Major bug fix updates produced after the final release of the ## distribution. deb http://de.archive.ubuntu.com/ubuntu/ quantal-updates main restricted deb-src http://de.archive.ubuntu.com/ubuntu/ quantal-updates main restricted ## N.B. software from this repository is ENTIRELY UNSUPPORTED by the Ubuntu ## team. Also, please note that software in universe WILL NOT receive any ## review or updates from the Ubuntu security team. deb http://de.archive.ubuntu.com/ubuntu/ quantal universe deb-src http://de.archive.ubuntu.com/ubuntu/ quantal universe deb http://de.archive.ubuntu.com/ubuntu/ quantal-updates universe deb-src http://de.archive.ubuntu.com/ubuntu/ quantal-updates universe ## N.B. software from this repository is ENTIRELY UNSUPPORTED by the Ubuntu ## team, and may not be under a free licence. Please satisfy yourself as to ## your rights to use the software. Also, please note that software in ## multiverse WILL NOT receive any review or updates from the Ubuntu ## security team. deb http://de.archive.ubuntu.com/ubuntu/ quantal multiverse deb-src http://de.archive.ubuntu.com/ubuntu/ quantal multiverse deb http://de.archive.ubuntu.com/ubuntu/ quantal-updates multiverse deb-src http://de.archive.ubuntu.com/ubuntu/ quantal-updates multiverse ## N.B. software from this repository may not have been tested as ## extensively as that contained in the main release, although it includes ## newer versions of some applications which may provide useful features. ## Also, please note that software in backports WILL NOT receive any review ## or updates from the Ubuntu security team. deb http://de.archive.ubuntu.com/ubuntu/ quantal-backports main restricted universe multiverse deb-src http://de.archive.ubuntu.com/ubuntu/ quantal-backports main restricted universe multiverse deb http://security.ubuntu.com/ubuntu quantal-security main restricted deb-src http://security.ubuntu.com/ubuntu quantal-security main restricted deb http://security.ubuntu.com/ubuntu quantal-security universe deb-src http://security.ubuntu.com/ubuntu quantal-security universe deb http://security.ubuntu.com/ubuntu quantal-security multiverse deb-src http://security.ubuntu.com/ubuntu quantal-security multiverse ## Uncomment the following two lines to add software from Canonical's ## 'partner' repository. ## This software is not part of Ubuntu, but is offered by Canonical and the ## respective vendors as a service to Ubuntu users. # deb http://archive.canonical.com/ubuntu quantal partner # deb-src http://archive.canonical.com/ubuntu quantal partner ## Uncomment the following two lines to add software from Ubuntu's ## 'extras' repository. ## This software is not part of Ubuntu, but is offered by third-party ## developers who want to ship their latest software. # deb http://extras.ubuntu.com/ubuntu quantal main # deb-src http://extras.ubuntu.com/ubuntu quantal main |
Dann ausführen
apt-get update
um die apt-Paketdatenbank zu aktualisieren und
apt-get upgrade
um die neuesten Updates zu installieren (falls vorhanden). Wenn Sie sehen, dass im Rahmen der Updates ein neuer Kernel installiert wird, sollten Sie das System danach neu starten:
reboot
9 Standard-Shell ändern
/bin/sh ist ein symbolischer Link zu /bin/dash, wir brauchen jedoch /bin/bash, nicht /bin/dash. Deshalb machen wir das:
dpkg-reconfigure dash
Dash als Standardsystem-Shell verwenden (/bin/sh)? <-- Nein
Andernfalls schlägt die Installation von ISPConfig fehl.
10 AppArmor deaktivieren
AppArmor ist eine Sicherheitserweiterung (ähnlich wie SELinux), die erweiterte Sicherheit bieten soll. Meiner Meinung nach brauchen Sie es nicht, um ein sicheres System zu konfigurieren, und es verursacht normalerweise mehr Probleme als Vorteile (denken Sie daran, nachdem Sie eine Woche lang Fehler behoben haben, weil ein Dienst nicht wie erwartet funktioniert hat, und dann Sie feststellen, dass alles in Ordnung war, nur AppArmor verursachte das Problem). Daher deaktiviere ich es (dies ist ein Muss, wenn Sie später ISPConfig installieren möchten).
Wir können es wie folgt deaktivieren:
/etc/init.d/apparmor stop
 update-rc.d -f apparmor remove
 apt-get remove apparmor apparmor-utils
11 Synchronisieren Sie die Systemuhr
Es ist eine gute Idee, die Systemuhr mit einem NTP (n Netzwerk t ich bin p rotocol)-Server über das Internet. Einfach ausführen
apt-get install ntp ntpdate
und Ihre Systemzeit wird immer synchron sein.
Der perfekte Server – Ubuntu 12.10 (Apache2, BIND, Dovecot, ISPConfig 3) – Seite 4
12 Installieren Sie Postfix, Dovecot, MySQL, phpMyAdmin, rkhunter, binutils
Wir können Postfix, Dovecot, MySQL, rkhunter und binutils mit einem einzigen Befehl installieren:
apt-get install postfix postfix-mysql postfix-doc mysql-client mysql-server openssl getmail4 rkhunter binutils dovecot-imapd dovecot-pop3d dovecot-mysql dovecot-sieve sudo
Ihnen werden die folgenden Fragen gestellt:
Neues Passwort für den MySQL-Benutzer „root“:<-- yourrootsqlpassword
Wiederholtes Passwort für den MySQL-Benutzer „root“:<-- yourrootsqlpassword
Allgemeine Art der Mailkonfiguration:<-- Internet Site
System-E-Mail-Name:<-- server1.example.com
Öffnen Sie als nächstes die TLS/SSL- und Übermittlungsports in Postfix:
vi /etc/postfix/master.cf
Entkommentieren Sie die Abschnitte „submission“ und „smtps“ (lassen Sie -o milter_macro_daemon_name=ORIGINATING, da wir es nicht benötigen):
[...] submission inet n - - - - smtpd -o syslog_name=postfix/submission -o smtpd_tls_security_level=encrypt -o smtpd_sasl_auth_enable=yes -o smtpd_client_restrictions=permit_sasl_authenticated,reject # -o milter_macro_daemon_name=ORIGINATING smtps inet n - - - - smtpd -o syslog_name=postfix/smtps -o smtpd_tls_wrappermode=yes -o smtpd_sasl_auth_enable=yes -o smtpd_client_restrictions=permit_sasl_authenticated,reject # -o milter_macro_daemon_name=ORIGINATING [...] |
Danach Postfix neu starten:
/etc/init.d/postfix restart
Wir möchten, dass MySQL auf allen Schnittstellen lauscht, nicht nur auf localhost, deshalb bearbeiten wir /etc/mysql/my.cnf und kommentieren die Zeile bind-address =127.0.0.1:
ausvi /etc/mysql/my.cnf
[...] # Instead of skip-networking the default is now to listen only on # localhost which is more compatible and is not less secure. #bind-address = 127.0.0.1 [...] |
Dann starten wir MySQL neu:
/etc/init.d/mysql restart
Überprüfen Sie nun, ob das Netzwerk aktiviert ist. Ausführen
netstat -tap | grep mysql
Die Ausgabe sollte so aussehen:
example@unixlinux.online:~# netstat -tap | grep mysql
 tcp        0      0 *:mysql                 *:*                     LISTEN      21298/mysqld
 example@unixlinux.online:~#
13 Installieren Sie Amavisd-new, SpamAssassin und Clamav
Um amavisd-new, SpamAssassin und ClamAV zu installieren, führen wir
ausapt-get install amavisd-new spamassassin clamav clamav-daemon zoo unzip bzip2 arj nomarch lzop cabextract apt-listchanges libnet-ldap-perl libauthen-sasl-perl clamav-docs daemon libio-string-perl libio-socket-ssl-perl libnet-ident-perl zip libnet-dns-perl
Das ISPConfig 3-Setup verwendet amavisd, das die SpamAssassin-Filterbibliothek intern lädt, sodass wir SpamAssassin stoppen können, um etwas RAM freizugeben:
/etc/init.d/spamassassin stop
 update-rc.d -f spamassassin remove
14 Installieren Sie Apache2, PHP5, phpMyAdmin, FCGI, suExec, Pear und mcrypt
Apache2, PHP5, phpMyAdmin, FCGI, suExec, Pear und mcrypt können wie folgt installiert werden:
apt-get install apache2 apache2.2-common apache2-doc apache2-mpm-prefork apache2-utils libexpat1 ssl-cert libapache2-mod-php5 php5 php5-common php5-gd php5-mysql php5-imap phpmyadmin php5-cli php5-cgi php5-curl libapache2-mod-fcgid apache2-suexec php-pear php-auth php5-mcrypt mcrypt php5-imagick imagemagick libapache2-mod-suphp libruby libapache2-mod-ruby libapache2-mod-python libapache2-mod-perl2
Sie sehen die folgende Frage:
Webserver zur automatischen Neukonfiguration:<-- apache2
Datenbank für phpmyadmin mit dbconfig-common konfigurieren? <-- Nein
Führen Sie dann den folgenden Befehl aus, um die Apache-Module suexec, rewrite, ssl, actions und include (plus dav, dav_fs und auth_digest, wenn Sie WebDAV verwenden möchten) zu aktivieren:
a2enmod suexec rewrite ssl actions include
a2enmod dav_fs dav auth_digest
Als nächstes öffnen Sie /etc/apache2/mods-available/suphp.conf...
vi /etc/apache2/mods-available/suphp.conf
... und kommentieren Sie den Abschnitt
<IfModule mod_suphp.c>
    #<FilesMatch "\.ph(p3?|tml)$">
    #    SetHandler application/x-httpd-suphp
    #</FilesMatch>
        AddType application/x-httpd-suphp .php .php3 .php4 .php5 .phtml
        suPHP_AddHandler application/x-httpd-suphp
    <Directory />
        suPHP_Engine on
    </Directory>
    # By default, disable suPHP for debian packaged web applications as files
    # are owned by root and cannot be executed by suPHP because of min_uid.
    <Directory /usr/share>
        suPHP_Engine off
    </Directory>
# # Use a specific php config file (a dir which contains a php.ini file)
#       suPHP_ConfigPath /etc/php5/cgi/suphp/
# # Tells mod_suphp NOT to handle requests with the type <mime-type>.
#       suPHP_RemoveHandler <mime-type>
</IfModule> |
Danach Apache neu starten:
/etc/init.d/apache2 restart
Wenn Sie Ruby-Dateien mit der Erweiterung .rb auf Ihren mit ISPConfig erstellten Websites hosten möchten, müssen Sie die Zeile application/x-ruby rb in /etc/mime.types auskommentieren:
vi /etc/mime.types
[...] #application/x-ruby rb [...] |
(Dies wird nur für .rb-Dateien benötigt; Ruby-Dateien mit der Erweiterung .rbx funktionieren sofort.)
Danach Apache neu starten:
/etc/init.d/apache2 restart
14.1 Xcache
Xcache ist ein kostenloser und offener PHP-Opcode-Cacher zum Zwischenspeichern und Optimieren von PHP-Zwischencode. Es ähnelt anderen PHP-Opcode-Cachern wie eAccelerator und APC. Es wird dringend empfohlen, eines davon zu installieren, um Ihre PHP-Seite zu beschleunigen.
Xcache kann wie folgt installiert werden:
apt-get install php5-xcache
Starten Sie nun Apache neu:
/etc/init.d/apache2 restart
14.2 PHP-FPM
Ab dem kommenden ISPConfig 3.0.5 wird es einen zusätzlichen PHP-Modus geben, den Sie für die Verwendung mit Apache auswählen können:PHP-FPM. Wenn Sie vorhaben, diesen PHP-Modus zu verwenden, ist es sinnvoll, Ihr System jetzt dafür zu konfigurieren, damit Ihr System später beim Upgrade auf ISPConfig 3.0.5 vorbereitet ist (die neueste ISPConfig-Version zum Zeitpunkt des Schreibens dieses Artikels ist ISPConfig 3.0 .4.6).
Um PHP-FPM mit Apache zu verwenden, benötigen wir das Apache-Modul mod_fastcgi (bitte nicht mit mod_fcgid verwechseln - sie sind sehr ähnlich, aber Sie können PHP-FPM nicht mit mod_fcgid verwenden). Wir können PHP-FPM und mod_fastcgi wie folgt installieren:
apt-get install libapache2-mod-fastcgi php5-fpm
Stellen Sie sicher, dass Sie das Modul aktivieren und Apache neu starten:
a2enmod actions fastcgi alias
 /etc/init.d/apache2 restart
14.3 Zusätzliche PHP-Versionen
Beginnend mit dem kommenden ISPConfig 3.0.5 wird es möglich sein, mehrere PHP-Versionen auf einem Server zu haben (wählbar über ISPConfig), die über FastCGI und PHP-FPM ausgeführt werden können. Die mit Ubuntu 12.10 gelieferte PHP-Version ist 5.4.6, daher werde ich jetzt zeigen, wie PHP 5.3.18 erstellt wird, damit es auf demselben Server verwendet werden kann, während Ubuntus Standard-PHP installiert ist. Ich werde PHP 5.3.18 im Verzeichnis /opt/php-5.3.18 installieren.
Laden Sie PHP 5.3.18 herunter und extrahieren Sie es:
mkdir /opt/php-5.3.18
 mkdir /usr/local/src/php5-build
 cd /usr/local/src/php5-build
 wget http://de.php.net/get/php-5.3.18.tar.bz2/from/this/mirror -O php-5.3.18.tar.bz2
 tar jxf php-5.3.18.tar.bz2
cd php-5.3.18/
Installieren Sie die Voraussetzungen zum Erstellen von PHP5:
apt-get build-dep php5
apt-get install libfcgi-dev libfcgi0ldbl libjpeg62-dbg libmcrypt-dev libssl-dev
Konfigurieren Sie einen Build PHP 5.3.18 wie folgt (Sie können den ./configure-Befehl an Ihre Bedürfnisse anpassen, werfen Sie einen Blick auf
./configure --help
um alle verfügbaren Optionen zu sehen; wenn Sie einen anderen ./configure-Befehl verwenden, sind möglicherweise zusätzliche Bibliotheken erforderlich oder der Build-Prozess schlägt fehl) - PHP-FPM und FastCGI schließen sich in PHP 5.3 gegenseitig aus, deshalb zeige ich zwei Möglichkeiten, PHP 5.3 zu erstellen. eine für PHP-FPM, eine für FastCGI, aber Sie können PHP zweimal mit beiden Konfigurationsoptionen kompilieren, um beide zu erhalten:
14.3.1 PHP-FPM
./configure \
 --prefix=/opt/php-5.3.18 \
 --with-pdo-pgsql \
 --with-zlib-dir \
 --with-freetype-dir \
 --enable-fpm \
 --enable-mbstring \
 --with-libxml-dir=/usr \
 --enable-soap \
 --enable-calendar \
 --with-curl --with-mcrypt \
 --with-zlib \
 --with-gd \
 --with-pgsql \
 --disable-rpath \
 --enable-inline-optimization \
 --with-bz2 \
 --with-zlib \
 --enable-sockets \
 --enable-sysvsem \
 --enable-sysvshm \
 --enable-pcntl \
 --enable-mbregex \
 --with-mhash \
 --enable-zip \
 --with-pcre-regex \
 --with-mysql \
 --with-pdo-mysql \
 --with-mysqli \
 --with-jpeg-dir=/usr \
 --with-png-dir=/usr \
 --enable-gd-native-ttf \
 --with-openssl \
 --with-fpm-user=www-data \
 --with-fpm-group=www-data \
 --with-libdir=/lib/x86_64-linux-gnu
make
 make install
Kopieren Sie php.ini und php-fpm.conf (wenn Sie PHP mit FPM kompiliert haben) an die richtigen Stellen:
cp /usr/local/src/php5-build/php-5.3.18/php.ini-production /opt/php-5.3.18/lib/php.ini
cp /opt/php-5.3.18/etc/php-fpm.conf.default /opt/php-5.3.18/etc/php-fpm.conf
Öffnen Sie /opt/php-5.3.18/etc/php-fpm.conf und passen Sie die folgenden Einstellungen an - in der Listen-Zeile müssen Sie einen unbenutzten Port verwenden (z. B. 8999; Port 9000 wird möglicherweise bereits von Ubuntus Standard-PHP-FPM verwendet ), und Sie müssen am Ende die Zeile include=/opt/php-5.3.18/etc/pool.d/*.conf hinzufügen:
vi /opt/php-5.3.18/etc/php-fpm.conf
[...] pid = run/php-fpm.pid [...] user = www-data group = www-data [...] listen = 127.0.0.1:8999 [...] include=/opt/php-5.3.18/etc/pool.d/*.conf |
Erstellen Sie das Pool-Verzeichnis für PHP-FPM:
mkdir /opt/php-5.3.18/etc/pool.d
Erstellen Sie als Nächstes ein Init-Skript für PHP-FPM:
vi /etc/init.d/php-5.3.18-fpm
#! /bin/sh
### BEGIN INIT INFO
# Provides:          php-5.3.18-fpm
# Required-Start:    $all
# Required-Stop:     $all
# Default-Start:     2 3 4 5
# Default-Stop:      0 1 6
# Short-Description: starts php-5.3.18-fpm
# Description:       starts the PHP FastCGI Process Manager daemon
### END INIT INFO
php_fpm_BIN=/opt/php-5.3.18/sbin/php-fpm
php_fpm_CONF=/opt/php-5.3.18/etc/php-fpm.conf
php_fpm_PID=/opt/php-5.3.18/var/run/php-fpm.pid
php_opts="--fpm-config $php_fpm_CONF"

wait_for_pid () {
        try=0
        while test $try -lt 35 ; do
                case "$1" in
                        'created')
                        if [ -f "$2" ] ; then
                                try=''
                                break
                        fi
                        ;;
                        'removed')
                        if [ ! -f "$2" ] ; then
                                try=''
                                break
                        fi
                        ;;
                esac
                echo -n .
                try=`expr $try + 1`
                sleep 1
        done
}
case "$1" in
        start)
                echo -n "Starting php-fpm "
                $php_fpm_BIN $php_opts
                if [ "$?" != 0 ] ; then
                        echo " failed"
                        exit 1
                fi
                wait_for_pid created $php_fpm_PID
                if [ -n "$try" ] ; then
                        echo " failed"
                        exit 1
                else
                        echo " done"
                fi
        ;;
        stop)
                echo -n "Gracefully shutting down php-fpm "
                if [ ! -r $php_fpm_PID ] ; then
                        echo "warning, no pid file found - php-fpm is not running ?"
                        exit 1
                fi
                kill -QUIT `cat $php_fpm_PID`
                wait_for_pid removed $php_fpm_PID
                if [ -n "$try" ] ; then
                        echo " failed. Use force-exit"
                        exit 1
                else
                        echo " done"
                       echo " done"
                fi
        ;;
        force-quit)
                echo -n "Terminating php-fpm "
                if [ ! -r $php_fpm_PID ] ; then
                        echo "warning, no pid file found - php-fpm is not running ?"
                        exit 1
                fi
                kill -TERM `cat $php_fpm_PID`
                wait_for_pid removed $php_fpm_PID
                if [ -n "$try" ] ; then
                        echo " failed"
                        exit 1
                else
                        echo " done"
                fi
        ;;
        restart)
                $0 stop
                $0 start
        ;;
        reload)
                echo -n "Reload service php-fpm "
                if [ ! -r $php_fpm_PID ] ; then
                        echo "warning, no pid file found - php-fpm is not running ?"
                        exit 1
                fi
                kill -USR2 `cat $php_fpm_PID`
                echo " done"
        ;;
        *)
                echo "Usage: $0 {start|stop|force-quit|restart|reload}"
                exit 1
        ;;
esac |
Make the init script executable and create the system startup links:
chmod 755 /etc/init.d/php-5.3.18-fpm
 insserv php-5.3.18-fpm
Finally start PHP-FPM:
/etc/init.d/php-5.3.18-fpm start
14.3.2 PHP With FastCGI
./configure \
 --prefix=/opt/php-5.3.18 \
 --with-pdo-pgsql \
 --with-zlib-dir \
 --with-freetype-dir \
 --enable-cgi \
 --enable-mbstring \
 --with-libxml-dir=/usr \
 --enable-soap \
 --enable-calendar \
 --with-curl --with-mcrypt \
 --with-zlib \
 --with-gd \
 --with-pgsql \
 --disable-rpath \
 --enable-inline-optimization \
 --with-bz2 \
 --with-zlib \
 --enable-sockets \
 --enable-sysvsem \
 --enable-sysvshm \
 --enable-pcntl \
 --enable-mbregex \
 --with-mhash \
 --enable-zip \
 --with-pcre-regex \
 --with-mysql \
 --with-pdo-mysql \
 --with-mysqli \
 --with-jpeg-dir=/usr \
 --with-png-dir=/usr \
 --enable-gd-native-ttf \
 --with-openssl \
 --with-libdir=/lib/x86_64-linux-gnu
make
 make install
Copy php.ini to the correct location:
cp /usr/local/src/php5-build/php-5.3.18/php.ini-production /opt/php-5.3.18/lib/php.ini
14.3.3 ISPConfig Configuration
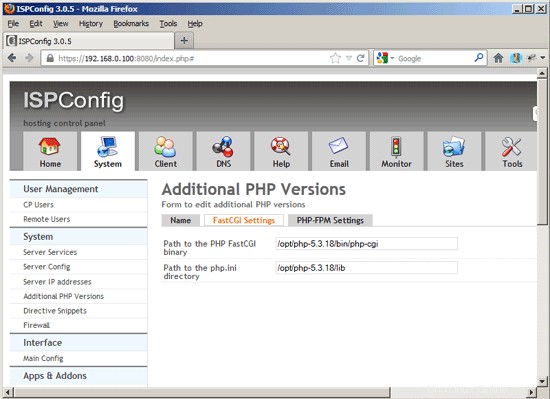
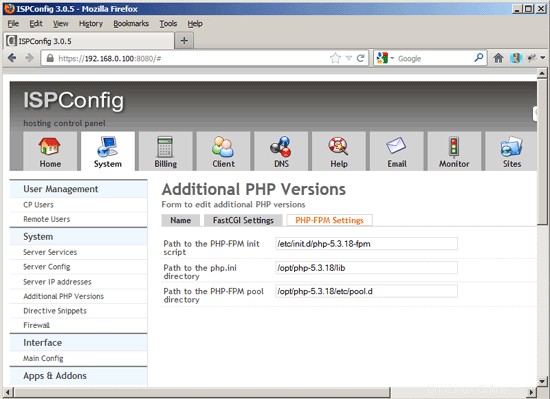
In ISPConfig 3.0.5, you can configure the new PHP version under System> Additional PHP Versions. On the Name tab, you just fill in a name for the PHP version (e.g. PHP 5.3.18) - this PHP version will be listed under this name in the website settings in ISPConfig:
If you want to use this PHP version with FastCGI, go to the FastCGI Settings tab (thePHP-FPM Settings tab can be left empty) and fill out the fields as follows:
If you want to use this PHP version with PHP-FPM, go to the PHP-FPM Settings tab (the FastCGI Settings tab can be left empty) and fill out the fields as follows:
The Perfect Server - Ubuntu 12.10 (Apache2, BIND, Dovecot, ISPConfig 3) - Page 5
15 Install Mailman
Since version 3.0.4, ISPConfig also allows you to manage (create/modify/delete) Mailman mailing lists. If you want to make use of this feature, install Mailman as follows:
apt-get install mailman
Select at least one language, e.g.:
Languages to support:<-- en (English)
Missing site list <-- Ok
Before we can start Mailman, a first mailing list called mailman must be created:
newlist mailman
example@unixlinux.online:~# newlist mailman
Enter the email of the person running the list: <-- admin email address, e.g. example@unixlinux.online
Initial mailman password: <-- admin password for the mailman list
To finish creating your mailing list, you must edit your /etc/aliases (or
equivalent) file by adding the following lines, and possibly running the
`newaliases' program:
## mailman mailing list
mailman: "|/var/lib/mailman/mail/mailman post mailman"
mailman-admin: "|/var/lib/mailman/mail/mailman admin mailman"
mailman-bounces: "|/var/lib/mailman/mail/mailman bounces mailman"
mailman-confirm: "|/var/lib/mailman/mail/mailman confirm mailman"
mailman-join: "|/var/lib/mailman/mail/mailman join mailman"
mailman-leave: "|/var/lib/mailman/mail/mailman leave mailman"
mailman-owner: "|/var/lib/mailman/mail/mailman owner mailman"
mailman-request: "|/var/lib/mailman/mail/mailman request mailman"
mailman-subscribe: "|/var/lib/mailman/mail/mailman subscribe mailman"
mailman-unsubscribe: "|/var/lib/mailman/mail/mailman unsubscribe mailman"
Hit enter to notify mailman owner... <-- ENTER
example@unixlinux.online:~#
Open /etc/aliases afterwards...
vi /etc/aliases
... and add the following lines:
[...] ## mailman mailing list mailman: "|/var/lib/mailman/mail/mailman post mailman" mailman-admin: "|/var/lib/mailman/mail/mailman admin mailman" mailman-bounces: "|/var/lib/mailman/mail/mailman bounces mailman" mailman-confirm: "|/var/lib/mailman/mail/mailman confirm mailman" mailman-join: "|/var/lib/mailman/mail/mailman join mailman" mailman-leave: "|/var/lib/mailman/mail/mailman leave mailman" mailman-owner: "|/var/lib/mailman/mail/mailman owner mailman" mailman-request: "|/var/lib/mailman/mail/mailman request mailman" mailman-subscribe: "|/var/lib/mailman/mail/mailman subscribe mailman" mailman-unsubscribe: "|/var/lib/mailman/mail/mailman unsubscribe mailman" |
Run
newaliases
afterwards and restart Postfix:
/etc/init.d/postfix restart
Finally we must enable the Mailman Apache configuration:
ln -s /etc/mailman/apache.conf /etc/apache2/conf.d/mailman.conf
This defines the alias /cgi-bin/mailman/ for all Apache vhosts, which means you can access the Mailman admin interface for a list at http://
Under http://
Restart Apache afterwards:
/etc/init.d/apache2 restart
Then start the Mailman daemon:
/etc/init.d/mailman start
16 Install PureFTPd And Quota
PureFTPd and quota can be installed with the following command:
apt-get install pure-ftpd-common pure-ftpd-mysql quota quotatool
Edit the file /etc/default/pure-ftpd-common...
vi /etc/default/pure-ftpd-common
... and make sure that the start mode is set to standalone and set VIRTUALCHROOT=true:
[...] STANDALONE_OR_INETD=standalone [...] VIRTUALCHROOT=true [...] |
Now we configure PureFTPd to allow FTP and TLS sessions. FTP is a very insecure protocol because all passwords and all data are transferred in clear text. By using TLS, the whole communication can be encrypted, thus making FTP much more secure.
If you want to allow FTP and TLS sessions, run
echo 1 > /etc/pure-ftpd/conf/TLS
In order to use TLS, we must create an SSL certificate. I create it in /etc/ssl/private/, therefore I create that directory first:
mkdir -p /etc/ssl/private/
Afterwards, we can generate the SSL certificate as follows:
openssl req -x509 -nodes -days 7300 -newkey rsa:2048 -keyout /etc/ssl/private/pure-ftpd.pem -out /etc/ssl/private/pure-ftpd.pem
Country Name (2 letter code) [AU]:<-- Enter your Country Name (e.g., "DE").
State or Province Name (full name) [Some-State]:<-- Enter your State or Province Name.
Locality Name (eg, city) []:<-- Enter your City.
Organization Name (eg, company) [Internet Widgits Pty Ltd]:<-- Enter your Organization Name (e.g., the name of your company).
Organizational Unit Name (eg, section) []:<-- Enter your Organizational Unit Name (e.g. "IT Department").
Common Name (eg, YOUR name) []:<-- Enter the Fully Qualified Domain Name of the system (e.g. "server1.example.com").
Email Address []:<-- Enter your Email Address.
Change the permissions of the SSL certificate:
chmod 600 /etc/ssl/private/pure-ftpd.pem
Then restart PureFTPd:
/etc/init.d/pure-ftpd-mysql restart
Edit /etc/fstab. Mine looks like this (I added ,usrjquota=quota.user,grpjquota=quota.group,jqfmt=vfsv0 to the partition with the mount point /):
vi /etc/fstab
# /etc/fstab: static file system information. # # Use 'blkid' to print the universally unique identifier for a # device; this may be used with UUID= as a more robust way to name devices # that works even if disks are added and removed. See fstab(5). # # <file system> <mount point> <type> <options> <dump> <pass> /dev/mapper/server1-root / ext4 errors=remount-ro,usrjquota=quota.user,grpjquota=quota.group,jqfmt=vfsv0 0 1 # /boot was on /dev/sda1 during installation UUID=07152d44-158e-4603-a14d-79f1838adebe /boot ext2 defaults 0 2 /dev/mapper/server1-swap_1 none swap sw 0 0 |
To enable quota, run these commands:
mount -o remount /
quotacheck -avugm
 quotaon -avug
17 Install BIND DNS Server
BIND can be installed as follows:
apt-get install bind9 dnsutils
18 Install Vlogger, Webalizer, And AWstats
Vlogger, webalizer, and AWstats can be installed as follows:
apt-get install vlogger webalizer awstats geoip-database libclass-dbi-mysql-perl
Open /etc/cron.d/awstats afterwards...
vi /etc/cron.d/awstats
... and comment out everything in that file:
#MAILTO=root #*/10 * * * * www-data [ -x /usr/share/awstats/tools/update.sh ] && /usr/share/awstats/tools/update.sh # Generate static reports: #10 03 * * * www-data [ -x /usr/share/awstats/tools/buildstatic.sh ] && /usr/share/awstats/tools/buildstatic.sh |
19 Install Jailkit
Jailkit is needed only if you want to chroot SSH users. It can be installed as follows (important:Jailkit must be installed before ISPConfig - it cannot be installed afterwards!):
apt-get install build-essential autoconf automake1.9 libtool flex bison debhelper binutils-gold
cd /tmp
 wget http://olivier.sessink.nl/jailkit/jailkit-2.15.tar.gz
 tar xvfz jailkit-2.15.tar.gz
 cd jailkit-2.15
 ./debian/rules binary
You can now install the Jailkit .deb package as follows:
cd ..
 dpkg -i jailkit_2.15-1_*.deb
 rm -rf jailkit-2.15*
The Perfect Server - Ubuntu 12.10 (Apache2, BIND, Dovecot, ISPConfig 3) - Page 6
20 Install fail2ban
This is optional but recommended, because the ISPConfig monitor tries to show the log:
apt-get install fail2ban
To make fail2ban monitor PureFTPd and Dovecot, create the file /etc/fail2ban/jail.local:
vi /etc/fail2ban/jail.local
[pureftpd] enabled = true port = ftp filter = pureftpd logpath = /var/log/syslog maxretry = 3 [dovecot-pop3imap] enabled = true filter = dovecot-pop3imap action = iptables-multiport[name=dovecot-pop3imap, port="pop3,pop3s,imap,imaps", protocol=tcp] logpath = /var/log/mail.log maxretry = 5 |
Then create the following two filter files:
vi /etc/fail2ban/filter.d/pureftpd.conf
[Definition] failregex = .*pure-ftpd: \(.*@<HOST>\) \[WARNING\] Authentication failed for user.* ignoreregex = |
vi /etc/fail2ban/filter.d/dovecot-pop3imap.conf
[Definition] failregex = (?: pop3-login|imap-login): .*(?:Authentication failure|Aborted login \(auth failed|Aborted login \(tried to use disabled|Disconnected \(auth failed|Aborted login \(\d+ authentication attempts).*rip=(?P<host>\S*),.* ignoreregex = |
Restart fail2ban afterwards:
/etc/init.d/fail2ban restart
21 Install SquirrelMail
To install the SquirrelMail webmail client, run
apt-get install squirrelmail
Then configure SquirrelMail:
squirrelmail-configure
We must tell SquirrelMail that we are using Dovecot-IMAP/-POP3:
SquirrelMail Configuration : Read: config.php (1.4.0)
---------------------------------------------------------
Main Menu --
1. Organization Preferences
2. Server Settings
3. Folder Defaults
4. General Options
5. Themes
6. Address Books
7. Message of the Day (MOTD)
8. Plugins
9. Database
10. Languages
D. Set pre-defined settings for specific IMAP servers
C Turn color on
S Save data
Q Quit
Command >> <-- D
SquirrelMail Configuration : Read: config.php
---------------------------------------------------------
While we have been building SquirrelMail, we have discovered some
preferences that work better with some servers that don't work so
well with others. If you select your IMAP server, this option will
set some pre-defined settings for that server.
Please note that you will still need to go through and make sure
everything is correct. This does not change everything. There are
only a few settings that this will change.
Please select your IMAP server:
bincimap = Binc IMAP server
courier = Courier IMAP server
cyrus = Cyrus IMAP server
dovecot = Dovecot Secure IMAP server
exchange = Microsoft Exchange IMAP server
hmailserver = hMailServer
macosx = Mac OS X Mailserver
mercury32 = Mercury/32
uw = University of Washington's IMAP server
gmail = IMAP access to Google mail (Gmail) accounts
quit = Do not change anything
Command >> <-- dovecot
SquirrelMail Configuration : Read: config.php
---------------------------------------------------------
While we have been building SquirrelMail, we have discovered some
preferences that work better with some servers that don't work so
well with others. If you select your IMAP server, this option will
set some pre-defined settings for that server.
Please note that you will still need to go through and make sure
everything is correct. This does not change everything. There are
only a few settings that this will change.
Please select your IMAP server:
bincimap = Binc IMAP server
courier = Courier IMAP server
cyrus = Cyrus IMAP server
dovecot = Dovecot Secure IMAP server
exchange = Microsoft Exchange IMAP server
hmailserver = hMailServer
macosx = Mac OS X Mailserver
mercury32 = Mercury/32
uw = University of Washington's IMAP server
gmail = IMAP access to Google mail (Gmail) accounts
quit = Do not change anything
Command >> dovecot
imap_server_type = dovecot
default_folder_prefix =
trash_folder = Trash
sent_folder = Sent
draft_folder = Drafts
show_prefix_option = false
default_sub_of_inbox = false
show_contain_subfolders_option = false
optional_delimiter = detect
delete_folder = false
Press any key to continue... <-- press a key
SquirrelMail Configuration : Read: config.php (1.4.0)
---------------------------------------------------------
Main Menu --
1. Organization Preferences
2. Server Settings
3. Folder Defaults
4. General Options
5. Themes
6. Address Books
7. Message of the Day (MOTD)
8. Plugins
9. Database
10. Languages
D. Set pre-defined settings for specific IMAP servers
C Turn color on
S Save data
Q Quit
Command >> <-- S
SquirrelMail Configuration : Read: config.php (1.4.0)
---------------------------------------------------------
Main Menu --
1. Organization Preferences
2. Server Settings
3. Folder Defaults
4. General Options
5. Themes
6. Address Books
7. Message of the Day (MOTD)
8. Plugins
9. Database
10. Languages
D. Set pre-defined settings for specific IMAP servers
C Turn color on
S Save data
Q Quit
Command >> <-- Q
Now we will configure SquirrelMail so that you can use it from within your web sites (created through ISPConfig) by using the /squirrelmail or /webmail aliases. So if your website is www.example.com, you will be able to access SquirrelMail using www.example.com/squirrelmail or www.example.com/webmail.
SquirrelMail's Apache configuration is in the file /etc/squirrelmail/apache.conf, but this file isn't loaded by Apache because it is not in the /etc/apache2/conf.d/ directory. Therefore we create a symlink called squirrelmail.conf in the /etc/apache2/conf.d/ directory that points to /etc/squirrelmail/apache.conf and reload Apache afterwards:
cd /etc/apache2/conf.d/
 ln -s ../../squirrelmail/apache.conf squirrelmail.conf
 /etc/init.d/apache2 reload
Now open /etc/apache2/conf.d/squirrelmail.conf...
vi /etc/apache2/conf.d/squirrelmail.conf
... and add the following lines to the
[...]
<Directory /usr/share/squirrelmail>
  Options FollowSymLinks
  <IfModule mod_php5.c>
    AddType application/x-httpd-php .php
    php_flag magic_quotes_gpc Off
    php_flag track_vars On
    php_admin_flag allow_url_fopen Off
    php_value include_path .
    php_admin_value upload_tmp_dir /var/lib/squirrelmail/tmp
    php_admin_value open_basedir /usr/share/squirrelmail:/etc/squirrelmail:/var/lib/squirrelmail:/etc/hostname:/etc/mailname
    php_flag register_globals off
  </IfModule>
  <IfModule mod_dir.c>
    DirectoryIndex index.php
  </IfModule>

  # access to configtest is limited by default to prevent information leak
  <Files configtest.php>
    order deny,allow
    deny from all
    allow from 127.0.0.1
  </Files>
</Directory>
[...] |
Create the directory /var/lib/squirrelmail/tmp...
mkdir /var/lib/squirrelmail/tmp
... and make it owned by the user www-data:
chown www-data /var/lib/squirrelmail/tmp
Reload Apache again:
/etc/init.d/apache2 reload
That's it already - /etc/apache2/conf.d/squirrelmail.conf defines an alias called /squirrelmail that points to SquirrelMail's installation directory /usr/share/squirrelmail.
You can now access SquirrelMail from your web site as follows:
http://192.168.0.100/squirrelmail
 http://www.example.com/squirrelmail
You can also access it from the ISPConfig control panel vhost (after you have installed ISPConfig, see the next chapter) as follows (this doesn't need any configuration in ISPConfig):
http://server1.example.com:8080/squirrelmail
If you'd like to use the alias /webmail instead of /squirrelmail, simply open /etc/apache2/conf.d/squirrelmail.conf...
vi /etc/apache2/conf.d/squirrelmail.conf
... and add the line Alias /webmail /usr/share/squirrelmail:
Alias /squirrelmail /usr/share/squirrelmail Alias /webmail /usr/share/squirrelmail [...] |
Then reload Apache:
/etc/init.d/apache2 reload
Now you can access Squirrelmail as follows:
http://192.168.0.100/webmail
http://www.example.com/webmail
http://server1.example.com:8080/webmail (after you have installed ISPConfig, see the next chapter)
If you'd like to define a vhost like webmail.example.com where your users can access SquirrelMail, you'd have to add the following vhost configuration to /etc/apache2/conf.d/squirrelmail.conf:
vi /etc/apache2/conf.d/squirrelmail.conf
[...] <VirtualHost 1.2.3.4:80> DocumentRoot /usr/share/squirrelmail ServerName webmail.example.com </VirtualHost> |
Make sure you replace 1.2.3.4 with the correct IP address of your server. Of course, there must be a DNS record for webmail.example.com that points to the IP address that you use in the vhost configuration. Also make sure that the vhost webmail.example.com does not exist in ISPConfig (otherwise both vhosts will interfere with each other!).
Now reload Apache...
/etc/init.d/apache2 reload
... and you can access SquirrelMail under http://webmail.example.com!
The Perfect Server - Ubuntu 12.10 (Apache2, BIND, Dovecot, ISPConfig 3) - Page 7
22 Install ISPConfig 3
To install ISPConfig 3 from the latest released version, do this:
cd /tmp
 wget http://www.ispconfig.org/downloads/ISPConfig-3-stable.tar.gz
 tar xfz ISPConfig-3-stable.tar.gz
 cd ispconfig3_install/install/
The next step is to run
php -q install.php
This will start the ISPConfig 3 installer. The installer will configure all services like Postfix, Dovecot, etc. for you. A manual setup as required for ISPConfig 2 (perfect setup guides) is not necessary.
example@unixlinux.online:/tmp/ispconfig3_install/install# php -q install.php
--------------------------------------------------------------------------------
_____ ___________ _____ __ _ ____
|_ _/ ___| ___ \ / __ \ / _(_) /__ \
| | \ `--.| |_/ / | / \/ ___ _ __ | |_ _ __ _ _/ /
| | `--. \ __/ | | / _ \| '_ \| _| |/ _` | |_ |
_| |_/\__/ / | | \__/\ (_) | | | | | | | (_| | ___\ \
\___/\____/\_| \____/\___/|_| |_|_| |_|\__, | \____/
__/ |
|___/
--------------------------------------------------------------------------------
>> Initial configuration
Operating System: Debian or compatible, unknown version.
Following will be a few questions for primary configuration so be careful.
Default values are in [brackets] and can be accepted with
Tap in "quit" (without the quotes) to stop the installer.
Select language (en,de) [en]: <-- ENTER
Installation mode (standard,expert) [standard]: <-- ENTER
Full qualified hostname (FQDN) of the server, eg server1.domain.tld [server1.example.com]: <-- ENTER
MySQL server hostname [localhost]: <-- ENTER
MySQL root username [root]: <-- ENTER
MySQL root password []: <-- yourrootsqlpassword
MySQL database to create [dbispconfig]: <-- ENTER
MySQL charset [utf8]: <-- ENTER
Generating a 2048 bit RSA private key
...........+++
.....................+++
writing new private key to 'smtpd.key'
-----
You are about to be asked to enter information that will be incorporated
into your certificate request.
What you are about to enter is what is called a Distinguished Name or a DN.
There are quite a few fields but you can leave some blank
For some fields there will be a default value,
If you enter '.', the field will be left blank.
-----
Country Name (2 letter code) [AU]: <-- ENTER
State or Province Name (full name) [Some-State]: <-- ENTER
Locality Name (eg, city) []: <-- ENTER
Organization Name (eg, company) [Internet Widgits Pty Ltd]: <-- ENTER
Organizational Unit Name (eg, section) []: <-- ENTER
C ommon Name (e.g. server FQDN or YOUR name) []: <-- ENTER
Email Address []: <-- ENTER
Configuring Jailkit
Configuring Dovecot
Configuring Spamassassin
Configuring Amavisd
Configuring Getmail
Configuring Pureftpd
Configuring BIND
Configuring Apache
Configuring Vlogger
Configuring Apps vhost
Configuring Bastille Firewall
Configuring Fail2ban
Installing ISPConfig
ISPConfig Port [8080]: <-- ENTER
Do you want a secure (SSL) connection to the ISPConfig web interface (y,n) [y]: <-- ENTER
Generating RSA private key, 4096 bit long modulus
.......++
.........................................................++
e is 65537 (0x10001)
You are about to be asked to enter information that will be incorporated
into your certificate request.
What you are about to enter is what is called a Distinguished Name or a DN.
There are quite a few fields but you can leave some b lank
For some fields there will be a default value,
If you enter '.', the field will be left blank.
-----
Country Name (2 letter code) [AU]: <-- ENTER
State or Province Name (full name) [Some-State]: <-- ENTER
Locality Name (eg, city) []: <-- ENTER
Organization Name (eg, company) [Internet Widgits Pty Ltd]: <-- ENTER
Organizational Unit Name (eg, section) []: <-- ENTER
Common Name (e.g. server FQDN or YOUR name) []: <-- ENTER
Email Address []: <-- ENTER
Please enter the following 'extra' attributes
to be sent with your certificate request
A challenge password []: <-- ENTER
An optional company name []: <-- ENTER
writing RSA key
Configuring DBServer
Installing ISPConfig crontab
no crontab for root
no crontab for getmail
Restarting services ...
Rather than invoking init scripts through /etc/init.d, use the service(8)
utility, e.g. service mysql restart
Since the script you are attempting to invoke has been converted to an
Upstart job, you may also use the stop(8) and then start(8) utilities,
e.g. stop mysql ; start mysql. The restart(8) utility is also available.
mysql stop/waiting
mysql start/running, process 2543
* Stopping Postfix Mail Transport Agent postfix
/usr/sbin/postconf: warning: /etc/postfix/master.cf: unused parameter: smtpd_bind_address=127.0.0.1
...done.
* Starting Postfix Mail Transport Agent postfix
postconf: warning: /etc/postfix/master.cf: unused parameter: smtpd_bind_address=127.0.0.1
postconf: warning: /etc/postfix/master.cf: unused parameter: smtpd_bind_address=127.0.0.1
postconf: warning: /etc/postfix/master.cf: unused parameter: smtpd_bind_address=127.0.0.1
postconf: warning: /etc/postfix/master.cf: unused parameter: smtpd_bind_address=127.0.0.1
postconf: warning: /etc/postfix/master.cf: unused parameter: smtpd_bind_address=127.0.0.1
postconf: warning: /etc/postfix/master.cf: unused parameter: smtpd_bind_address=127.0.0.1
/usr/sbin/postconf: warning: /etc/postfix/master.cf: unused parameter: smtpd_ bind_address=127.0.0.1
/usr/sbin/postconf: warning: /etc/postfix/master.cf: unused parameter: smtpd_bind_address=127.0.0.1
/usr/sbin/postconf: warning: /etc/postfix/master.cf: unused parameter: smtpd_bind_address=127.0.0.1
/usr/sbin/postconf: warning: /etc/postfix/master.cf: unused parameter: smtpd_bind_address=127.0.0.1
/usr/sbin/postconf: warning: /etc/postfix/master.cf: unused parameter: smtpd_bind_address=127.0.0.1
/usr/sbin/postconf: warning: /etc/postfix/master.cf: unused parameter: smtpd_bind_address=127.0.0.1
/usr/sbin/postconf: warning: /etc/postfix/master.cf: unused parameter: smtpd_bind_address=127.0.0.1
/usr/sbin/postconf: warning: /etc/postfix/master.cf: unused parameter: smtpd_bind_address=127.0.0.1
/usr/sbin/postconf: warning: /etc/postfix/master.cf: unused parameter: smtpd_bind_address=127.0.0.1
/usr/sbin/postconf: warning: /etc/postfix/master.cf: unused parameter: smtpd_bind_address=127.0.0.1
/usr/sbin/postcon f: warning: /etc/postfix/master.cf: unused parameter: smtpd_bind_address=127.0.0.1
/usr/sbin/postconf: warning: /etc/postfix/master.cf: unused parameter: smtpd_bind_address=127.0.0.1
/usr/sbin/postconf: warning: /etc/postfix/master.cf: unused parameter: smtpd_bind_address=127.0.0.1
/usr/sbin/postconf: warning: /etc/postfix/master.cf: unused parameter: smtpd_bind_address=127.0.0.1
/usr/sbin/postconf: warning: /etc/postfix/master.cf: unused parameter: smtpd_bind_address=127.0.0.1
/usr/sbin/postconf: warning: /etc/postfix/master.cf: unused parameter: smtpd_bind_address=127.0.0.1
...done.
Stopping amavisd: (not running).
The amavisd daemon is already running, PID: [1126]
Starting amavisd: (failed).
* Stopping ClamAV daemon clamd
...done.
* Starting ClamAV daemon clamd
...done.
Rather than invoking init scripts through /etc/init.d, use the service(8)
utility, e.g. service dovecot restart
Since the script you are attempting to invoke has been converted to an
Upstart job, you may also use the stop(8) and then start(8) utilities,
e.g. stop dovecot ; start dovecot. The restart(8) utility is also available.
dovecot stop/waiting
dovecot start/running, process 3668
* Restarting Mailman master qrunner mailmanctl
* Waiting...
...done.
...done.
* Restarting web server apache2
... waiting . ...done.
Restarting ftp server: Running: /usr/sbin/pure-ftpd-mysql-virtualchroot -l mysql:/etc/pure-ftpd/db/mysql.conf -l pam -E -H -Y 1 -O clf:/var/log/pure-ftpd/transfer.log -8 UTF-8 -b -D -A -u 1000 -B
Installation completed.
example@unixlinux.online:/tmp/ispconfig3_install/install#
The installer automatically configures all underlying services, so no manual configuration is needed.
You now also have the possibility to let the installer create an SSL vhost for the ISPConfig control panel, so that ISPConfig can be accessed using https:// instead of http://. To achieve this, just press ENTER when you see this question:Do you want a secure (SSL) connection to the ISPConfig web interface (y,n) [y]:.
Afterwards you can access ISPConfig 3 under http(s)://server1.example.com:8080/ or http(s)://192.168.0.100:8080/ ( http or https depends on what you chose during installation). Log in with the username admin and the password admin (you should change the default password after your first login):
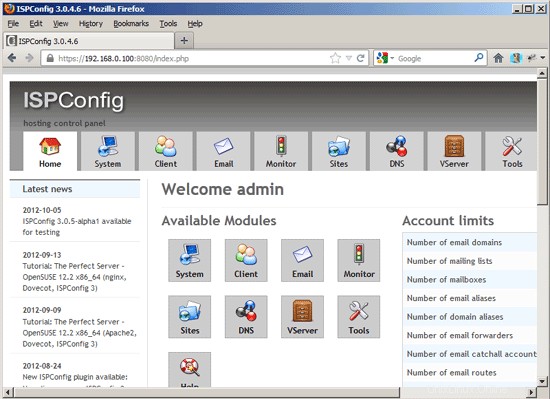
The system is now ready to be used.
22.1 ISPConfig 3 Manual
In order to learn how to use ISPConfig 3, I strongly recommend to download the ISPConfig 3 Manual.
On more than 300 pages, it covers the concept behind ISPConfig (admin, resellers, clients), explains how to install and update ISPConfig 3, includes a reference for all forms and form fields in ISPConfig together with examples of valid inputs, and provides tutorials for the most common tasks in ISPConfig 3. It also lines out how to make your server more secure and comes with a troubleshooting section at the end.
22.2 ISPConfig Monitor App For Android
With the ISPConfig Monitor App, you can check your server status and find out if all services are running as expected. You can check TCP and UDP ports and ping your servers. In addition to that you can use this app to request details from servers that have ISPConfig installed (please note that the minimum installed ISPConfig 3 version with support for the ISPConfig Monitor App is 3.0.3.3! ); these details include everything you know from the Monitor module in the ISPConfig Control Panel (e.g. services, mail and system logs, mail queue, CPU and memory info, disk usage, quota, OS details, RKHunter log, etc.), and of course, as ISPConfig is multiserver-capable, you can check all servers that are controlled from your ISPConfig master server.
For download and usage instructions, please visit http://www.ispconfig.org/ispconfig-3/ispconfig-monitor-app-for-android/.
23 Additional Notes
23.1 OpenVZ
If the Ubuntu server that you've just set up in this tutorial is an OpenVZ container (virtual machine), you should do this on the host system (I'm assuming that the ID of the OpenVZ container is 101 - replace it with the correct VPSID on your system):
VPSID=101
 for CAP in CHOWN DAC_READ_SEARCH SETGID SETUID NET_BIND_SERVICE NET_ADMIN SYS_CHROOT SYS_NICE CHOWN DAC_READ_SEARCH SETGID SETUID NET_BIND_SERVICE NET_ADMIN SYS_CHROOT SYS_NICE
 do
   vzctl set $VPSID --capability ${CAP}:on --save
 done
24 Links
- Ubuntu:http://www.ubuntu.com/
- ISPConfig:http://www.ispconfig.org/