Überblick über das cPanel-Bedienfeld
cPanel Das Steuerungsfeld dient zur Verwaltung separater Hosting-Konten auf dem Server. Endbenutzer/Kunden können:- Dateien für ihre Websites hochladen und verwalten
- DNS-Einträge für ihre Domains bearbeiten
- Addon-Domains und Subdomains hinzufügen/entfernen
- Installieren Sie das CMS mit dem Softaculous-Skriptinstallationsprogramm
- E-Mail-Konten erstellen
- E-Mail-Einstellungen und SPAM-Schutz verwalten
- Website-Statistiken prüfen
- Datenbanken und Backups verwalten, etc.
Wir haben cPanel 11.86 auf unseren Hosting-Servern installiert. Hier finden Sie die neueste Dokumentation, die alle seine Funktionen abdeckt.
Sie können eine cPanel-Strukturübersicht für das cPanel Basic Theme finden und für cPanel Retro Theme unten in dieser Anleitung.
Für cPanel Basic Theme:
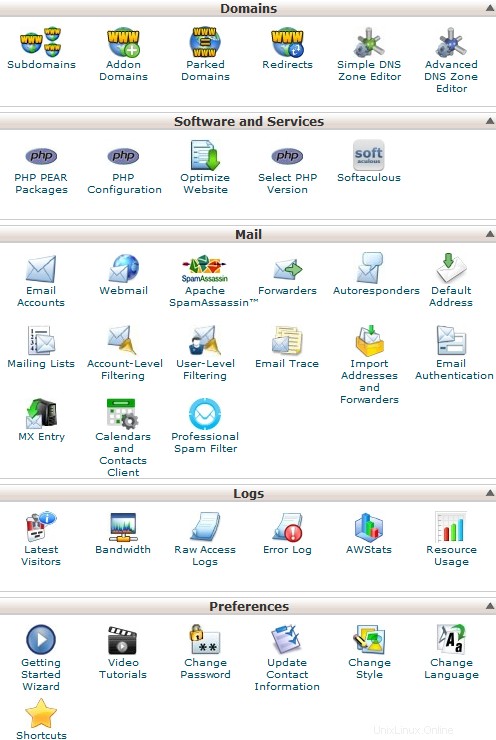
Grundsätzlich hat cPanel zwei vertikale Abschnitte mit unterschiedlichen Eigenschaften:
Linke Spalte die eine Reihe verschiedener Funktionen bietet, die bequem für bestimmte Gruppen strukturiert sind, basierend auf dem konkreten Aspekt des Webhosting-Dienstes und rechte Spalte die verschiedene Statistiken enthält Informationen zum Konto. Zusätzlich sehen Sie eine Kopfzeile über beiden Abschnitten:
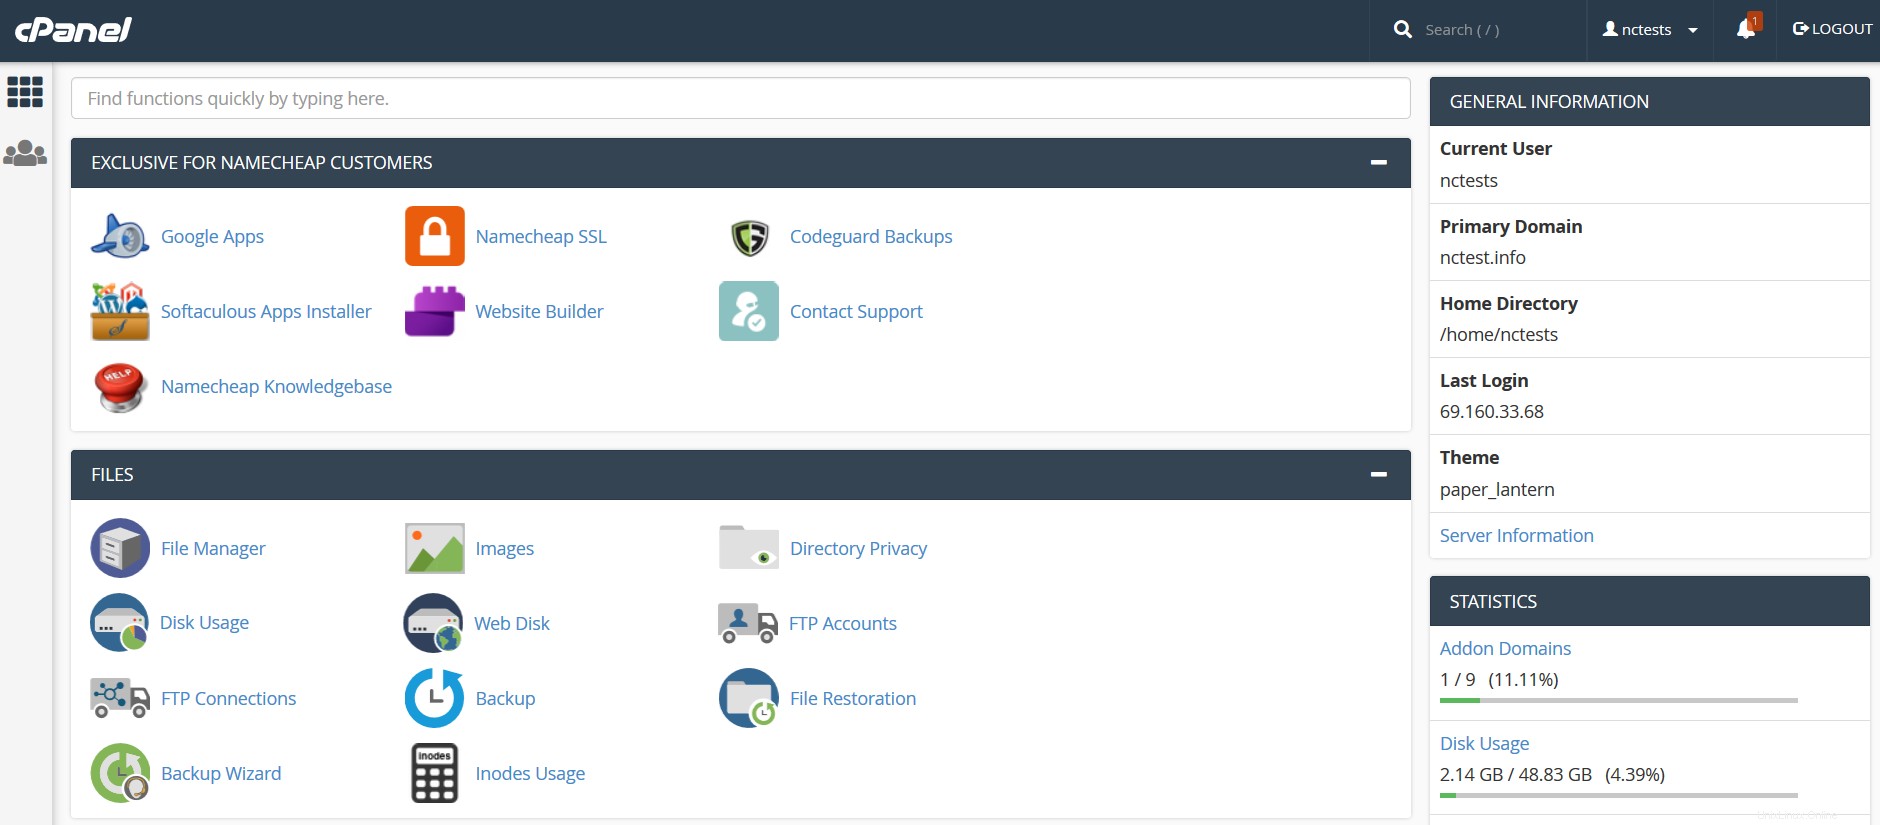
Kopfzeile und rechte Spalte:
- Suchen
- Benutzer
- Statistiken
Linke Spalte:
- Exklusiv für Namecheap-Kunden
- Dateien
- Datenbanken
- Domänen
- Metriken
- Sicherheit
- Software
- Erweitert
- Einstellungen
Kopfzeile und rechte Spalte:
Suche Nutzer Statistiken
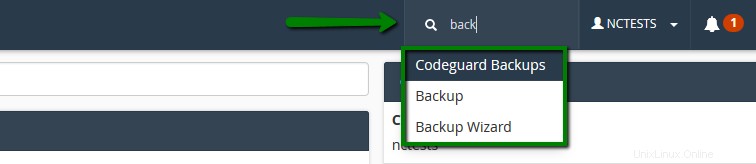
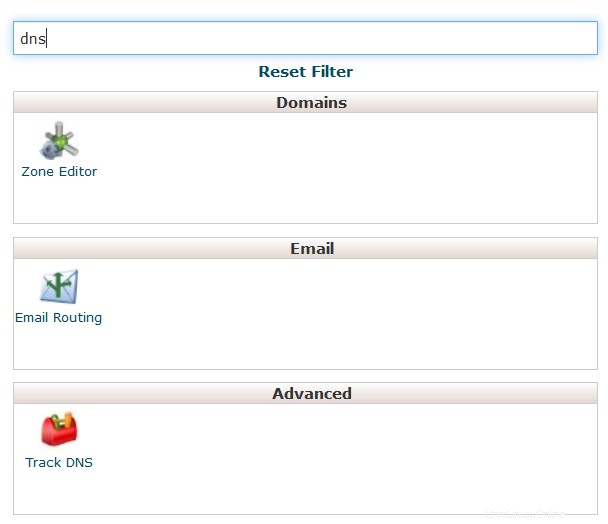
Suche: eine Suchleiste, mit der Sie cPanel-Funktionen am schnellsten finden können. Geben Sie einfach den Namen des benötigten Werkzeugs ein, um das entsprechende Menü zuzuweisen:
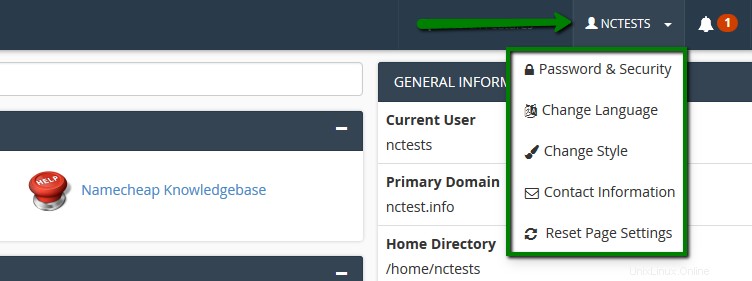
Benutzer: Dieses Menü bietet eine Reihe von Optionen in Bezug auf Ihren cPanel-Benutzer und Ihr Konto selbst – das Ändern Ihres cPanel-Passworts, Ihrer Kontaktinformationen, Ihres Stils und Ihrer Sprache sowie das Zurücksetzen der gesamten aktuellen Kontokonfiguration auf den Standardzustand:
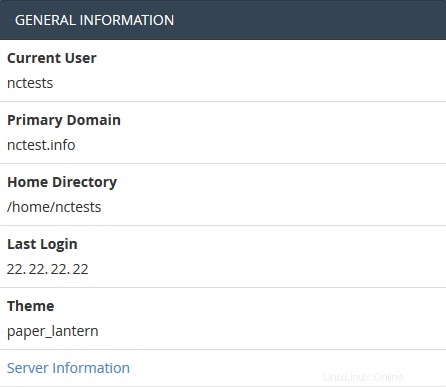
Statistiken: Hier finden Sie allgemeine Informationen zu Ihrem cPanel-Konto:
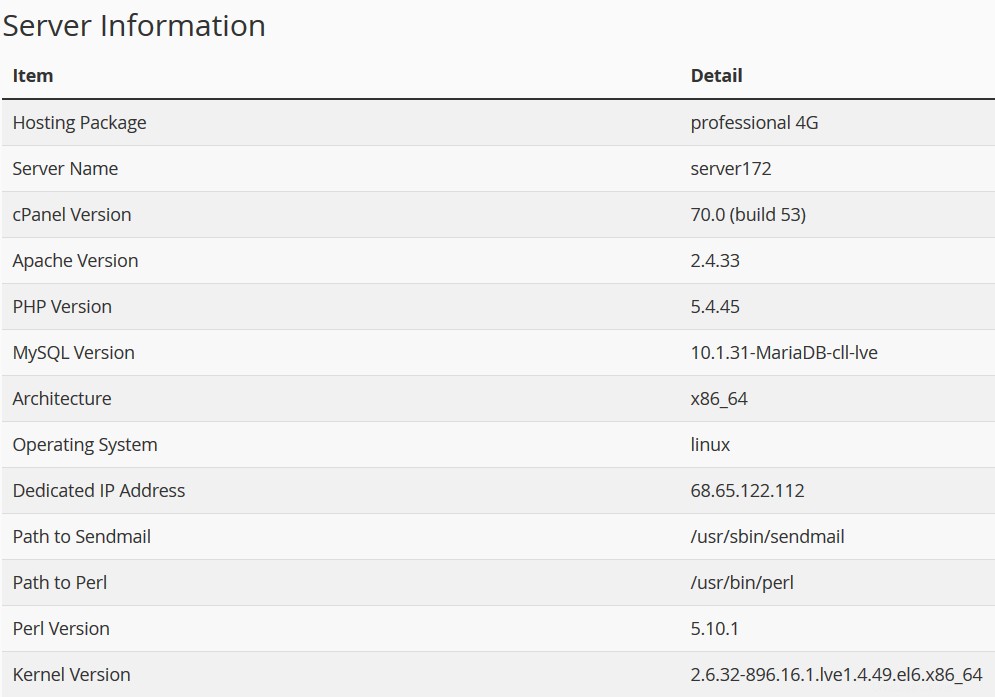
Serverinformationen Das Menü listet das Hosting-Kontopaket und zusätzliche serverseitige Details auf, wie die Ihrem cPanel-Konto zugewiesene IP-Adresse, auf dem Server installierte Software und den Status der Kerndienste:
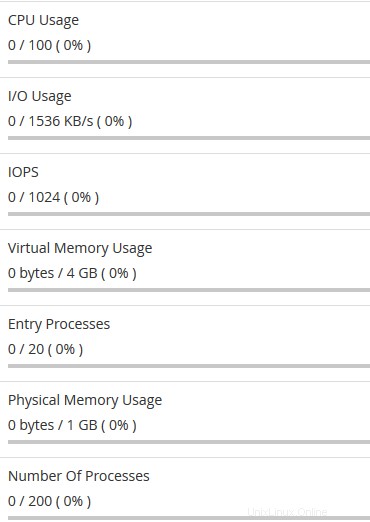
Statistiken Spalte sammelt cPanel-Dienste und Kontingente sowie die aktuelle Ressourcennutzung des Kontos:
Linke Spalte:
Exklusiv für Namecheap-Kunden
Dateien Datenbanken E-Mail Domains Metriken Sicherheit Software Erweiterte Einstellungen
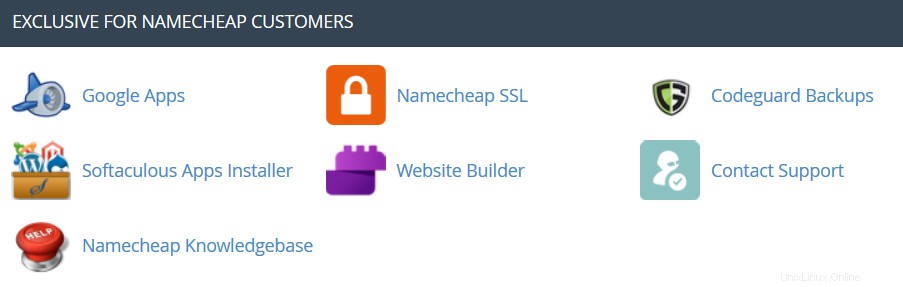
Exklusiv für Namecheap-Kunden
Automatische Sicherung: Es ist ein cPanel-Plug-in, mit dem Kunden mit Premium- und Business-Hosting sofort ein vollständiges cPanel-Backup abrufen können.
 Google Apps: Mit diesem Tool können Sie den Google Apps-Dienst für Ihre Domain mit nur wenigen Klicks konfigurieren. Weitere Informationen finden Sie in dieser Kategorie.
  Namecheap SSL: In diesem Menü können Sie das Namecheap SSL cPanel-Plugin verwenden. Weitere Informationen finden Sie in dieser Anleitung.
  CodeGuard-Sicherung: Dieses Tool wurde entwickelt, um den Backup-Prozess so einfach wie möglich zu gestalten. Das CodeGuard-System wird die Website ständig überwachen und Sie über alle Änderungen auf dem Laufenden halten, indem es vollautomatische Backups Ihrer Dateien durchführt, um mögliche Ausfallzeiten zu vermeiden. Weitere Informationen finden Sie in den folgenden Artikeln:
- So erstellen Sie Backups mit CodeGuard
- So sichern Sie eine WordPress-Site mit CodeGuard
 Softaculous Apps Installer: Mit dieser Funktion können Sie den Softaculous Script Installer verwenden, der die gängigsten CMS wie Wordpress/Joomla/Magento usw. enthält. Er ist viel schneller als andere Skript-Installer und installiert CMS mit wenigen Klicks. Die Softaculous-Anwendung wird mit jedem cPanel-Konto in allen unseren Shared-Hosting-Plänen bereitgestellt. Sie können verfügbare Skripte und deren Demos hier anzeigen. Diese Anleitungen können hilfreich sein, wenn Sie mit dem Softaculous-Installationsprogramm arbeiten:
- Wie man mit Skripten in Softaculous arbeitet
- So installieren Sie WordPress mit Softaculous
- So installieren Sie Joomla mit Softaculous
Node.js-App einrichten: ermöglicht die Auswahl einer bestimmten Version von Node.js, um die Apps mit Node.js auszuführen.
 Wählen Sie PHP-Version: Über dieses Menü können Sie die erforderliche PHP-Version auswählen sowie bestimmte PHP-Module und -Funktionen aktivieren/deaktivieren.
Python-App einrichten: Mit dieser Funktion können Sie Python-Anwendungen auf Ihrem cPanel bereitstellen, während Sie den Apache-Webserver ausführen.
Ruby-App einrichten: Mit dieser Funktion können Sie Ruby-Anwendungen auf Ihrem cPanel bereitstellen, während Sie den Apache-Webserver ausführen.
 Website-Builder :Mit diesem Tool können Sie ganz einfach eine ganze Website mit einem Drag-and-Drop-Editor erstellen, ohne Code zu kennen oder spezielle Software zu installieren.
  Support kontaktieren :Öffnet einen Live-Chat mit unserem Kundensupport-Team.
  Namecheap-Wissensdatenbank: Mit dieser Schaltfläche gelangen Sie zu unserem Abschnitt der Knowledgebase-Website.
 Shell verwalten: Mit diesem Plugin können Sie den SSH-Zugriff für Ihre jeweiligen Hosting-Konten mit nur wenigen Klicks aktivieren oder deaktivieren.
PHP-Optimierungen: ermöglicht die Verwaltung von PHP-Einstellungen auf unseren Business-Servern (Stellar Business und alte Business-SSD-Pläne).
Dateien
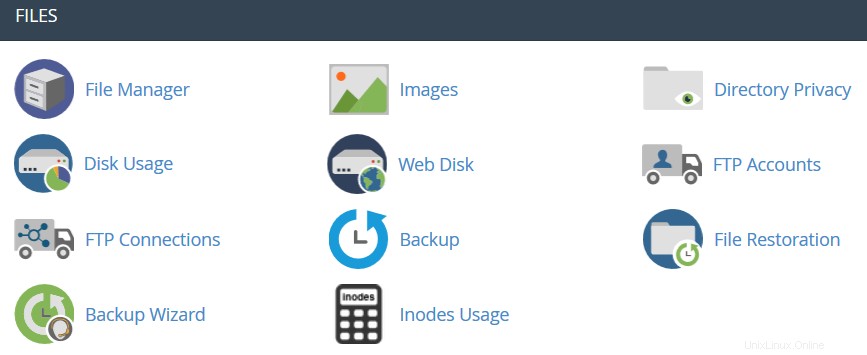
 Dateimanager: Hier können Sie die in Ihrem Konto gespeicherten Dateien verwalten. Diese Anleitungen können bei der Arbeit mit diesem Menü hilfreich sein:
- Verwendung des Dateimanagers in cPanel
- Wie lade ich meine Website hoch?
 Bilder: Mit diesem Tool können Sie Bilder in Ihrem Konto anzeigen und ändern.
  Verzeichnisdatenschutz: ermöglicht es Ihnen, eine Anforderung für einen Benutzernamen und ein Kennwort festzulegen, wenn Benutzer versuchen, über das Internet auf Ihre Website zuzugreifen. Es kann verwendet werden, wenn Sie den Zugriff auf einen bestimmten Teil Ihrer Website einschränken müssen. Weitere Einzelheiten finden Sie in diesem Leitfaden.
  Festplattennutzung: In diesem Menü können Sie detaillierte Informationen über die Speicherplatznutzung Ihres Kontos einsehen. Es zeigt die Gesamtdatenträgernutzung für die Verzeichnisse Ihres Kontos und alle seine Datenbanken an, nicht für einzelne Dateien oder Datenbanken. Weitere Details zur Optimierung der Speicherplatznutzung finden Sie in diesem Artikel.
 Web Disk: Diese Funktion ist eine cPanel-Implementierung des WebDav-Protokolls, mit der Sie die Dateien Ihrer Website so verwalten, hochladen und herunterladen können, als wären sie lokal auf Ihrem PC. Ausführlichere Anweisungen zum Einrichten von WebDisk finden Sie in diesen Artikeln:
- So richten Sie Web Disk unter Windows 7 ein
- So richten Sie Web Disk unter Windows 8 ein
 FTP-Konten: Mit dieser Option können Sie Ihre FTP-Konten erstellen und verwalten. Um ein FTP-Konto zu erstellen, lesen Sie bitte diesen Artikel. Anweisungen zur FTP-Verbindung finden Sie in diesen Anleitungen:
- So greifen Sie über FTP auf ein Konto zu
- So richten Sie FileZilla ein
- So richten Sie Cyberduck ein
- So richten Sie iWeb ein
- So richten Sie Adobe Muse ein
- Dreamweaver einrichten
- So richten Sie den CoreFTP-Client ein
- So richten Sie CuteFTP ein
 FTP-Verbindungen: Mit diesem Tool können Sie die Benutzer überwachen, die derzeit per FTP auf Ihrer Website angemeldet sind. Außerdem ist es möglich, eine FTP-Verbindung von hier aus zu beenden.
 Sicherung: Mit dieser Funktion können Sie eine gezippte Kopie Ihres gesamten Kontos oder bestimmter Teile davon herunterladen, z. B. Ihr Home-Verzeichnis, Datenbanken, E-Mail-Weiterleitungskonfiguration oder Ihre E-Mail-Filterkonfiguration. Weitere detaillierte Anleitungen zum Erstellen von Backups in cPanel finden Sie hier.
 Sicherungsassistent: eine benutzerfreundliche Oberfläche zum Erstellen eines Backups Ihrer gesamten Site, eines Teil-Backups oder zum Zulassen einer Site-Wiederherstellung aus dem letzten gespeicherten Backup. Beachten Sie, dass Wiederherstellen Die in diesem Menü bereitgestellte Option ist standardmäßig auf allen unseren gemeinsam genutzten Servern deaktiviert.
Git-Versionskontrolle: Mit dieser Funktion können Sie ganz einfach Git-Repositories auf Ihrem cPanel-Konto hosten.
 Inodes-Verwendung: stellt Statistiken über die Nutzung Ihrer Konto-Inodes (Dateien) bereit. Weitere Einzelheiten zu diesem Tool finden Sie hier.
 Datenbanken
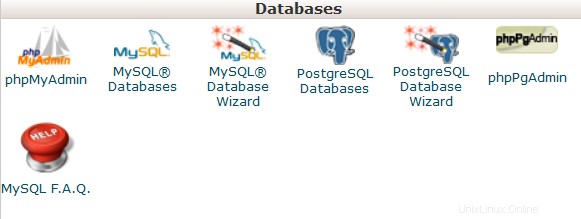
 phpMyAdmin: Es ist das Datenbankverwaltungstool, mit dem Sie verschiedene Änderungen an MySQL-Datenbanken in Ihrem Konto vornehmen können. Weitere Informationen zum Arbeiten mit Datenbanken über phpMyAdmin finden Sie in dieser Anleitung.
 MySQL-Datenbanken: In diesem Menü können Sie MySQL-Datenbanken im cPanel-Konto erstellen und verwalten. Weitere Einzelheiten finden Sie in diesem Leitfaden.
 MySQL-Datenbankassistent: bietet dieselbe Funktionalität wie MySQL-Datenbanken Menü, allerdings vereinfacht.
 PostgreSQL-Datenbanken: Mit dieser Option können Sie PostgreSQL-Datenbanken in cPanel erstellen und verwalten.
 PostgreSQL-Datenbankassistent: hat dieselbe Funktionalität wie PostgreSQL-Datenbanken Menü, sondern ermöglicht es, alle Änderungen auf einfachere Weise vorzunehmen.
 phpPgAdmin: Es ist das Datenbankverwaltungstool, mit dem Sie verschiedene Änderungen an PostgreSQL-Datenbanken in Ihrem Konto vornehmen können.MySQL F.A.Q.: Diese Schaltfläche bringt Sie zum entsprechenden Knowledgebase-Bereich, der MySQL-Fragen gewidmet ist.
 E-Mail-Konten: In diesem Menü können Sie Postfächer erstellen und verwalten, die mit den in Ihrem Konto gehosteten Domänennamen verknüpft sind. Um ein E-Mail-Konto zu erstellen, lesen Sie bitte diese Anleitung. Weitere Details zum Einrichten eines neu erstellten E-Mail-Kontos mit E-Mail-Clients finden Sie in der Artikelgruppe cPanel E-Mail:Client-Setup.
  Weiterleitungen: Das Einrichten der Weiterleitungsfunktion bietet Ihnen die Möglichkeit, eine Kopie aller E-Mails von einer E-Mail-Adresse an eine andere zu senden. Sie haben beispielsweise zwei verschiedene E-Mail-Konten und möchten nicht jedes Mal beide überprüfen, also könnten Sie E-Mails von test@yourdomain.com an test2@yourdomain2.com weiterleiten. Beachten Sie, dass die ursprüngliche Adresse weiterhin die weitergeleiteten E-Mails erhält.
 E-Mail-Routing: Hier können Sie das E-Mail-Routing für die in Ihrem cPanel-Konto gehosteten Domains festlegen. Weitere Einzelheiten finden Sie in dieser Anleitung.
 Autoresponder: Mit dieser Funktion können Sie automatisch Nachrichten als Antwort auf eingehende E-Mails senden, die auf einem bestimmten E-Mail-Konto empfangen wurden. Dies ist sehr nützlich, wenn Sie im Urlaub oder nicht verfügbar sind oder wenn Sie allgemeine Nachrichten senden möchten. Weitere Informationen finden Sie in diesem Leitfaden.
 Standardadresse: In diesem Menü können Sie eine E-Mail-Adresse verwalten, die von cPanel verwendet wird, um alle Nachrichten abzurufen, die an E-Mail-Konten gesendet werden, die in Ihrer Domain nicht existieren (auch bekannt als „Catch-All-Adresse“). Weitere Details finden Sie hier.
 Mailinglisten: Mit dieser Option können Sie eine einzelne Adresse erstellen, um E-Mails, Newsletter und andere Updates gleichzeitig an mehrere E-Mail-Adressen zu senden. Weitere Informationen finden Sie in diesem Artikel.
 Sendung verfolgen: Mit diesem Menü können Sie die E-Mail-Zustellung für Ihr Konto überwachen.
 Globale E-Mail-Filter: Mit dieser Funktion können Sie Filter für alle E-Mails konfigurieren, die bei Ihren gehosteten Domains ankommen.
 E-Mail-Filter: Mit dieser Option können Sie Filter für jedes E-Mail-Konto Ihrer Domain erstellen. Weitere Einzelheiten zu Filterwerkzeugen finden Sie in diesem Artikel.
 E-Mail-Zustellbarkeit: Dieses Tool hilft Ihnen, Spam zu verhindern. Durch das Einrichten von DKIM- und SPF-Einträgen für Ihr Konto statten Sie E-Mail-Nachrichten mit überprüfbaren Informationen aus, sodass Ihr Server die Art eingehender und ausgehender Nachrichten automatisch erkennen kann. Eine detaillierte Anleitung zur Verwendung dieser Funktion finden Sie hier.
 Adressimporteur: In diesem Menü können Sie zwei Dateitypen verwenden (.xls und .csv ) zum Importieren von Daten, um gleichzeitig mehrere E-Mail-Adressen oder E-Mail-Weiterleitungen für Ihr Konto zu erstellen.
 Spam-Filter: Es ist ein benutzerfreundliches E-Mail-Dienstprogramm, das eingehende E-Mails auf verschiedene Spam-Merkmale untersucht. Es verwendet verschiedene Netzwerktests und Spamfilter, um eine Gesamtpunktzahl zu erhalten, um zu entscheiden, ob die E-Mail als Spam betrachtet werden soll oder nicht. Das SpamAssassin-Tool wird standardmäßig mit allen unseren Shared- und Reseller-Hosting-Plänen bereitgestellt. Diese Artikel können hilfreich für die Einrichtung der SpamAssasin-Funktion sein:
- SpamAssassin-FAQ
- So konfigurieren Sie SpamAssassin in cPanel
 Verschlüsselung: Mit dieser Option können Sie GnuPG einrichten, ein öffentlich verfügbares Verschlüsselungsschema, das den Public-Key-Ansatz verwendet. Dieses System verwendet einen öffentlichen Schlüssel, um Nachrichten zu verschlüsseln, und Sie können sie mit dem privaten Schlüssel entschlüsseln, den der beabsichtigte Empfänger der Nachricht behält.
  BoxTrapper: Dieses Tool kann Ihren Posteingang vor Spam schützen, indem alle E-Mail-Absender, die nicht auf Ihrer Whitelist stehen, aufgefordert werden, auf eine Bestätigungs-E-Mail zu antworten, bevor Sie ihre E-Mails erhalten können.
  Kalender und Kontakte: Dieses Menü hilft Ihnen, Ihren Client so zu konfigurieren, dass er sich mit CalDAV für Kalender und CardDAV für Kontakte verbindet, um auf diese auf Ihren persönlichen Geräten zuzugreifen. Die detaillierte Anleitung finden Sie in dieser Anleitung.
 Festplattennutzung per E-Mail: Mit diesem Dienstprogramm können Sie Speicherplatz freigeben, indem Sie alte Nachrichten aus Ihrer Mailbox löschen.
  Professioneller Spam-Filter: In diesem Menü können Sie SpamExperts konfigurieren, eine benutzerfreundliche E-Mail-Filterlösung, mit der Sie Ihr Konto vor ein- und ausgehendem Spam schützen können. Weitere Informationen zu dieser Funktion finden Sie in diesem Artikel. E-Mail-FAQ: Diese Schaltfläche führt Sie zum entsprechenden Knowledgebase-Bereich, der E-Mail-Fragen gewidmet ist. E-Mail-Client-Setup: Diese Schaltfläche führt Sie zum entsprechenden Knowledgebase-Abschnitt, der der Einrichtung von E-Mail-Konten mit verschiedenen E-Mail-Clients und -Geräten gewidmet ist.
Domains

 Site Publisher :Sie können diese Schnittstelle verwenden, um schnell eine Website aus einer Reihe verfügbarer Vorlagen zu erstellen. Auf diese Weise können Besucher einige grundlegende Informationen sehen, während Sie Ihre Website weiterentwickeln.
 Domänen: Diese Schnittstelle ermöglicht das Erstellen und Verwalten mehrerer Domains über eine einzige cPanel-Schnittstelle.
 Addon-Domains: Mit Hilfe dieses Menüs können Sie dem Hosting-Account weitere Domains hinzufügen. Addon-Domains haben dieselbe Funktionalität wie die Ihrem Hosting-Account zugewiesene Hauptdomain. Weitere Einzelheiten zum Hinzufügen von Domains zu cPanel finden Sie hier.
  Subdomains: In diesem Menü können Sie Subdomains erstellen und diese auf verschiedene Bereiche Ihrer Website oder andere IPs verweisen. Detaillierte Anweisungen zu diesem Menü finden Sie in diesem Artikel.
 Aliasse: Mit dieser Funktion können Sie zusätzliche Domainnamen für Ihr bestehendes Hosting-Konto „parken“. Sie zeigen dieselbe Website wie Ihre primäre Domain an und teilen auch Webstatistiken. Sie können sich auf diese Anleitung beziehen, wenn Sie eine neue geparkte Domain einrichten.
 Weiterleitungen: Hier können Sie eine Weiterleitung für eine bestimmte Domain/Seite zu einer anderen Domain/Seite erstellen und deren Inhalt anzeigen. Weitere Details finden Sie hier.
 Zoneneditor: ermöglicht es Ihnen, die DNS-Zone der Domain(s) in Ihrem cPanel-Konto zu bearbeiten. Folgende Einträge können hinzugefügt werden:A, AAAA, CNAME, SRV, TXT, MX. Lesen Sie diesen Artikel, um weitere Informationen zum Einrichten von DNS-Einträgen in cPanel zu erhalten. Domains F.A.Q.: Über diese Schaltfläche gelangen Sie zum entsprechenden Knowledgebase-Bereich, der Fragen zur Domänenverwaltung gewidmet ist.
Metriken
 Besucher: das Zugriffsprotokoll Ihres Kontos in einer Tabellenansicht.
 Fehler: Hier können Sie das Fehlerprotokoll für Ihr Konto überprüfen, das die letzten 300 Inhaltszeilen im Zusammenhang mit Fehlern anzeigt, die von einer in Ihrem Konto gehosteten Website generiert wurden.
 Bandbreite: liefert Ihnen detaillierte Informationen über die von Ihrem Konto verwendete Bandbreite.
 Raw-Zugriff: das RAW-Zugriffsprotokoll für Ihr Konto.
 Awstats: Dieses Tool bietet Ihnen die Möglichkeit, die Zugriffsindizes Ihres Kontos zu überwachen – Benutzer, Robots, aufgerufene Seiten und vieles mehr. Eine genauere Erklärung finden Sie in diesem Artikel.
 Nutzung von CPU und gleichzeitiger Verbindung: zeigt Informationen zu den von Ihrem Konto verbrauchten Ressourcen an. In diesem Leitfaden finden Sie einige zusätzliche Informationen zur Ressourcennutzung.
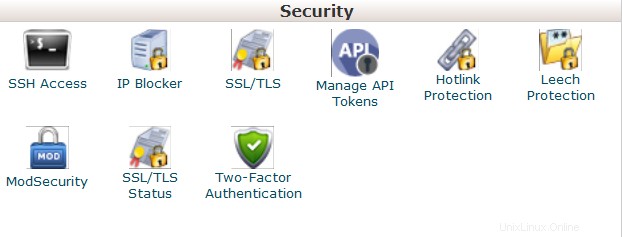
Sicherheit
 SSH-Zugriff: Hier können Sie einen Zugangsschlüssel für Ihr Konto generieren, um sich mit SSH-Schlüsseln zu verbinden. Weitere Details zum Einrichten von SSH-Schlüsseln finden Sie in diesem Artikel.
  IP-Blocker: Mit Hilfe dieses Tools können Sie eine Reihe von IP-Adressen blockieren, um zu verhindern, dass sie auf Ihre Website zugreifen. Lesen Sie dazu gerne diesen Leitfaden.
 SSL/TLS: Dieses Tool hilft Ihnen bei der Installation und Verwaltung Ihrer SSL-Zertifikate. Eine ausführlichere Anleitung finden Sie hier.
 Hotlink-Schutz: In diesem Menü können Sie den Hotlink-Schutz für Ihre Website aktivieren (um zu verhindern, dass jemand Ihre Bilder direkt mit einer anderen Website verlinkt und dadurch die Bandbreite Ihres Hosting-Kontos verbraucht). Weitere Informationen finden Sie in dieser Anleitung.
 Blutegelschutz: können Sie steuern, ob Benutzer ihre Passwörter für eingeschränkte Bereiche Ihrer Website weitergeben oder öffentlich veröffentlichen können. Es kann verwendet werden, um kompromittierte Konten auf die URL Ihrer Wahl umzuleiten oder sie zu sperren.
 ModSecurity: In diesem Menü können Sie ModSecurity für Ihre Domains und Subdomains deaktivieren oder aktivieren.
  SSL/TLS-Status: Verwenden Sie diese Schnittstelle, um den SSL-Status Ihrer Domains anzuzeigen.
 Zwei-Faktor-Authentifizierung: Mit diesem Tool können Sie 2FA aktivieren, eine verbesserte Sicherheitsmaßnahme, die zwei Formen der Identifizierung erfordert:Ihr Passwort und einen generierten Sicherheitscode. Wenn 2FA aktiviert ist, liefert eine App auf Ihrem Smartphone einen Code, den Sie zusammen mit Ihrem Passwort eingeben müssen, um sich anzumelden. Hier erfahren Sie mehr über die Aktivierung von 2FA.
Software
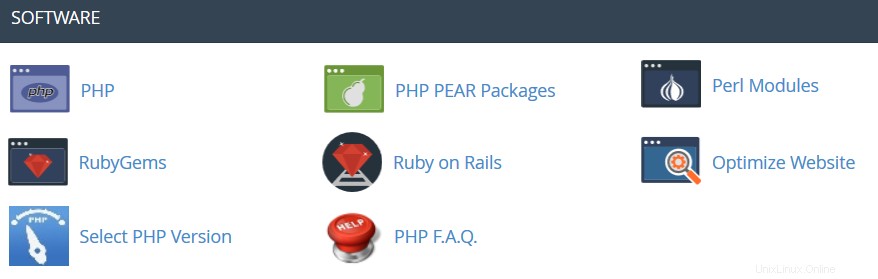
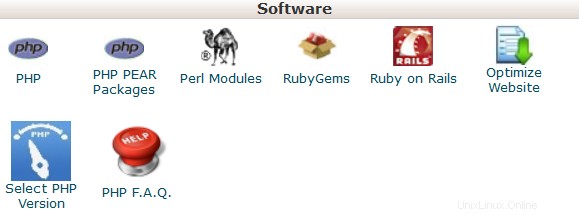
 PHP PEAR-Pakete: Diese Option ermöglicht Ihnen die Installation und Wartung von PHP PEAR-Paketen für Ihr Hosting-Konto.
 Perl-Module: Hier können Sie die für Ihr Konto verfügbaren Perl-Module verwalten. Ein Perl-Modul ist eine eigenständige Softwarekomponente für die Programmiersprache Perl. Perl wird auf allen unseren Shared/Reseller-Servern unterstützt. In diesem Artikel erfahren Sie mehr über diese Funktion.
 RubyGems: In diesem Menü finden Sie die Funktionen, mit denen Sie Aufgaben in Ruby ausführen können. Es muss ein Gem installiert werden, bevor Sie es in einem Ruby-Programm verwenden können.
 Ruby on Rails: Mit diesem Menü können Sie Funktionen von Ruby on Rails verwenden. Ruby on Rails ist ein kostenloses Webanwendungs-Framework für die Programmiersprache Ruby. Es wird oft als „Rails“ oder „RoR“ bezeichnet. Wir unterstützen RoR mit unserem Stellar Plus, Stellar Business und Wiederverkäufer Pakete (undalte Professional , Ultimativ , Business-SSD, Reseller Pakete). Weitere Informationen finden Sie in diesem Leitfaden.
 Website optimieren: Mit dieser Funktion können Sie die Komprimierung Ihrer Website aktivieren/deaktivieren und konfigurieren, indem Sie die Art und Weise optimieren, wie Apache Anfragen verarbeitet, wodurch die Leistung Ihrer Website gesteigert werden kann.
 Node.js-App einrichten: ermöglicht die Auswahl einer bestimmten Version von Node.js, um die Apps mit Node.js auszuführen.
PHP-Version auswählen: Hier können Sie die auf Ihr cPanel-Konto angewendete PHP-Version ändern. Weitere Informationen finden Sie in diesem Artikel. Python-App einrichten: Mit dieser Funktion können Sie Python-Anwendungen auf Ihrem cPanel bereitstellen, während Sie den Apache-Webserver ausführen.
Ruby-App einrichten: Mit dieser Funktion können Sie Ruby-Anwendungen auf Ihrem cPanel bereitstellen, während Sie den Apache-Webserver ausführen.
PHP F.A.Q.: Über diese Schaltfläche gelangen Sie zum Abschnitt unserer Knowledgebase-Website, der Fragen zu PHP gewidmet ist.Erweitert
Terminal: Diese Schnittstelle ermöglicht Ihnen den Zugriff auf eine In-Browser-Terminalanwendung für direkten Befehlszeilenzugriff innerhalb einer cPanel-Sitzung.
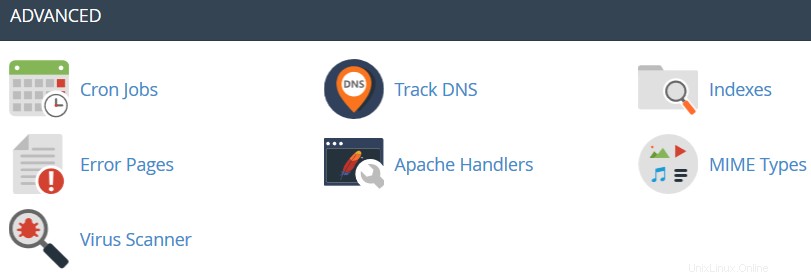
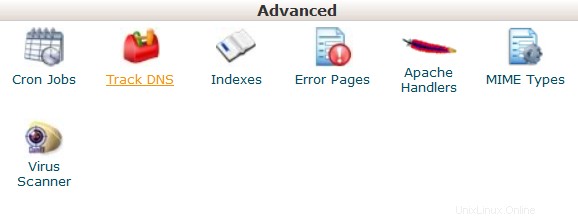
 Cron-Jobs: Hier können Sie Skripts einrichten, die nach Zeitplan ausgeführt werden. Weitere Einzelheiten zum Einrichten von CronJobs finden Sie in dieser Anleitung. DNS verfolgen: Mit diesem Tool können Sie DNS-Informationen zu jeder Domain überprüfen oder die Route vom Server, auf dem sich Ihre Website befindet, zu dem Computer verfolgen, von dem aus Sie auf cPanel zugreifen.
 Indizes: In diesem Menü können Sie anpassen, wie Besucher ein Verzeichnis im Web anzeigen können.
 Fehlerseiten: Mit dieser Funktion können Sie den Code für die Standardfehlerseiten bearbeiten, die Ihre Website anzeigen kann.
 Apache-Handler: Hier können Sie verschiedene Apache-Handler für den Umgang mit bestimmten Dateiformaten konfigurieren.
 MIME-Typen: bietet Ihnen Informationen über die vom System vordefinierten MIME-Typen und die Möglichkeit, selbst einen MIME-Typ hinzuzufügen.
 Virenscanner: Mit diesem Tool können Sie Ihr Konto mit dem ClamAV-Virenscanner auf Viren scannen. ClamAV ist eine Open Source (GPL) Antiviren-Engine, die in einer Vielzahl von Situationen verwendet wird, einschließlich E-Mail-Scannen, Web-Scannen und Endpunktsicherheit. Es bietet eine Reihe von Dienstprogrammen, darunter einen flexiblen und skalierbaren Multithread-Daemon, einen Befehlszeilenscanner und ein fortschrittliches Tool für automatische Datenbankaktualisierungen.
 Einstellungen
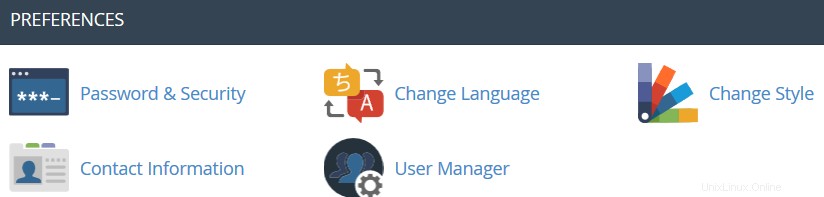
 Passwort und Sicherheit: In diesem Menü können Sie Ihr cPanel-Hauptpasswort ändern, wenn Sie das ursprüngliche kennen. Andernfalls können Sie das Passwort gemäß den Schritten in dieser Anleitung zurücksetzen.
 Change Language: this feature provides you with an opportunity to change your cPanel interface language.
 Change style: here you can change the overall look and feel of the interface by selecting one of the several preinstalled styles.
 Contact Information: in this menu you can specify an email address that will receive system email notifications.
  User Manager: allows you to manage your Subaccounts. Subaccounts use the same login and password information for email, FTP, and Web Disk.
For cPanel Retro Theme:
Basically cPanel has two vertical sections with different features:
Left column which includes different Stats information about the account, the possibility to switch cPanel theme, the search bar and frequently accessed menus and Right column which provides a number of various features that are conveniently structured to specific groups based on the concrete aspect of the web hosting service.
Below you can find a list of each menu for your convenience:
Left Column:
- Find
- Stats
- Preferences
- Domains
- Files
- Metrics
- Security
- Databases
- Software
- Advanced
- Exclusive for Namecheap Customers
Left Column
In this column you will find following options:
Find: it is a search bar that allows to find cPanel features in the quickest way. Just start entering the name of the needed tool to allocate the corresponding menu:
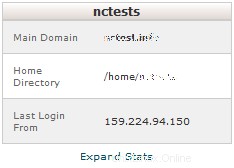
Stats: here you will find all the information related to the statistics of your hosting account. At the bottom of this section you will find Expand Stats button, which allows you to review the full statistics:
If you see the expanded stats menu, you will find Collapse Stats button at the bottom of this section in order to switch to the short menu version:
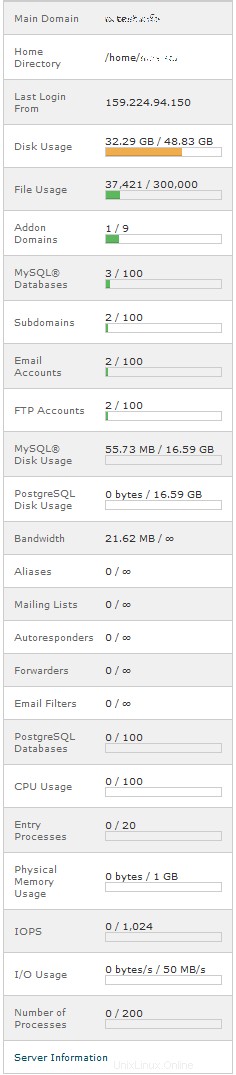
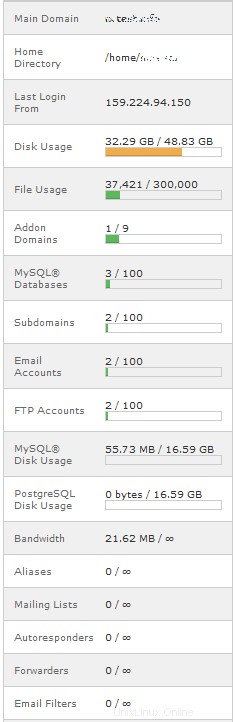
Here is an overview of all indexes:
- Main Domain: the primary domain name associated with your hosting account.
- Home Directory: the path the home directory of your account on the server where your websites' folders and files reside.
- Last Login: the last IP address your cPanel has been accessed from.
- Disk Usage: the amount of server disk space provided with your cPanel account. This index displays disk space used by your websites' content, databases, emails, etc.
- File Usage: the current number of files (inodes) and your cPanel account's inode limit.
- Addon Domains: the current number of already added addon domains and the total number allowed for your cPanel account.
- MySQL Databases: the current number of MySQL or MariaDB databases created your cPanel account.
- Subdomains: the current number of already created subdomains and the total number allowed for your cPanel account.
- Email Accounts: the current number of already created email accounts and the total number of email accounts allowed for your cPanel account.
- FTP Accounts: the current number of already created FTP accounts and the total number allowed for your cPanel account.
- MySQL Disk Usage: the amount of disk space used by your MySQL or MariaDB databases.
- PostgreSQL Disk Usage: the amount of disk space used by your PostgreSQL databases.
- Bandwidth: the current amount of data transferred to and from your cPanel account for the month and the total amount of your cPanel account's monthly bandwidth limit.
- Aliases: the current number of already created alias domains and the total number allowed for your cPanel account.
- Mailing Lists: the current number of already created mailing lists and the total number allowed for your cPanel account.
- Autoresponders: the current number of created email autoresponders and the maximum number allowed.
- Forwarders: the amount of email forwarders created and the maximum number allowed.
- Email filters: the number of email filters created vs. the maximum number allowed.
- PostgreSQL Databases: the current number of PostgreSQL databases created in your cPanel account.
- CPU Usage: this value specifies how much of the allocated CPU resources you are currently using. The amount of CPU resources we provide to each account is the percentage of the server’s resources.
- Entry Processes: this is the number of processes that enter your account. For example, every PHP page that is accessed by a user will usually generate a single entry process.
- Physical Memory Usage: the actual memory allocated for your account. Virtual memory is usually a file on a disk drive that the operating system uses to store information (swap-to-from) when the real memory becomes full, for instance the page (swap) file on a Linux system. Therefore, if you try to publish a big post, it might take all physical memory to do so, but after some time it will be normalized.
- I/O Usage: this index represents how much I/O (or disk activity) your account is using. Any task which makes use of the servers disk drive (such as reading or writing to the server) will consume I/O. More details about resource limits can be found here.
- Number of Processes: this limit is similar to the above but includes all the processes generated by the account rather than the specific PHP, SSH or cron jobs.
Right Column
Preferences
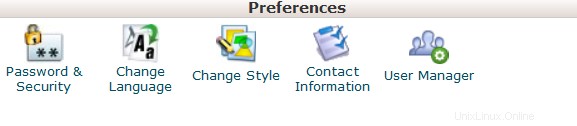
This group of features provides you with the general information on cPanel management and allows you to make basic changes to your cPanel account.
 Password &Security: this menu allows you to change your cPanel main password if know the original one. Otherwise, you can reset the password following the steps in this guide.
  Change Language: this feature provides you with an opportunity to change your cPanel interface language.
  Change style: here you can change the overall look and feel of the interface by selecting one of the several preinstalled styles.
 Contact Information: in this menu you can specify an email address that will receive system email notifications.
  User Manager: allows you to manage your Subaccounts. Subaccounts use the same login and password information for email, FTP, and Web Disk.
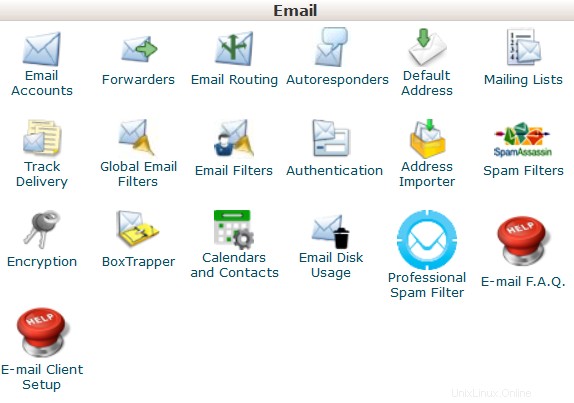
This group of features allows you to create email accounts for your domain names and manage email settings.
 Email Accounts: in this menu you can create and manage mailboxes associated with the domain names hosted in your account.In order to create an email account, feel free to check this guidance.More details about setting up a newly created email account with email clients can be found in the set of articles cPanel Email:Client Setup.
  Forwarders: setting up Forwarders feature provides you with an opportunity to send a copy of all emails from one email address to another. For example, you have two different email accounts and you don’t want to check both of them every time, so you could forward emails from test@yourdomain.com to test2@yourdomain2.com. Note, that the original address will still receive the forwarded emails.
  Email Routing: here you can set email routing for the domains hosted in your cPanel account, more details can be found in this guide.
  Autoresponders: this feature allows you to automatically send messages in reply to incoming emails received on a specific email account. This is pretty useful when you are on holidays or unavailable, or if you have any generic messages to send. You will find more information in this guide.
 Default Address: in this menu you can manage an email address, which is used by cPanel to fetch any message sent to email accounts which do not exist at your domain (also known as 'catch-all address'). More details can be found here.
  Mailing Lists: with this option you can create a single address to send emails, newsletters and other updates to multiple email addresses simultaneously. Feel free to refer to this article to get more information.
  Track Delivery: this menu allows you to monitor emails delivery for your account.
 Global Email Filters: this feature allows you to configure filters of all the emails arriving to your hosted domains.
  Email Filters: with this option you can create filters for each email account for your domain. You can find more details about filtering tools in this article.
  Email Deliverability : this tool will help you to prevent spam. Setting up DKIM and SPF records for your account equip email messages with verifiable information so that your server can automatically detect the nature of incoming and outgoing messages.The detailed guidance about using this feature can be found here.
 Address Importer: this menu allows you to use two types of files (.xls and .csv ) for importing data in order to simultaneously create multiple email address or email forwarders for your account.
  Spam Filters: it is a user-friendly email utility which examines incoming mail for different spam characteristics. It uses various network tests and spam filtering to get an overall score in order to decide whether the mail should be considered as spam or not.SpamAssassin tool is provided by default with all our shared and reseller hosting plans.These articles can be found useful for setting up SpamAssasin feature:
- SpamAssassin FAQs
- How to configure SpamAssassin in cPanel
 Encryption :this option allows you to set up GnuPG, which is a publicly-available encryption scheme that uses the public key approach. This system uses a public key to encrypt messages and you can decrypt them with the private key, which the intended recipient of the message retains.
 BoxTrapper :this tool can protect your Inbox from spam by requiring all email senders not on your Whitelist reply to a verification email before you can receive their mail.
 Calendars and Contacts: this menu helps to configure your client to connect to CalDAV for calendars and CardDAV for contacts in order to access them on your personal devices. The detailed instructions can be found in this guidance.
  Email Disk Usage :this utility allows you to recover disk space by deleting old messages from your mailbox.
 Professional Spam Filter: this menu allows you to configure SpamExperts, a user-friendly email filtering solution that allows to protect your account from both incoming and outgoing spam. More information about this feature is provided in this article. E-mail F.A.Q. :this button will take you to the corresponding Knowledgebase section dedicated to email questions. E-mail Client Setup :this button will take you to the corresponding Knowledgebase section dedicated to email account setup with different email clients and devices.
Domains
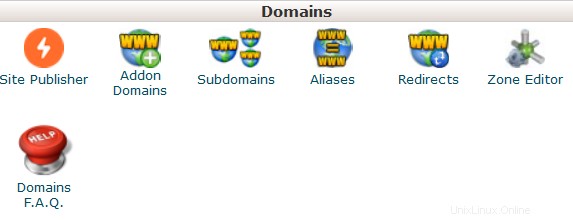
 Site Publisher :you can use this interface to quickly create a website from a set of available templates. This allows visitors to see some basic information while you continue to develop your website.
 Domains: this interface allows creating and managing multiple domains from a single cPanel interface.
 Addon Domains: with the help of this menu you can add more domains to the hosting account. Addon domains have the same functionality as the main domain assigned to your hosting account. More details about adding domains to cPanel are provided here.
 Subdomains: in this menu you can create subdomains and point them to different sections of your website or other IPs. Detailed instructions about this menu can be found in this article. Aliases: this feature allows you to 'park' additional domain names to your existing hosting account. They display the same website as your primary domain and share web statistics as well. You can refer to this guide when setting up a new parked domain.
  Redirects: here you can create a redirect for a specific domain/page to another domain/page and display the contents of the latter. More details can be found here.
 Zone Editor: allows you to edit the DNS zone of the domain(s) in your cPanel account. The following records can be added:A record, AAAA record, CNAME record, SRV record, TXT record. Feel free to check this article to get more information about setting up DNS records in cPanel. Domains F.A.Q .:this button will take you to the corresponding Knowledgebase section dedicated to domains' management questions.
Files
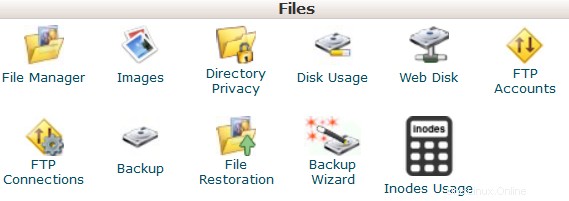
 File Manager: here you can manage the files stored in your account. These guides can be found helpful while working with this menu:
- How to use File Manager in cPanel
- How do I upload my site?
 Images :this tool allows you to view and modify images in your account.
 Directory Privacy :allows you to set a requirement for a username and password when users attempt to access your site from the web. It can be used when you need to limit access to a certain part of your site. You can get more details in this guide.
 Disk Usage: in this menu you will be able to check a detailed information about the disk space usage of your account. It shows disk usage totals for your account’s directories and all of its databases, not for individual files or databases. More details about Disk Space usage optimization are provided in this article.
  Web Disk: this feature is a cPanel implementation of the WebDav protocol, which allows you to manage, upload, and download your website’s files as though they were local to your personal computer. More detailed instructions about setting up WebDisk can be found in these articles:
- How to set up Web Disk on Windows 7
- How to set up Web Disk on Windows 8
 FTP Accounts: this option allows you to create and manage your FTP accounts. In order to create an FTP account, feel free to check this article. For FTP connection instructions, refer to this set of guides:
- How to access an account via FTP
- How to set up FileZilla
- How to set up Cyberduck
- How to set up iWeb
- How to set up Adobe Muse
- How to set up Dreamweaver
- How to set up CoreFTP Client
- How to set up CuteFTP
 FTP Connections: using this tool you can monitor the users who are currently logged into your site via FTP. Also, it’s possible to terminate an FTP connection from here.
 Backup: this feature allows you to download a zipped copy of your entire account or specific parts of it, such as your home directory, databases, email forwarder configuration, or your email filters configuration. More details guidance about how to make backups in cPanel can be found here.
  Backup Wizard: a user-friendly interface for creating a backup of your entire site, a partial backup, or allowing a site restoration from the last backup saved. Note, that Restore option provided in this menu is disabled by default on all our shared servers.
 Git Version Control: this feature allows you to easily host Git repositories on your cPanel account.
 Inodes Usage: provides the statistics of your account inodes (files) usage.You will find more details about this tool here.
Metrics

 Visitors: the access log of your account provided in a table view.
  Errors: here you can check the error log for your account, showing the latest 300 lines of content related to the errors generated by any website hosted in your account.
 Bandwidth: provides you with the detailed information the bandwidth used by your account.
  Raw Access: the RAW access log for your account Awstats: this tool provides you with an opportunity to monitor the access indexes on your account – users, robots, accessed pages and many, many more. You will find a more detailed explanation in this article.
  CPU and Concurrent Connection Usage: shows information on the resources consumed by your account.
Security
 SSH Access: here you can generate an access key for your account in order to connect using SSH keys. More details about setting up SSH keys can be found in this article.
  IP Blocker :with the help of this tool you can block a range of IP addresses to prevent them from accessing your site. Feel free to refer to this guide on the matter.
 SSL/TLS: this tool will help you to install and manage your SSL Certificates. You will find a more detailed guide here.
  Hotlink Protection: in this menu you can enable hotlink protection for your website (that is to prevent someone from direct linking of your images to another website and, as a result, consuming your hosting account bandwidth). Feel free to check this guidance for additional information.
  Leech Protection: allows you to control whether users can give out or publicly post their passwords for restricted areas of your site. It can be used to redirect compromised accounts to the URL of your choice, or suspend them.
  ModSecurity: in this menu you can disable or enable ModSecurity for your domains and subdomains.
 SSL/TLS Status :use this interface to view the SSL status of your domains.
 Two-Factor Authentication: this tool lets you enable 2FA, an improved security measure that requires two forms of identification:your password and a generated security code. When 2FA is enabled, an app on your smartphone supplies a code you must enter with your password to log in. You can learn more about enabling 2FA here.
Databases
 phpMyAdmin: the database management tool, which allows you to make different changes to MySQL databases in your account. You can find more information about how to work with databases via phpMyAdmin this guide.
  MySQL Databases: in this menu you can create and manage MySQL databases in cPanel account.
  MySQL Databases Wizard: provides the same functionality as MySQL Databases menu, in a simplified way though. More details about how to use both menus can be found here.
 PostgreSQL Databases: this option allows you to create and manage PostgreSQL databases in cPanel.
  PostgreSQL Databases Wizard: has the same functionality as PostgreSQL Databases menu, but allows to make all the changes in a simpler way.
  phpPgAdmin: the database management tool, which allows you to make different changes to PostgreSQL databases in your account. MySQL F.A.Q.: this button will take you to the corresponding Knowledgebase section dedicated to MySQL questions.
 Software and Services
 PHP PEAR Packages: this options allows you to install and maintain PHP PEAR packages for your hosting account.
  Perl Modules: here you can manage Perl modules available for your account. A Perl module is a discrete component of software for the Perl programming language. Perl is supported on all of our shared/reseller servers.This article will provide you with more details about this feature.
 RubyGems: in this menu you will find the set of functions that allow you to perform tasks in Ruby. It’s needed to install a Gem before you can use it inside a Ruby program.
 Ruby on Rails: with this menu you can use Ruby on Rails features. Ruby on Rails is a free web application framework for the Ruby programming language. It is often referred to as 'Rails' or 'RoR'. We support RoR with our Stellar Plus, Stellar Business and Reseller packages (and old Professional , Ultimate , Business SSD, Reseller packages). The following versions are working on our servers:Ruby – 1.8.7, Rails – 2.3.18. More information can be found in this guide.
  Optimize Website: this feature allows you to enable/disable and configure the compression of your website by tweaking the way Apache handles requests, which can increase the performance of your website.
 Setup Node.js App: allows for the choosing a specific version of Node.js in order to run the apps using Node.js.
Select PHP Version: here you can change PHP version applied to your cPanel account. You can find more information in this article. Setup Python App: this feature allows you to deploy Python applications on your cPanel while running the Apache web server.
Setup Ruby App: this feature allows you to deploy Ruby applications on your cPanel while running Apache web server.
PHP F.A.Q.: this button will take you to our Knowledgebase site section dedicated to PHP-related questions.Advanced
Terminal: this interface allows you to access an in-browser terminal application for direct command-line access within a cPanel session.
 Cron Jobs: here you can set up scripts running on a scheduled basis. For more details about setting up CronJobs refer to this guidance.
  Track DNS :using this tool you can check DNS information about any domain, or to trace the route from the server your site is on to the computer you are accessing cPanel from.
 Indexes: in this menu you can customize the way in which visitors can view a directory on the web.
  Error Pages: this feature allows you to edit the code for the default errors pages your website can display.
 Apache Handlers: here you can configure different Apache handlers for dealing with certain file formats.
 MIME Types: provides you with the information about the system predefined MIME types and the option to add a MIME Type on your own.
 Virus Scanner: this tool will allow you to scan your account for viruses with ClamAV virus scanner. ClamAV is an open source (GPL) anti-virus engine used in a variety of situations including email scanning, web scanning, and endpoint security. It provides a number of utilities including a flexible and scalable multi-threaded daemon, a command line scanner and an advanced tool for automatic database updates.
 Exclusive for Namecheap Customers
AutoBackup: it is a cPanel plugin that allows customers with Premium and Business Hosting to retrieve a full cPanel backup right away.
Google Apps: with this tool you will be able to configure Google Apps service for your domain in just a few clicks.Feel free to check this category for more information. Namecheap SSL: this menu allows you to use Namecheap SSL cPanel plugin, check this guide for more details. CodeGuard Backup: this tool was designed to make the backup process as easy as possible. CodeGuard system will constantly monitor the website and keep you informed of any changes, performing full automatic backups of your files to avoid any possible downtime.More information is provided in the following articles:- How to make backups using CodeGuard
- How to back up a WordPress site using CodeGuard
Softaculous Apps Installer: this feature allows you to use Softaculous Script Installer, which includes most popular CMS, such as Wordpress/Joomla/Magento etc. It is much faster than other script installers and it installs CMSes in a few clicks. Softaculous application is provided with any cPanel account on all of our shared hosting plans. You can view available scripts and their demo here.You may find these guides useful when working with Softaculous installer:- How to work with scripts in Softaculous
- How to install WordPress using Softaculous
- How to install Joomla with Softaculous
Setup Node.js App: allows for the choosing a specific version of Node.js in order to run the apps using Node.js.
Select PHP Version: using this menu it is possible to select the necessary PHP version as well as enable/disable certain PHP modules and functions.
Setup Python App: this feature allows you to deploy Python applications on your cPanel while running the Apache web server.
Setup Ruby App: this feature allows you to deploy Ruby applications on your cPanel while running Apache web server.
Website Builder :this tool allows you to easily create an entire website using a drag-and-drop editor and without knowing any code or installing special software. Contact Support :opens a Live Chat with our customer support team. Namecheap Knowledgebase: this button will take you to our Knowledgebase site section.Manage Shell: this plugin allows you to enable or disable SSH access for your respective hosting accounts with just a few clicks.
PHP Tweaks: allows managing PHP settings on our Business servers (Stellar Business and old Business SSD plans).