In diesem Tutorial installieren wir ISPConfig auf CentOS 8.
ISPConfig ist ein Open Source Control Panel für Linux. Es hat eine benutzerfreundliche Weboberfläche. Mit ISPConfig können Benutzer ihre Websites, E-Mail-Adressen, FTP-Konten, DNS-Einträge, Datenbanken und Shell-Konten verwalten.
Administrator, Wiederverkäufer, Kunde und E-Mail-Benutzer sind die vier verschiedenen Ebenen des Benutzerzugriffs ISPConfig. Jede Benutzerebene hat eine andere Art von Adresse.
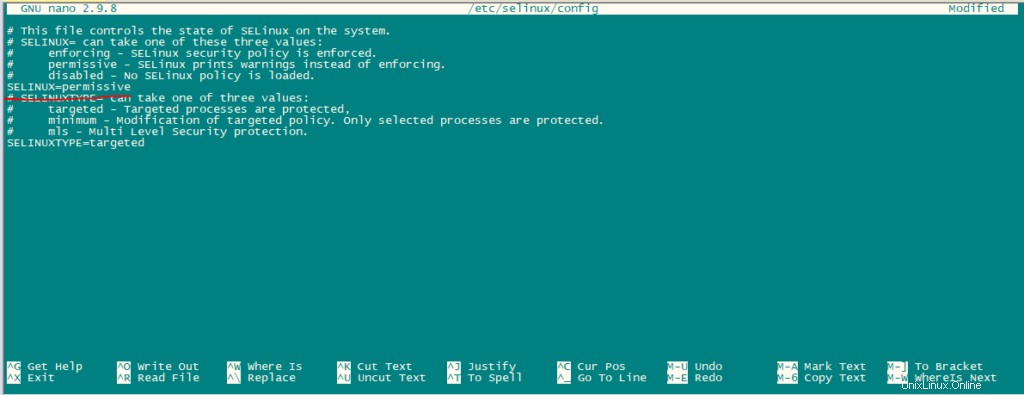
Setzen Sie SElinux zunächst auf den zulässigen Modus.
nano /etc/selinux/configÄndern Sie den Modus von „Enable“ auf „Permissive“, wie in der Abbildung unten gezeigt.
Starten Sie nun das System neu.
rebootZusätzliche Repositories aktivieren:
Importieren Sie zuerst den GPG-Schlüssel für Softwarepakete.
rpm --import /etc/pki/rpm-gpg/RPM-GPG-KEY*Epel-Repository aktivieren.
dnf -y install epel-release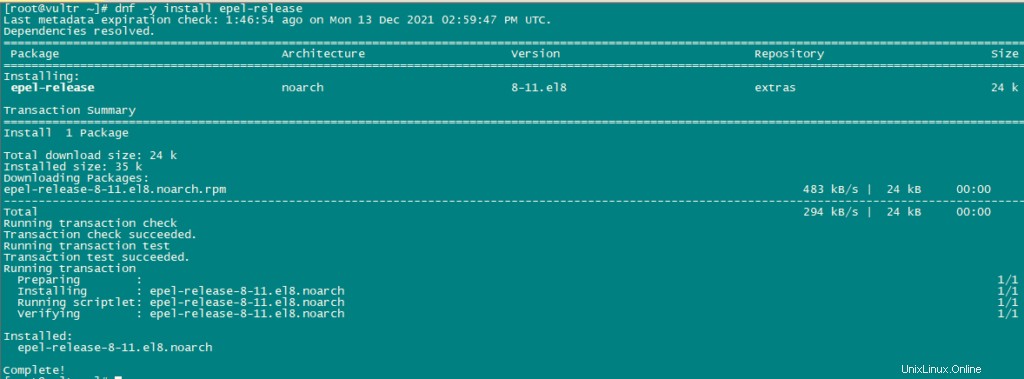
Jetzt werden wir Elektrowerkzeuge aktivieren.
dnf config-manager --set-enabled powertoolsWir aktualisieren jetzt mit dem folgenden Befehl:
dnf -y update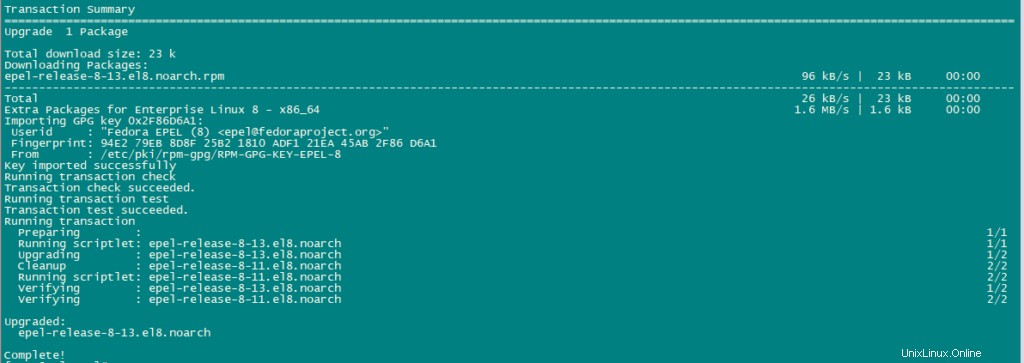
Installieren Sie einige zusätzliche Pakete.
dnf -y groupinstall 'Development Tools'
Wir müssen Remi Repository aktivieren, um neuere Versionen von PHP zu erhalten.
dnf install http://rpms.remirepo.net/enterprise/remi-release-8.rpm
dnf -y install yum-utils
dnf -y module reset php
dnf -y module install php:remi-7.4
dnf update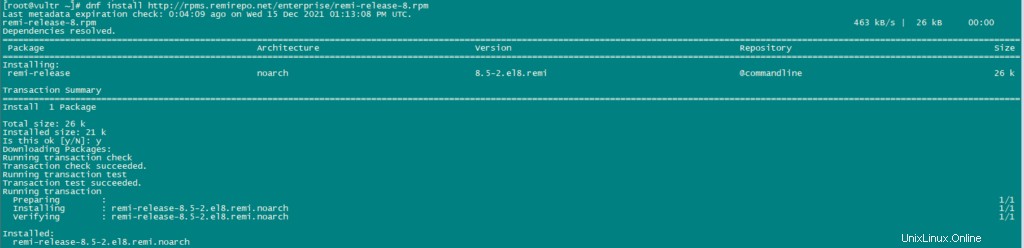
Verwenden Sie den folgenden Befehl, um erforderliche Pakete zu installieren:
dnf -y install httpd mod_ssl mariadb-server php php-mysqlnd php-mbstring
Aus Sicherheitsgründen deaktivieren wir den HTTP_PROXY-Header in Apache global mit dem folgenden Befehl:
echo "RequestHeader unset Proxy early" >> /etc/httpd/conf/httpd.confStarten Sie den httpd-Dienst neu, um die Konfigurationsänderungen zu übernehmen.
systemctl restart httpd
Jetzt installieren wir PhpMyAdmin.
cd /tmp
wget https://files.phpmyadmin.net/phpMyAdmin/5.0.2/phpMyAdmin-5.0.2-all-languages.tar.gz
tar xzvf phpMyAdmin-5.0.2-all-languages.tar.gz
mkdir /usr/share/phpmyadmin
mv phpMyAdmin-5.0.2-all-languages/* /usr/share/phpmyadmin/
mkdir /usr/share/phpmyadmin/tmp
chown -R apache:apache /usr/share/phpmyadmin
chmod 777 /usr/share/phpmyadmin/tmp
Dovecot installieren – ISPConfig auf CentOS 8 installieren
Wir verwenden die folgenden Befehle, um dovecot zu installieren.
dnf -y install dovecot dovecot-mysql dovecot-pigeonhole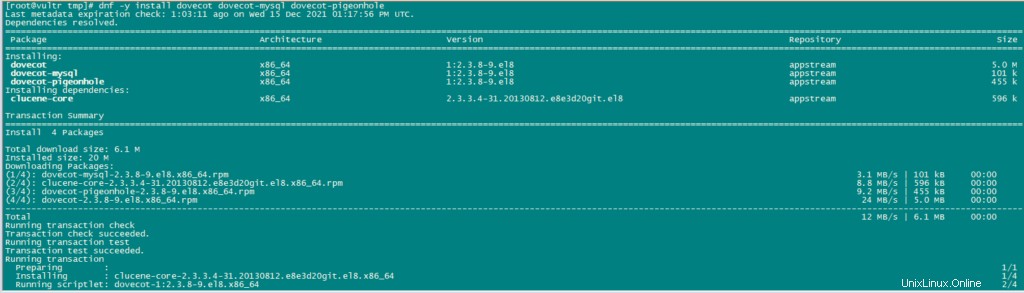
Erstellen Sie eine leere Konfigurationsdatei und erstellen Sie Symlinks mit der Hauptkonfigurationsdatei.
touch /etc/dovecot/dovecot-sql.conf
ln -s /etc/dovecot/dovecot-sql.conf /etc/dovecot-sql.conf
ln -s /etc/dovecot/dovecot.conf /etc/dovecot.conf
Aktivieren Sie jetzt Dovecot, damit es automatisch hochfährt. Starten Sie außerdem den Dienst.
systemctl enable dovecot
systemctl start dovecot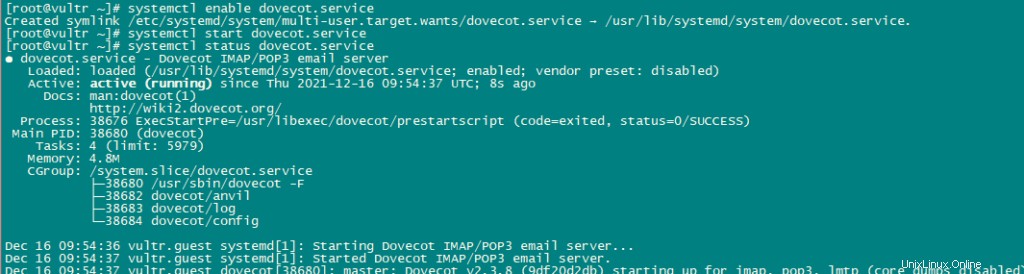
Postfix installieren:
Verwenden Sie den folgenden Befehl, um Postfix zu installieren:
dnf -y install postfix postfix-mysql
Jetzt öffnen wir die TLS/SSL- und Übermittlungsports in Postfix.
nano /etc/postfix/master.cfNach dem Bearbeiten der Datei master.cf sollte sie so aussehen:
submission inet n - n - - smtpd
 -o syslog_name=postfix/submission
 -o smtpd_tls_security_level=encrypt
 -o smtpd_sasl_auth_enable=yes
 -o smtpd_client_restrictions=permit_sasl_authenticated,reject
# -o smtpd_reject_unlisted_recipient=no
# -o smtpd_client_restrictions=$mua_client_restrictions
# -o smtpd_helo_restrictions=$mua_helo_restrictions
# -o smtpd_sender_restrictions=$mua_sender_restrictions
# -o smtpd_recipient_restrictions=
# -o smtpd_relay_restrictions=permit_sasl_authenticated,reject
# -o milter_macro_daemon_name=ORIGINATING
smtps inet n - n - - smtpd
 -o syslog_name=postfix/smtps
 -o smtpd_tls_wrappermode=yes
 -o smtpd_sasl_auth_enable=yes
 -o smtpd_client_restrictions=permit_sasl_authenticated,reject
# -o smtpd_reject_unlisted_recipient=no
# -o smtpd_client_restrictions=$mua_client_restrictions
# -o smtpd_helo_restrictions=$mua_helo_restrictions
# -o smtpd_sender_restrictions=$mua_sender_restrictions
# -o smtpd_recipient_restrictions=
# -o smtpd_relay_restrictions=permit_sasl_authenticated,reject
# -o milter_macro_daemon_name=ORIGINATING
Nur die Zeilen geändert, lösche keinen Inhalt in der Datei, ändere einfach die oben genannten Zeilen.
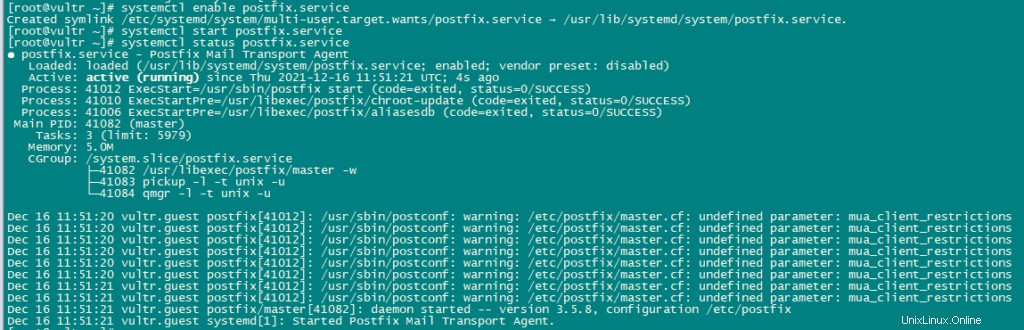
Aktivieren und starten Sie den Postfix- und Mariadb-Dienst.
systemctl enable mariadb.service
systemctl start mariadb.service

systemctl enable postfix.service
systemctl restart postfix.service
Getmail installieren:
Verwenden Sie die folgenden Befehle, um getmail zu installieren:
dnf install python2
cd /tmp
wget http://pyropus.ca/software/getmail/old-versions/getmail-5.14.tar.gz
tar xvfz getmail-5.14.tar.gz
cd getmail-5.14
python2 setup.py build
python2 setup.py install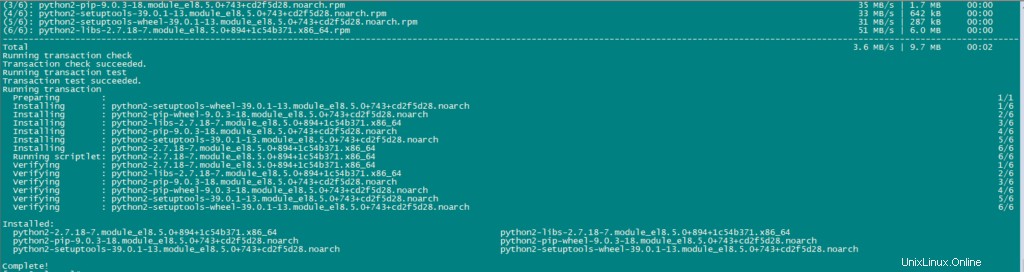

Jetzt werden wir das MYSQL-Passwort festlegen und phpMyAdmin konfigurieren.
Verwenden Sie den folgenden Befehl für die Mariadb-Konfiguration:
mysql_secure_installationStellen Sie alle Konfigurationen wie folgt ein:
NOTE: RUNNING ALL PARTS OF THIS SCRIPT IS RECOMMENDED FOR ALL MariaDB
      SERVERS IN PRODUCTION USE!  PLEASE READ EACH STEP CAREFULLY!

In order to log into MariaDB to secure it, we'll need the current
password for the root user.  If you've just installed MariaDB, and
you haven't set the root password yet, the password will be blank,
so you should just press enter here.

Enter current password for root (enter for none):
OK, successfully used password, moving on...

Setting the root password ensures that nobody can log into the MariaDB
root user without the proper authorisation.

Set root password? [Y/n] y
New password:
Re-enter new password:
Password updated successfully!
Reloading privilege tables..
 ... Success!


By default, a MariaDB installation has an anonymous user, allowing anyone
to log into MariaDB without having to have a user account created for
them.  This is intended only for testing, and to make the installation
go a bit smoother.  You should remove them before moving into a
production environment.

Remove anonymous users? [Y/n] y
 ... Success!

Normally, root should only be allowed to connect from 'localhost'.  This
ensures that someone cannot guess at the root password from the network.

Disallow root login remotely? [Y/n] y
 ... Success!

By default, MariaDB comes with a database named 'test' that anyone can
access.  This is also intended only for testing, and should be removed
before moving into a production environment.

Remove test database and access to it? [Y/n] y
 - Dropping test database...
 ... Success!
 - Removing privileges on test database...
 ... Success!

Reloading the privilege tables will ensure that all changes made so far
will take effect immediately.

Reload privilege tables now? [Y/n] y
 ... Success!

Cleaning up...

All done!  If you've completed all of the above steps, your MariaDB
installation should now be secure.

Thanks for using MariaDB!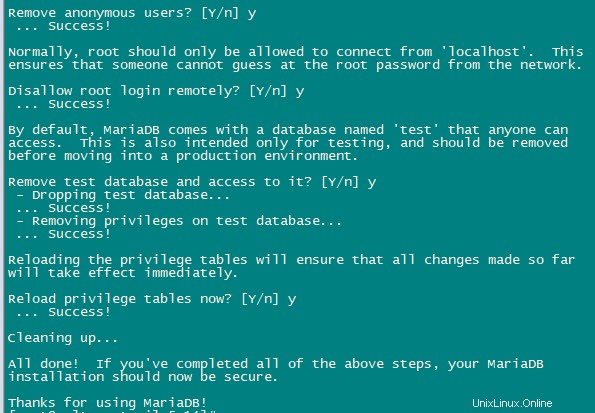
Jetzt konfigurieren wir phpmyadmin.
nano /etc/httpd/conf.d/phpmyadmin.confFügen Sie der Datei die folgenden Zeilen hinzu:
# phpMyAdmin - Web based MySQL browser written in php
#
# Allows only localhost by default
#
# But allowing phpMyAdmin to anyone other than localhost should be considered
# dangerous unless properly secured by SSL

Alias /phpMyAdmin /usr/share/phpmyadmin
Alias /phpmyadmin /usr/share/phpmyadmin

<Directory /usr/share/phpmyadmin/>
   <IfModule mod_authz_core.c>
     # Apache 2.4
  #  <RequireAny>
     #  Require ip 127.0.0.1
     #  Require ip ::1
  #  </RequireAny>
   </IfModule>
   <IfModule !mod_authz_core.c>
     # Apache 2.2
     Order Deny,Allow
     Deny from All
     Allow from 127.0.0.1
     Allow from ::1
   </IfModule>
</Directory>
Als Nächstes ändern wir die Authentifizierung in phpMyAdmin von Cookie auf http.
cp -pf /usr/share/phpmyadmin/config.sample.inc.php /usr/share/phpmyadmin/config.inc.php
nano /usr/share/phpmyadmin/config.inc.php
Ändern Sie die folgende Zeile:
$cfg['Servers'][$i]['auth_type'] = 'http';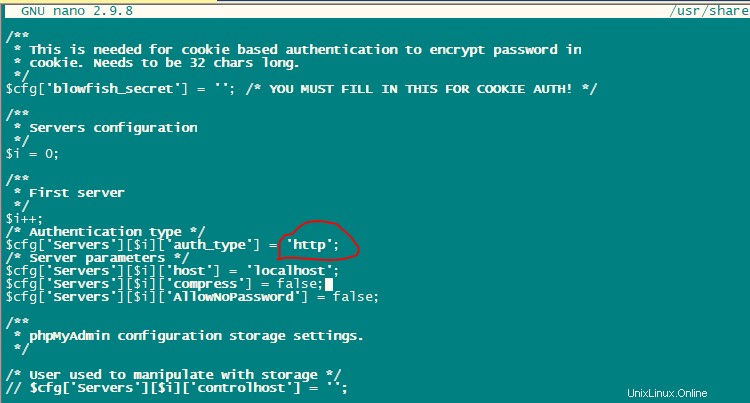
Aktivieren und starten Sie den Apache-Dienst.
systemctl enable httpd
systemctl restart httpd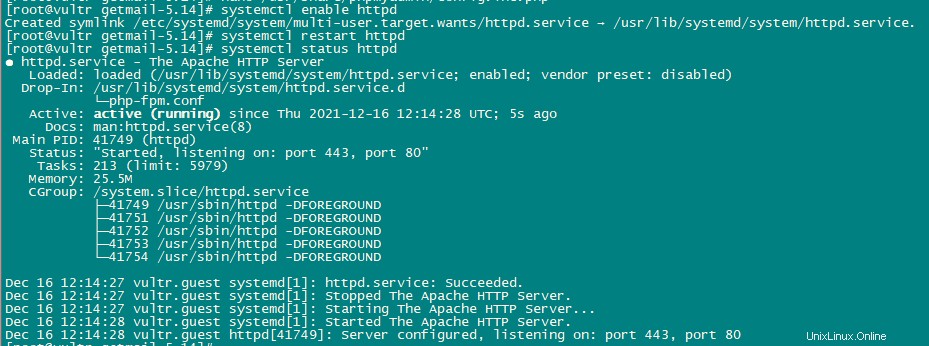
Installieren Sie Amavisd-new, SpamAssassin, ClamAV und Postgrey:
Wir werden amavisd-new, SpamAssassin und ClamAV mit dem folgenden Befehl installieren:
dnf -y install amavisd-new spamassassin clamav-server clamav-data clamav-update clamav-filesystem clamav clamav-scanner-systemd clamav-devel clamav-lib clamav-server-systemd unzip bzip2 perl-DBD-mysql postgrey re2cAls Nächstes aktivieren und starten wir diese Dienste.
sa-update
freshclam
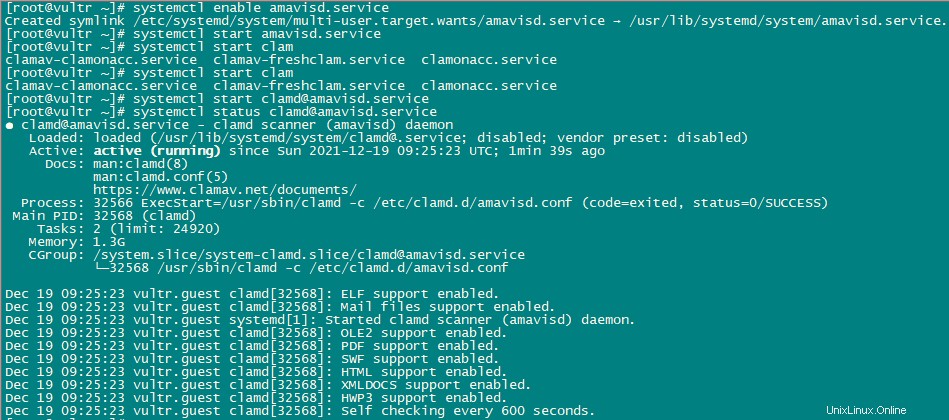
systemctl enable amavisd.service
systemctl start amavisd.service
systemctl start clamd@amavisd.service
systemctl enable postgrey.service
systemctl start postgrey.service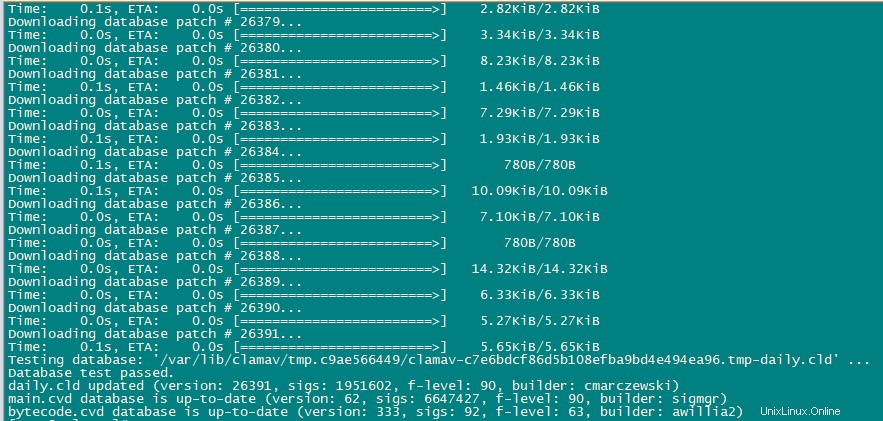
Jetzt werden wir den Postgrey-Dienst konfigurieren.
nano /etc/sysconfig/postgrey

Change the following line

POSTGREY_TYPE="--unix=/var/spool/postfix/postgrey/socket"

to

POSTGREY_TYPE="--inet=10023"
Speichern und beenden Sie die Datei und starten Sie den Postgrey-Dienst neu.
systemctl restart postgrey.serviceJetzt Amivid konfigurieren.
nano /etc/clamd.d/amavisd.conf

change the following line

LocalSocket /run/clamd.amavisd/clamd.sock

to

LocalSocket /var/spool/amavisd/clamd.sock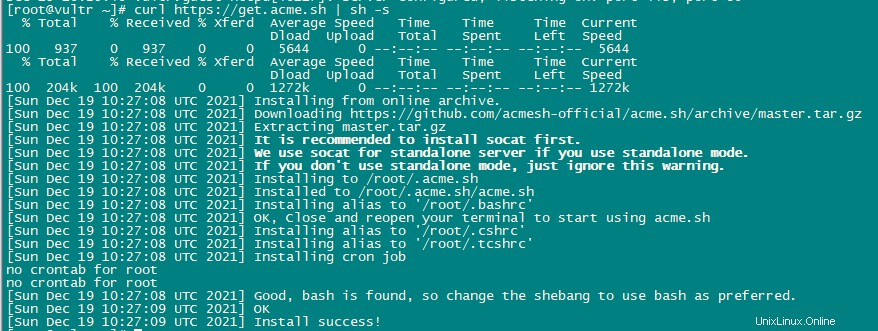
Speichern und beenden Sie die Datei und starten Sie den clamAV-Dienst neu.
systemctl restart clamd@amavisd.service
systemctl status clamd@amavisd.service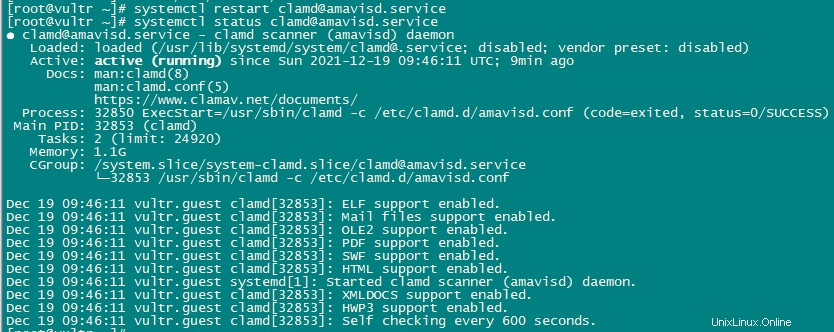
Jetzt erstellen wir freshclam als Dienst, damit er mit systemctl gestartet und gestoppt werden kann. Damit dies funktioniert, müssen wir eine Datei mit dem Pfad /usr/lib/systemd/system/freshclam.service.
erstellennano /usr/lib/systemd/system/freshclam.serviceFügen Sie der Datei folgenden Inhalt hinzu:
[Unit]
Description = ClamAV Scanner
After = network.target

[Service]
Type = forking
# if you want to scan more than one in a day change the number 1 with your desired number in below line.
ExecStart = /usr/bin/freshclam -d -c 1
Restart = on-failure
PrivateTmp =true

[Install]
WantedBy=multi-user.target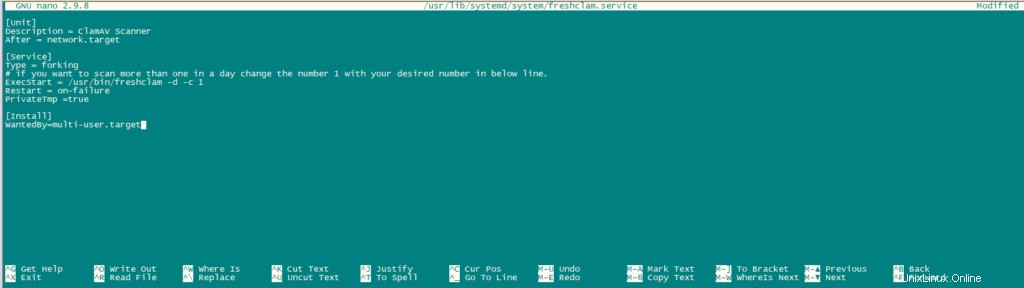
Speichern und beenden Sie die Datei.
Jetzt den Dienst aktivieren und starten.
systemctl enable freshclam.service
systemctl start freshclam.service
systemctl status freshclam.service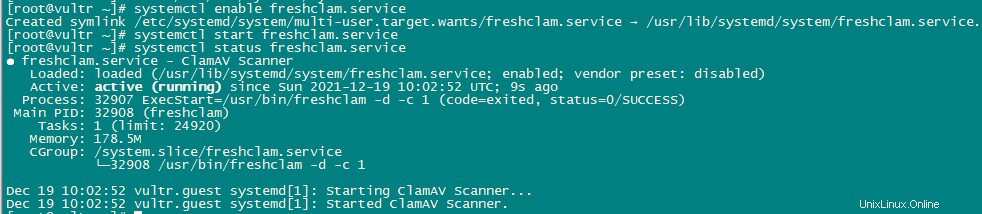
Installieren Sie Apache mit mod_php, mod_fcgi/PHP, PHP-FPM:
ISPConfig 3 ermöglicht Ihnen die Verwendung von mod_php, mod_fcgi/PHP, cgi/PHP und PHP-FPM je nach Website-Basis.
Installieren Sie Apache2 mit mod_php, mod_fcgid und PHP mit dem folgenden Befehl:
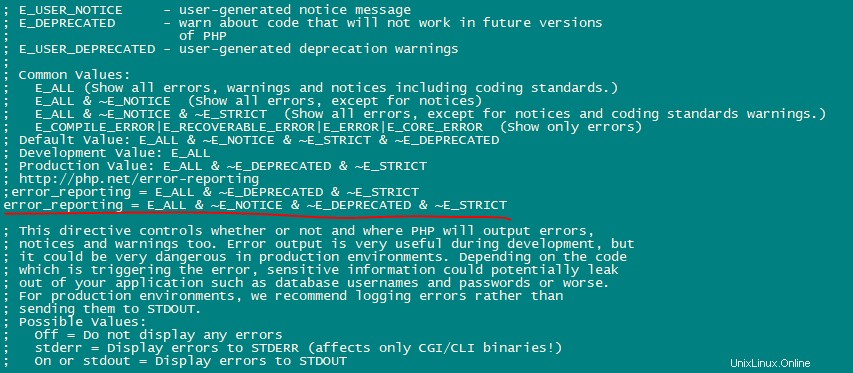
dnf -y install php php-devel php-gd php-imap php-ldap php-mysql php-odbc php-pear php-xml php-xmlrpc php-pecl-apc php-mbstring php-mcrypt php-snmp php-soap php-tidy curl curl-devel perl-libwww-perl ImageMagick libxml2 libxml2-devel mod_fcgid php-cli httpd-devel php-fpm php-intl php-imagick php-pspell wgetJetzt konfigurieren wir die Datei php.ini.
nano /etc/php.iniÄndern Sie die Fehlerberichterstattung so, dass keine Benachrichtigung angezeigt wird, stellen Sie die Zeitzone ein und kommentieren Sie die Zeile „cgi.fix_pathinfo=1“ aus “.


Aktivieren Sie httpd und PHP-FPM, damit der Dienst beim Booten gestartet werden kann, und starten Sie den PHP-FPM-Dienst.
systemctl start php-fpm.service
systemctl enable php-fpm.service
systemctl status php-fpm.service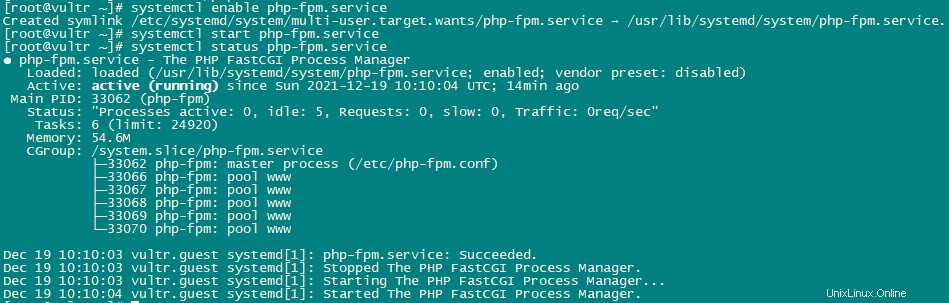
Aktivieren Sie jetzt den Apache-Dienst und starten Sie ihn neu.
systemctl enable httpd.service
systemctl restart httpd.service
systemctl status httpd.service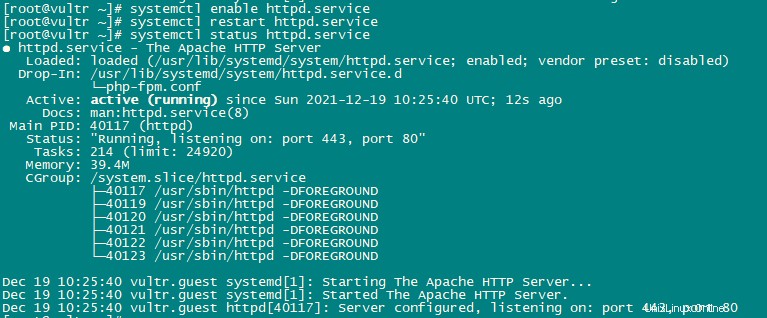
Jetzt werden wir Unterstützung für Let’s encrypt hinzufügen. ISPConfig verwendet acme.sh als Let’s Encrypt-Client. Installieren Sie acme.sh mit dem folgenden Befehl:
curl https://get.acme.sh | sh -sInstallation von mod_python:
mod_python ist ein Modul von Apache. Es ist nicht als RPM verfügbar, also müssen wir es aus dem Quellcode kompilieren. Zuerst werden wir Python-Entwicklungsdateien installieren und dann die aktuelle Version der mod_python tar.gz-Datei herunterladen.
dnf -y install python3-devel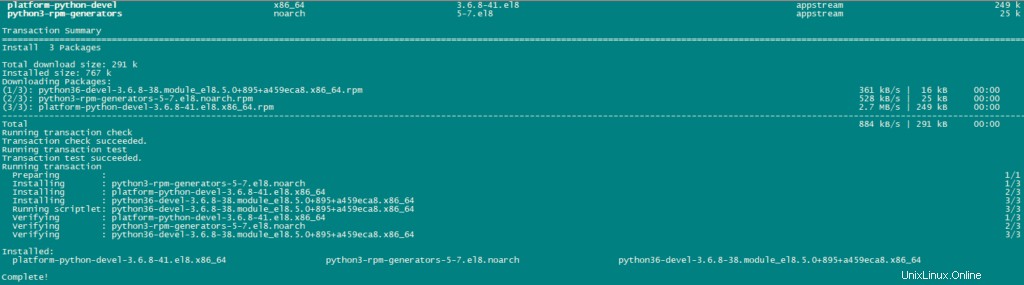
cd /usr/local/src/
wget http://dist.modpython.org/dist/mod_python-3.5.0.tgz
tar xfz mod_python-3.5.0.tgz
cd mod_python-3.5.0
Jetzt werden wir mod_python konfigurieren und kompilieren.
./configure --with-python=/usr/bin/python3
make
Es gibt einen Fehler im kompilierten Modul, der dazu führt, dass die Installation mit dem Fehler „version =„fatal:Not a git repository (or any of the parent directorys):.git“ fehlschlägt “. Um diesen Fehler zu beheben, führen Sie diesen sed-Befehl aus (der Befehl besteht aus einer Zeile!).
sed -e 's/(git describe --always)/(git describe --always 2>\/dev\/null)/g' -e 's/`git describe --always`/`git describe --always 2>\/dev\/null`/g' -i $( find . -type f -name Makefile\* -o -name version.sh )Installieren Sie nun das Modul mit dem folgenden Befehl:
make install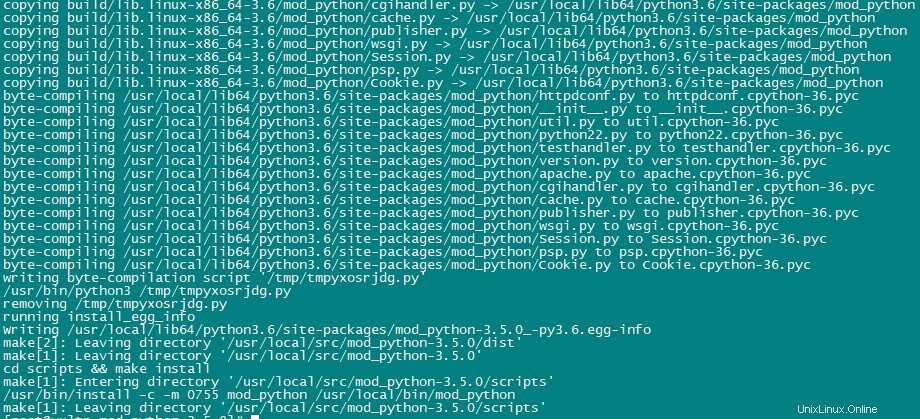
Aktivieren Sie das Modul in Apache mit dem folgenden Befehl:
echo 'LoadModule python_module modules/mod_python.so' > /etc/httpd/conf.modules.d/10-python.conf
systemctl restart httpd.service
systemctl status httpd.service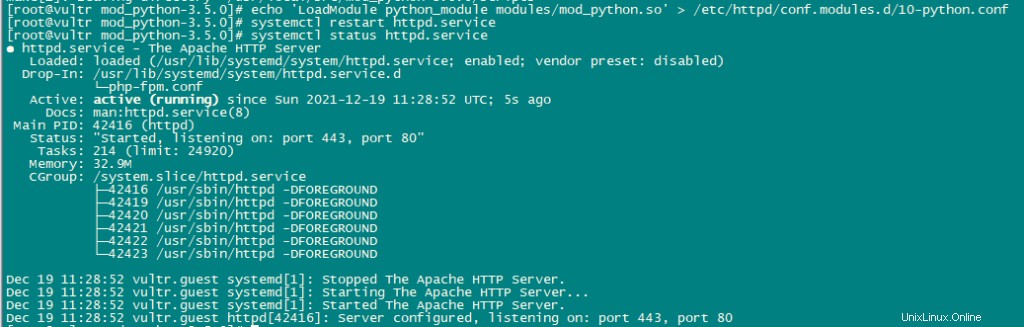
Installieren Sie PureFTPd:
PureFTPd kann mit dem folgenden Befehl installiert werden:
dnf -y install pure-ftpd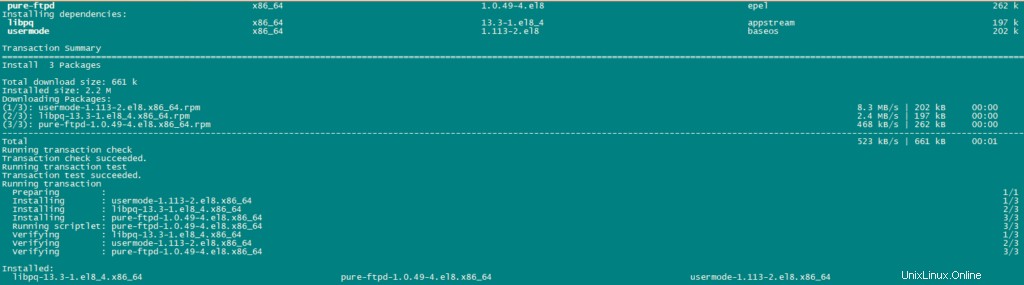
Aktivieren und starten Sie den PureFTPd-Dienst.
systemctl enable pure-ftpd.service
systemctl start pure-ftpd.service
systemctl status pure-ftpd.service
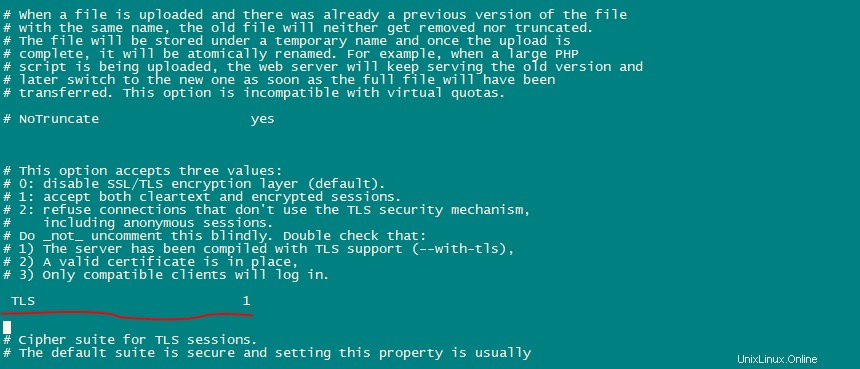
Jetzt werden wir PureFTPd so konfigurieren, dass FTP- und TLS-Sitzungen zugelassen werden. FTP ist ein sehr unsicheres Protokoll, da alle Passwörter und Daten im Klartext übertragen werden. Durch die Verwendung von TLS kann die gesamte Kommunikation verschlüsselt werden, wodurch FTP viel sicherer wird.
OpenSSL wird von TLS benötigt; Um OpenSSL zu installieren, verwenden Sie den folgenden Befehl:
dnf install opensslÖffnen Sie /etc/pure-ftpd/pure-ftpd.conf und TLS aktivieren.
nano /etc/pure-ftpd/pure-ftpd.confFTP- und TLS-Sitzungen zulassen, TLS einstellen zu 1 indem Sie das # vor der TLS-Zeile entfernen. Es wird dringend empfohlen, TLS zu aktivieren.
Um TLS verwenden zu können, müssen wir ein SSL-Zertifikat erstellen. erstellen Sie es in /etc/ssl/private/ , deshalb erstellen wir zuerst dieses Verzeichnis:
mkdir -p /etc/ssl/private/Jetzt generieren wir mit dem folgenden Befehl ein SSL-Zertifikat:
openssl req -x509 -nodes -days 7300 -newkey rsa:2048 -keyout /etc/ssl/private/pure-ftpd.pem -out /etc/ssl/private/pure-ftpd.pem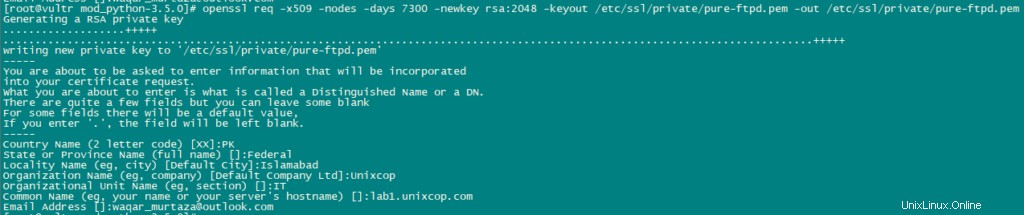
Ändern Sie die Berechtigungen des SSL-Zertifikats:
chmod 600 /etc/ssl/private/pure-ftpd.pemErstellen Sie nun eine DHParam-Datei mit dem folgenden Befehl:
openssl dhparam -out /etc/ssl/private/pure-ftpd-dhparams.pem 2048
Starten Sie den PureFTPd-Dienst neu, um alle Konfigurationen zu übernehmen.
systemctl restart pure-ftpd.service
systemctl status pure-ftpd.service
Installieren Sie BIND:
Installieren Sie BIND mit dem folgenden Befehl:
dnf -y install bind bind-utils haveged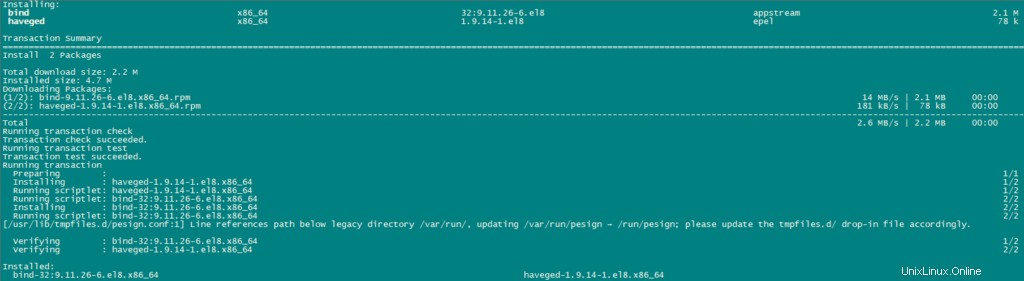
Wir werden BIND daher nach unseren Bedürfnissen konfigurieren, eine Sicherungskopie der vorhandenen Konfigurationsdatei erstellen und wie folgt eine neue erstellen:
cp /etc/named.conf /etc/named.conf_bak
cat /dev/null > /etc/named.conf
nano /etc/named.conf
Fügen Sie die folgenden Zeilen in der Konfigurationsdatei hinzu.
//
// named.conf
//
// Provided by Red Hat bind package to configure the ISC BIND named(8) DNS
// server as a caching only nameserver (as a localhost DNS resolver only).
//
// See /usr/share/doc/bind*/sample/ for example named configuration files.
//
options {
        listen-on port 53 { any; };
        listen-on-v6 port 53 { any; };
        directory       "/var/named";
        dump-file       "https://1118798822.rsc.cdn77.org/var/named/data/cache_dump.db";
        statistics-file "https://1118798822.rsc.cdn77.org/var/named/data/named_stats.txt";
        memstatistics-file "https://1118798822.rsc.cdn77.org/var/named/data/named_mem_stats.txt";
        allow-query     { any; };
				allow-recursion {"none";};
        recursion no;
};
logging {
        channel default_debug {
                file "data/named.run";
                severity dynamic;
        };
};
zone "." IN {
        type hint;
        file "named.ca";
};
include "https://1118798822.rsc.cdn77.org/etc/named.conf.local";
Speichern und beenden Sie die Datei.
Erstellen Sie die Datei /etc/named.conf.local die am Ende von /etc/named.conf enthalten ist „/etc/named.conf.local “ wird später von ISPConfig ausgefüllt, wenn Sie DNS-Zonen in ISPConfig erstellen.
touch /etc/named.conf.localAktivieren und starten Sie BIND und haben Sie.
systemctl enable named.service
systemctl start named.service
systemctl status named.service
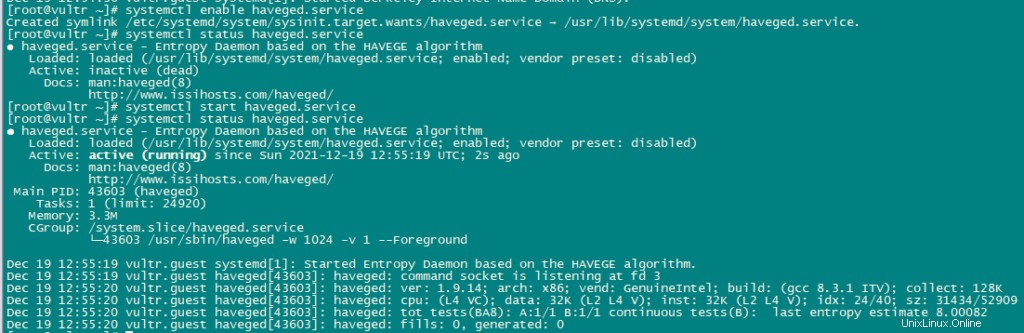
systemctl enable haveged.service
systemctl start haveged.service
systemctl status haveged.service
Installieren Sie AWStats:
AWStats ist eine Anwendung für Webstatistiken. Verwenden Sie den folgenden Befehl, um AWStats zu installieren:
dnf -y install awstats perl-DateTime-Format-HTTP perl-DateTime-Format-Builder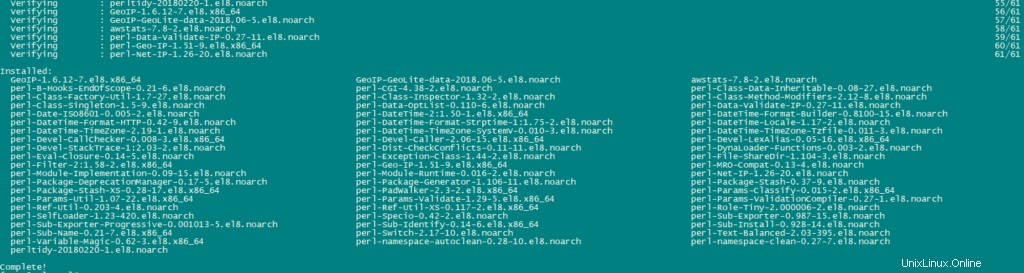
Jailkit installieren:
Wir werden Jailkit verwenden, um SSH-Benutzer und Cronjobs zu chrooten. Es kann wie folgt installiert werden:
ln -s /usr/bin/python2 /usr/bin/python
cd /tmp
wget http://olivier.sessink.nl/jailkit/jailkit-2.21.tar.gz
tar xvfz jailkit-2.21.tar.gz
cd jailkit-2.21
./configure
make
make install
cd ..
rm -rf jailkit-2.21*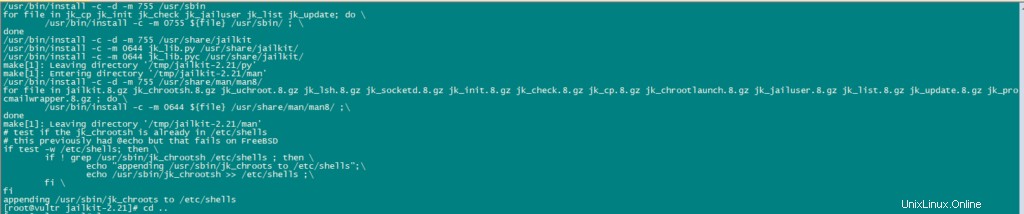
Fail2Ban installieren:
Fail2Ban ist optional, wird aber empfohlen, da der ISPConfig-Monitor versucht, das Protokoll anzuzeigen.
Verwenden Sie den folgenden Befehl, um Fail2Ban zu installieren.
dnf -y install iptables-services fail2ban fail2ban-systemd
systemctl stop firewalld.service
systemctl mask firewalld.service
systemctl disable firewalld.service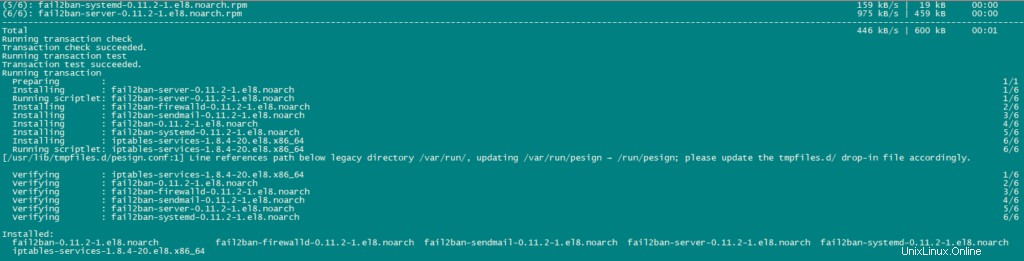
Erstellen Sie als Nächstes die Datei /etc/fail2ban/jail.local und aktivieren Sie die Überwachung für den SSH-, E-Mail- und FTP-Dienst.
nano /etc/fail2ban/jail.localFügen Sie der Datei die folgenden Zeilen hinzu:
[sshd]
enabled = true
action = iptables[name=sshd, port=ssh, protocol=tcp]

[pure-ftpd]
enabled = true
action = iptables[name=FTP, port=ftp, protocol=tcp]
maxretry = 3

[dovecot]
enabled = true
action = iptables-multiport[name=dovecot, port="pop3,pop3s,imap,imaps", protocol=tcp]
maxretry = 5

[postfix-sasl]
enabled = true
action = iptables-multiport[name=postfix-sasl, port="smtp,smtps,submission", protocol=tcp]
maxretry = 3
Aktivieren und starten Sie den Fail2Ban-Dienst.
systemctl enable fail2ban.service
systemctl start fail2ban.service
systemctl status fail2ban.service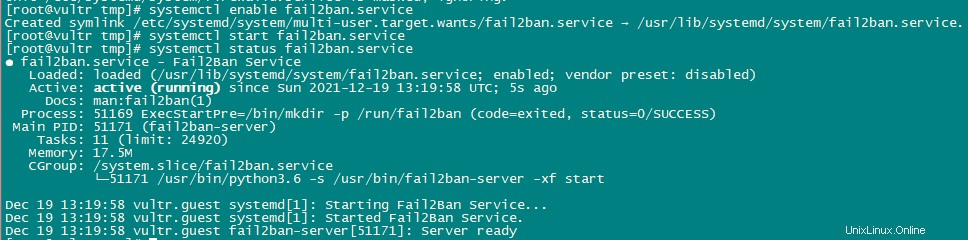
rkhunter installieren:
Wir werden jetzt rkhunter mit dem folgenden Befehl installieren:
dnf -y install rkhunter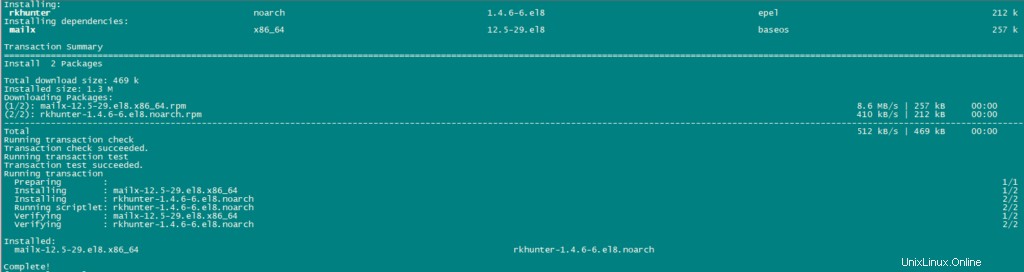
Mailman installieren:
Wenn Sie Mailinglisten mit Mailman auf Ihrem Server verwalten möchten, dann installieren Sie mailman jetzt. Mailman wird von ISPConfig unterstützt, sodass Sie später neue Mailinglisten über ISPConfig erstellen können.
dnf -y install mailman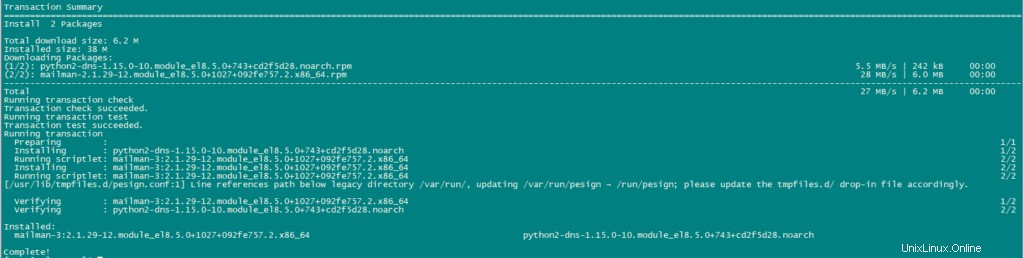
Bevor Sie mailman starten, erstellen Sie eine Mailingliste namens mailman.
touch /var/lib/mailman/data/aliases
postmap /var/lib/mailman/data/aliases
/usr/lib/mailman/bin/newlist mailman
ln -s /usr/lib/mailman/mail/mailman /usr/bin/mailman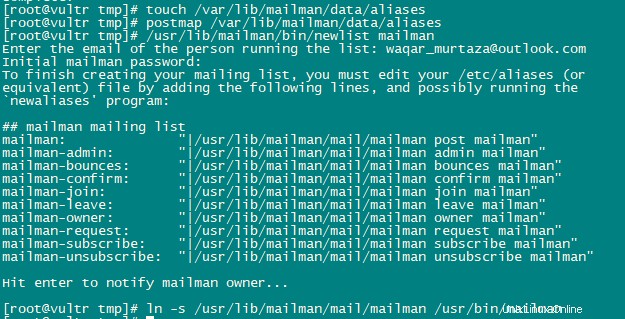
Öffnen Sie Aliasse mit dem folgenden Befehl:
nano /etc/aliasesFügen Sie der Datei die folgenden Zeilen hinzu:
mailman:              "|/usr/lib/mailman/mail/mailman post mailman"
mailman-admin:        "|/usr/lib/mailman/mail/mailman admin mailman"
mailman-bounces:      "|/usr/lib/mailman/mail/mailman bounces mailman"
mailman-confirm:      "|/usr/lib/mailman/mail/mailman confirm mailman"
mailman-join:         "|/usr/lib/mailman/mail/mailman join mailman"
mailman-leave:        "|/usr/lib/mailman/mail/mailman leave mailman"
mailman-owner:        "|/usr/lib/mailman/mail/mailman owner mailman"
mailman-request:      "|/usr/lib/mailman/mail/mailman request mailman"
mailman-subscribe:    "|/usr/lib/mailman/mail/mailman subscribe mailman"
mailman-unsubscribe:  "|/usr/lib/mailman/mail/mailman unsubscribe mailman"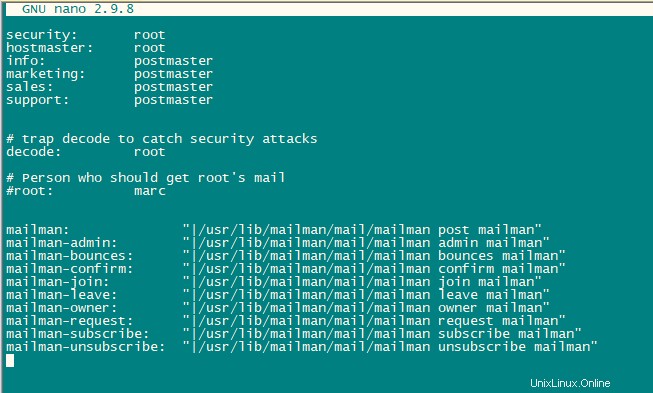
Führen Sie den folgenden Befehl aus, um die neu hinzugefügte Konfiguration anzuwenden:
newaliasesPostfix neu starten.
systemctl restart postfix.serviceWir werden die Apache Mailman-Konfigurationsdatei konfigurieren.
nano /etc/httpd/conf.d/mailman.confFügen Sie die Zeile ScriptAlias /cgi-bin/mailman/ /usr/lib/mailman/cgi-bin/ hinzu . Kommentieren Sie Alias /pipermail/ /var/lib/mailman/archives/public/ aus und fügen Sie die Zeile Alias /pipermail /var/lib/mailman/archives/public/ hinzu .
Nach der Bearbeitung sieht die Datei so aus:
#
#  httpd configuration settings for use with mailman.
#

ScriptAlias /mailman/ /usr/lib/mailman/cgi-bin/
ScriptAlias /cgi-bin/mailman/ /usr/lib/mailman/cgi-bin/
<Directory /usr/lib/mailman/cgi-bin/>
    AllowOverride None
    Options ExecCGI
    Require all granted
</Directory>


#Alias /pipermail/ /var/lib/mailman/archives/public/
Alias /pipermail /var/lib/mailman/archives/public/
<Directory /var/lib/mailman/archives/public>
    Options MultiViews FollowSymLinks
    AllowOverride None
    Require all granted
    AddDefaultCharset Off
</Directory>

# Uncomment the following line, replacing www.example.com with your server's
# name, to redirect queries to /mailman to the listinfo page (recommended).

# RedirectMatch ^/mailman[/]*$ http://www.example.com/mailman/listinfo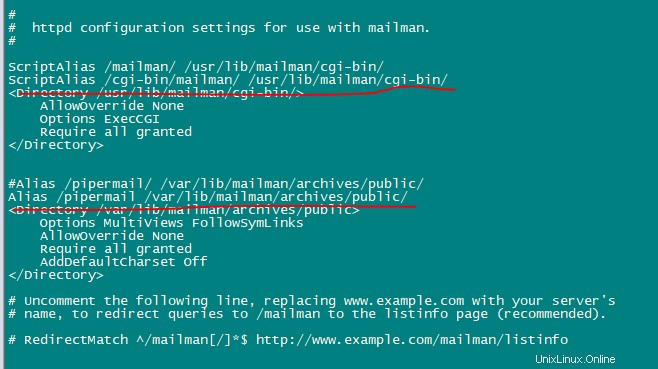
Starten Sie den Apache-Dienst neu, um die Konfigurationen zu übernehmen.
systemctl restart httpd.serviceAktivieren und starten Sie den Mailman-Dienst.
systemctl enable mailman.service
systemctl start mailman.service
systemctl status mailman.service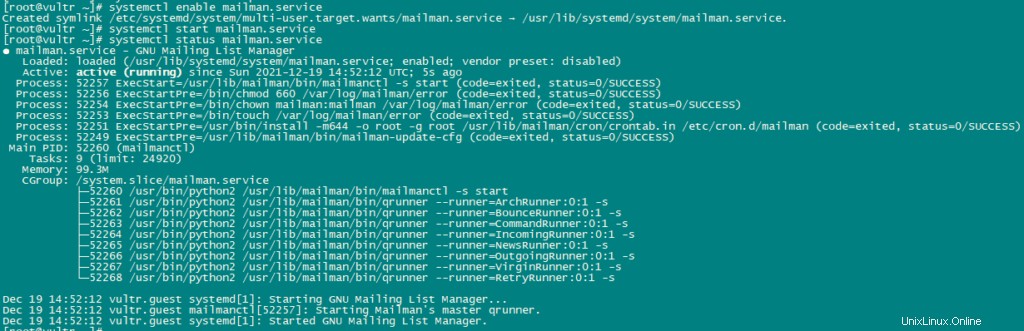
Nachdem Sie ISPConfig 3 installiert haben, können Sie Mailman wie folgt verwenden:
Sie können den Alias /cgi-bin/mailman für alle Apache-Vhosts verwenden (bitte beachten Sie, dass suExec und CGI für alle Vhosts deaktiviert sein müssen, von denen aus Sie auf Mailman zugreifen möchten!), was bedeutet, dass Sie auf die Mailman-Admin-Oberfläche für eine Liste zugreifen können unter http:///cgi-bin/mailman/admin/, und die Webseite für Benutzer einer Mailingliste finden Sie unter http:///cgi-bin/mailman/listinfo/.
Unter http:///pipermail/ finden Sie das Archiv der Mailingliste.
Roundcube-Webmail installieren:
Wir laden Roundcube-Webmail mit wget herunter und installieren es dann.
cd /tmp
wget https://github.com/roundcube/roundcubemail/releases/download/1.4.3/roundcubemail-1.4.3-complete.tar.gz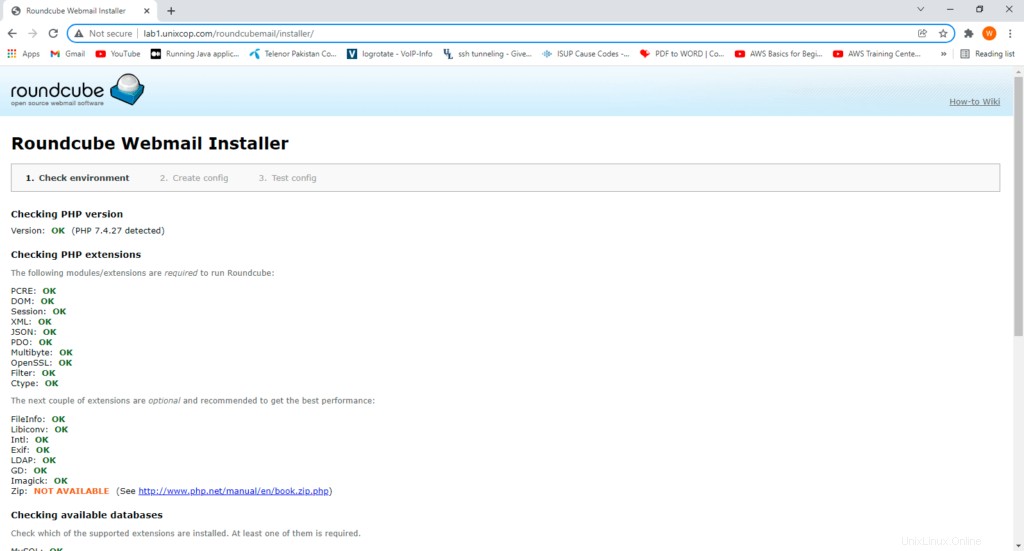
Entpacken Sie die tar.gz-Datei und verschieben Sie die RoundCube-Quelle nach /usr/share/roundcubemail.
tar xfz roundcubemail-1.4.3-complete.tar.gz
mkdir /usr/share/roundcubemail
mv /tmp/roundcubemail-1.4.3/* /usr/share/roundcubemail/
chown -R root:root /usr/share/roundcubemail
chown apache /usr/share/roundcubemail/temp
chown apache /usr/share/roundcubemail/logs
Erstellen Sie eine Roundcube-Konfigurationsdatei.
nano /etc/httpd/conf.d/roundcubemail.confFügen Sie der Datei die folgenden Zeilen hinzu:
#
# Round Cube Webmail is a browser-based multilingual IMAP client
#

Alias /roundcubemail /usr/share/roundcubemail
Alias /webmail /usr/share/roundcubemail

# Define who can access the Webmail
# You can enlarge permissions once configured

<Directory /usr/share/roundcubemail/>
        Options none
        AllowOverride Limit
        Require all granted
</Directory>

# Define who can access the installer
# keep this secured once configured

<Directory /usr/share/roundcubemail/installer>
        Options none
        AllowOverride Limit
        Require all granted
</Directory>


# Those directories should not be viewed by Web clients.
<Directory /usr/share/roundcubemail/bin/>
    Order Allow,Deny
    Deny from all
</Directory>
<Directory /usr/share/roundcubemail/plugins/enigma/home/>
    Order Allow,Deny
    Deny from all
</Directory>
Starten Sie Apache neu.
systemctl restart httpd.serviceJetzt brauchen wir eine Datenbank für RoundCube-Mail, wir werden sie wie folgt erstellen:
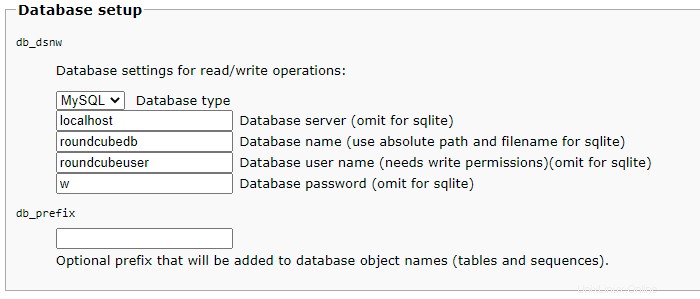
mysql -u root -pVerwenden Sie die folgenden Abfragen, um eine Datenbank zu erstellen:
CREATE DATABASE roundcubedb;
CREATE USER roundcubeuser@localhost IDENTIFIED BY 'roundcubepassword';
GRANT ALL PRIVILEGES on roundcubedb.* to roundcubeuser@localhost ;
FLUSH PRIVILEGES;
exit
Jetzt installieren wir RoundCube im Browser unter http://YOUR_IPAddress/roundcubemail/installer/
Erstellen Sie nun die Datei config.inc.php.
nano /usr/share/roundcubemail/config/config.inc.phpFügen Sie darin die folgenden Zeilen hinzu:
<?php

/* Local configuration for Roundcube Webmail */

// ----------------------------------
// SQL DATABASE
// ----------------------------------
// Database connection string (DSN) for read+write operations
// Format (compatible with PEAR MDB2): db_provider://user:password@host/database
// Currently supported db_providers: mysql, pgsql, sqlite, mssql, sqlsrv, oracle
// For examples see http://pear.php.net/manual/en/package.database.mdb2.intro-dsn.php
// NOTE: for SQLite use absolute path (Linux): 'sqlite:////full/path/to/sqlite.db?mode=0646'
// or (Windows): 'sqlite:///C:/full/path/to/sqlite.db'
$config['db_dsnw'] = 'mysql://roundcubeuser:roundcubepassword@localhost/roundcubedb';

// ----------------------------------
// IMAP
// ----------------------------------
// The IMAP host chosen to perform the log-in.
// Leave blank to show a textbox at login, give a list of hosts
// to display a pulldown menu or set one host as string.
// To use SSL/TLS connection, enter hostname with prefix ssl:// or tls://
// Supported replacement variables:
// %n - hostname ($_SERVER['SERVER_NAME'])
// %t - hostname without the first part
// %d - domain (http hostname $_SERVER['HTTP_HOST'] without the first part)
// %s - domain name after the '@' from e-mail address provided at login screen
// For example %n = mail.domain.tld, %t = domain.tld
// WARNING: After hostname change update of mail_host column in users table is
// required to match old user data records with the new host.
$config['default_host'] = 'localhost';
$config['smtp_server'] = 'localhost';
$config['smtp_port'] = 25;

// provide an URL where a user can get support for this Roundcube installation
// PLEASE DO NOT LINK TO THE ROUNDCUBE.NET WEBSITE HERE!
$config['support_url'] = '';

// This key is used for encrypting purposes, like storing of imap password
// in the session. For historical reasons it's called DES_key, but it's used
// with any configured cipher_method (see below).
$config['des_key'] = 'pb0UucO0eqjgvhrqYlFTBVjE';

// ----------------------------------
// PLUGINS
// ----------------------------------
// List of active plugins (in plugins/ directory)
$config['plugins'] = array();

// Set the spell checking engine. Possible values:
// - 'googie' - the default (also used for connecting to Nox Spell Server, see 'spellcheck_uri' setting)
// - 'pspell' - requires the PHP Pspell module and aspell installed
// - 'enchant' - requires the PHP Enchant module
// - 'atd' - install your own After the Deadline server or check with the people at http://www.afterthedeadline.com before using their API
// Since Google shut down their public spell checking service, the default settings
// connect to http://spell.roundcube.net which is a hosted service provided by Roundcube.
// You can connect to any other googie-compliant service by setting 'spellcheck_uri' accordingly.
$config['spellcheck_engine'] = 'pspell';
$config['enable_installer'] = true;
Now click Next in the web browser:
Then press continue and you will enter a new page where It will give you the configurations. Just copy these configurations and paste on config.php.ini file.

then initailize database.
Now, Open config file.
nano /usr/share/roundcubemail/config/config.inc.php

change the line:

$config['enable_installer'] = true;

to

$config['enable_installer'] = false;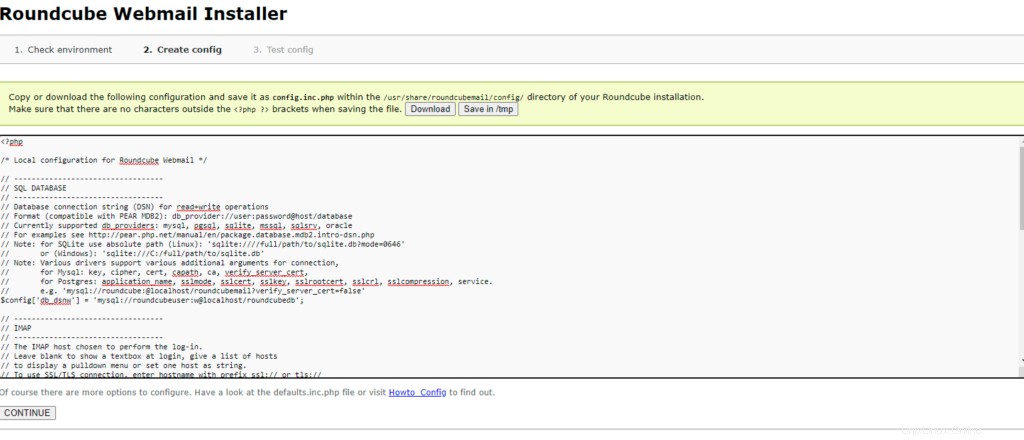
Roundcube is available now under the aliases /webmail and /roundcubemail on your server:
http://YOUR_IPAddress/webmail
The RoundCube login is the email address and password of an email account that you create later in ISPConfig.
Install ISPConfig on CentOS 8
The ISPConfig installer will configure all services like Postfix, Dovecot, etc. for you.
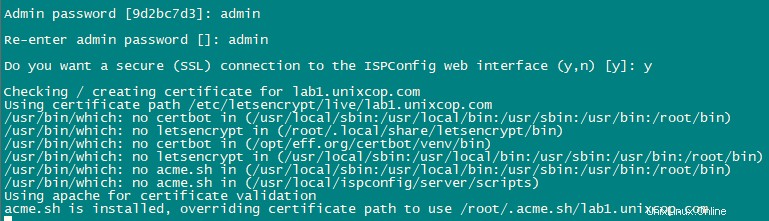
You also have the possibility to let the installer create an SSL vhost for the ISPConfig control panel
so that ISPConfig can be accessed using https:// instead of http://. To achieve this, just press ENTER when you see this question:
Do you want a secure (SSL) connection to the ISPConfig web interface (y,n) [y]:.
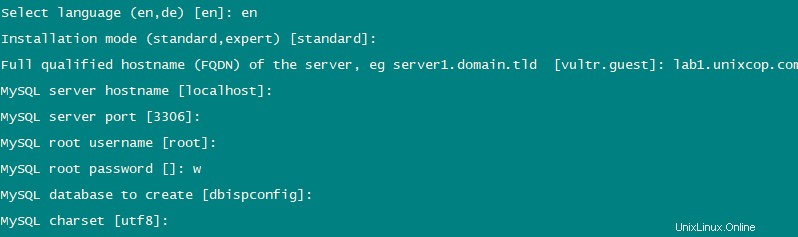
To install ISPConfig 3.2 nightly build, use the following commands:
cd /tmp
wget -O ispconfig.tar.gz https://www.ispconfig.org/downloads/ISPConfig-3-stable.tar.gz
tar xfz ispconfig.tar.gz
cd ispconfig3*/install/
The next step is to run:
php -q install.php
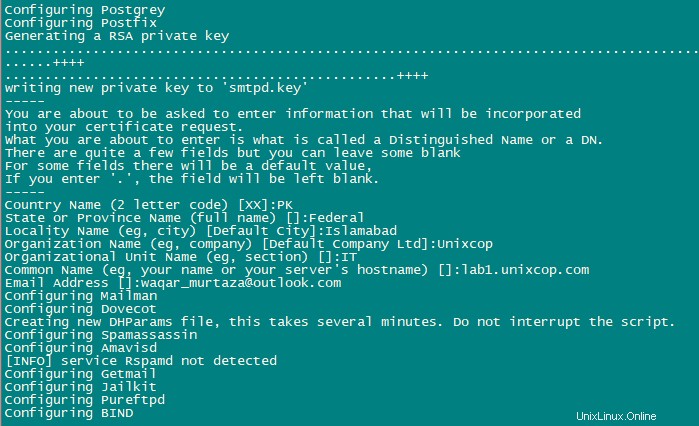
Dadurch wird das ISPConfig 3-Installationsprogramm gestartet. The installer will configure all services like Postfix, Dovecot, etc. for you.
Hit Enter if the value in bracket is what you want you set otherwise enter your desired value and press Enter.
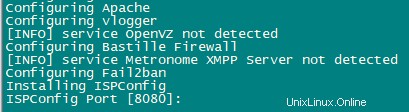
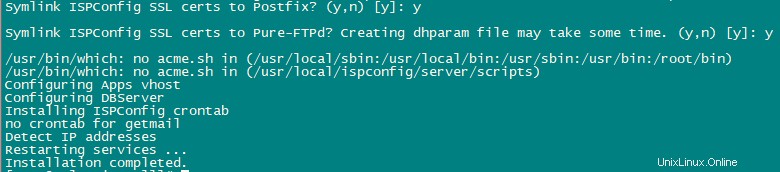
Installation is now complete.
Afterwards you can access ISPConfig 3 using https://YOUR-IPAddress:8080.
Login with admin as Username and Password. You should change the default password after first login.
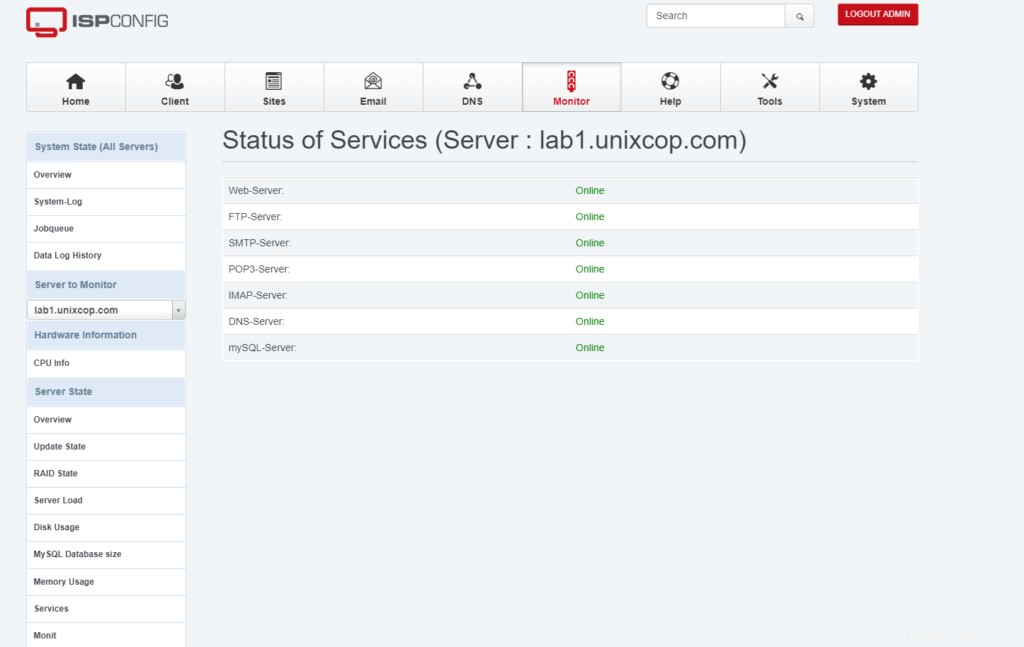
Now you can use ISPConfig as per your need.