LAMP ist die Abkürzung für L inux, A pache, M ySQL, P PS. Dieses Tutorial zeigt, wie Sie einen Apache2-Webserver auf einem CentOS 6.4-Server mit PHP5-Unterstützung (mod_php) und MySQL-Unterstützung installieren können.
Ich gebe keine Garantie dafür, dass dies bei Ihnen funktioniert!
1 Vorbemerkung
In diesem Tutorial verwende ich den Hostnamen server1.example.com mit der IP-Adresse 192.168.0.100. Diese Einstellungen können für Sie abweichen, daher müssen Sie sie gegebenenfalls ersetzen.
2 Installation von MySQL 5
Um MySQL zu installieren, gehen wir wie folgt vor:
yum -y install mysql mysql-server
Dann erstellen wir die Systemstart-Links für MySQL (damit MySQL automatisch startet, wenn das System hochfährt) und starten den MySQL-Server:
chkconfig --levels 235 mysqld on
/etc/init.d/mysqld start
Legen Sie Passwörter für das MySQL-Root-Konto fest:
mysql_secure_installation
[[email protected] ~]# mysql_secure_installation
NOTE: RUNNING ALL PARTS OF THIS SCRIPT IS RECOMMENDED FOR ALL MySQL
SERVERS IN PRODUCTION USE! PLEASE READ EACH STEP CAREFULLY!
In order to log into MySQL to secure it, we'll need the current
password for the root user. If you've just installed MySQL, and
you haven't set the root password yet, the password will be blank,
so you should just press enter here.
Enter current password for root (enter for none):
OK, successfully used password, moving on...
Setting the root password ensures that nobody can log into the MySQL
root user without the proper authorisation.
Set root password? [Y/n] <-- ENTER
New password: <-- yourrootsqlpassword
Re-enter new password: <-- yourrootsqlpassword
Password updated successfully!
Reloading privilege tables..
... Success!
By default, a MySQL installation has an anonymous user, allowing anyone
to log into MySQL without having to have a user account created for
them. This is intended only for testing, and to make the installation
go a bit smoother. You should remove them before moving into a
production environment.
Remove anonymous users? [Y/n] <-- ENTER
... Success!
Normally, root should only be allowed to connect from 'localhost'. This
ensures that someone cannot guess at the root password from the network.
Disallow root login remotely? [Y/n] <-- ENTER
... Success!
By default, MySQL comes with a database named 'test' that anyone can
access. This is also intended only for testing, and should be removed
before moving into a production environment.
Remove test database and access to it? [Y/n] <-- ENTER
- Dropping test database...
... Success!
- Removing privileges on test database...
... Success!
Reloading the privilege tables will ensure that all changes made so far
will take effect immediately.
Reload privilege tables now? [Y/n] <-- ENTER
... Success!
Cleaning up...
All done! If you've completed all of the above steps, your MySQL
installation should now be secure.
Thanks for using MySQL!
3 Installieren von Apache2
Apache2 ist als CentOS-Paket verfügbar, daher können wir es wie folgt installieren:
yum -y install httpd
Konfigurieren Sie nun Ihr System so, dass Apache beim Booten gestartet wird...
chkconfig --levels 235 httpd on
... und Apache starten:
/etc/init.d/httpd start
Leiten Sie nun Ihren Browser zu http://192.168.0.100, und Sie sollten die Apache2-Platzhalterseite sehen:
Das standardmäßige Dokumentenstammverzeichnis von Apache ist /var/www/html unter CentOS, und die Konfigurationsdatei ist /etc/httpd/conf/httpd.conf. Zusätzliche Konfigurationen werden im Verzeichnis /etc/httpd/conf.d/ gespeichert.
4 Installation von PHP5
Wir können PHP5 und das Apache PHP5-Modul wie folgt installieren:
yum -y install php
Danach müssen wir Apache neu starten:
/etc/init.d/httpd restart
5 Testen von PHP5 / Abrufen von Details zu Ihrer PHP5-Installation
Das Dokumentenstammverzeichnis der Standardwebsite ist /var/www/html. In diesem Verzeichnis erstellen wir nun eine kleine PHP-Datei (info.php) und rufen sie in einem Browser auf. Die Datei zeigt viele nützliche Details über unsere PHP-Installation an, wie z. B. die installierte PHP-Version.
vi /var/www/html/info.php
<?php phpinfo(); ?> |
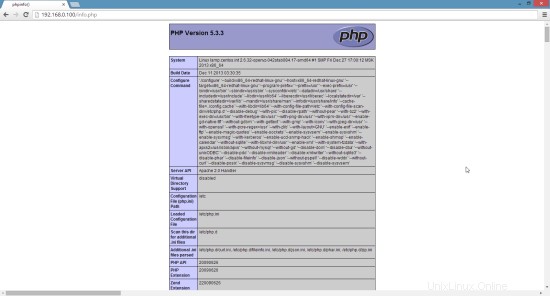
Nun nennen wir diese Datei in einem Browser (z. B. http://192.168.0.100/info.php):
Wie Sie sehen, funktioniert PHP5 und es funktioniert über den Apache 2.0 Handler, wie in der Server-API-Zeile gezeigt. Wenn Sie weiter nach unten scrollen, sehen Sie alle Module, die bereits in PHP5 aktiviert sind. MySQL ist dort nicht aufgeführt, was bedeutet, dass wir noch keine MySQL-Unterstützung in PHP5 haben.
6 MySQL-Unterstützung in PHP5 erhalten
Um MySQL-Unterstützung in PHP zu erhalten, können wir das Paket php-mysql installieren. Es ist eine gute Idee, einige andere PHP5-Module zu installieren, die Sie möglicherweise für Ihre Anwendungen benötigen. Sie können wie folgt nach verfügbaren PHP5-Modulen suchen:
yum search php
Wählen Sie die benötigten aus und installieren Sie sie wie folgt:
yum -y install php-mysql
Im nächsten Schritt werde ich einige gängige PHP-Module installieren, die von CMS-Systemen wie Wordpress, Joomla und Drupal benötigt werden:
yum -y install php-gd php-imap php-ldap php-odbc php-pear php-xml php-xmlrpc php-mbstring php-mcrypt php-mssql php-snmp php-soap php-tidy curl curl-devel
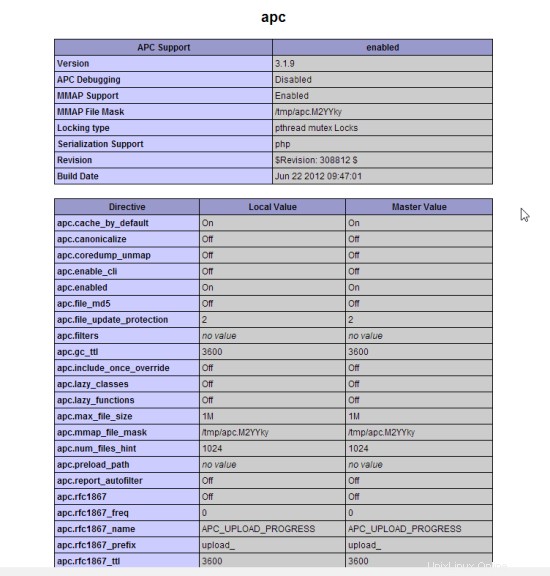
APC ist ein kostenloser und offener PHP-Opcode-Cacher zum Caching und Optimieren von PHP-Zwischencode. Es ähnelt anderen PHP-Opcode-Cachern wie eAccelerator und Xcache. Es wird dringend empfohlen, eines davon zu installieren, um Ihre PHP-Seite zu beschleunigen.
APC kann wie folgt installiert werden:
yum -y install php-pecl-apc
Starten Sie nun Apache2 neu:
/etc/init.d/httpd restart
Laden Sie nun http://192.168.0.100/info.php in Ihrem Browser neu und scrollen Sie erneut nach unten zum Modulbereich. Dort sollten Sie jetzt viele neue Module finden, einschließlich des APC-Moduls:
7 phpMyAdmin
phpMyAdmin ist eine Webschnittstelle, über die Sie Ihre MySQL-Datenbanken verwalten können.
Zuerst aktivieren wir das RPMforge-Repository auf unserem CentOS-System, da phpMyAdmin in den offiziellen CentOS 6.5-Repositorys nicht verfügbar ist:
Importieren Sie den RPMforge-GPG-Schlüssel:
rpm --import http://dag.wieers.com/rpm/packages/RPM-GPG-KEY.dag.txt
Auf x86_64-Systemen:
yum -y install http://pkgs.repoforge.org/rpmforge-release/rpmforge-release-0.5.3-1.el6.rf.x86_64.rpm
Auf i386-Systemen:
yum -y install http://pkgs.repoforge.org/rpmforge-release/rpmforge-release-0.5.3-1.el6.rf.i686.rpm
phpMyAdmin kann nun wie folgt installiert werden:
yum -y install phpmyadmin
Jetzt konfigurieren wir phpMyAdmin. Wir ändern die Apache-Konfiguration so, dass phpMyAdmin Verbindungen nicht nur von localhost zulässt (durch Auskommentieren der Zeilengruppe
vi /etc/httpd/conf.d/phpmyadmin.conf
# # Web application to manage MySQL # #<Directory "/usr/share/phpmyadmin"> # Order Deny,Allow # Deny from all # Allow from 127.0.0.1 #</Directory> Alias /phpmyadmin /usr/share/phpmyadmin Alias /phpMyAdmin /usr/share/phpmyadmin Alias /mysqladmin /usr/share/phpmyadmin |
Als nächstes ändern wir die Authentifizierung in phpMyAdmin von cookie auf http:
vi /usr/share/phpmyadmin/config.inc.php
[...] /* Authentication type */ $cfg['Servers'][$i]['auth_type'] = 'http'; [...] |
Starten Sie Apache neu:
/etc/init.d/httpd restart
Danach erreichen Sie phpMyAdmin unter http://192.168.0.100/phpmyadmin/:

8 Links
- Apache:http://httpd.apache.org/
- PHP:http://www.php.net/
- MySQL:http://www.mysql.com/
- CentOS:http://www.centos.org/
- phpMyAdmin:http://www.phpmyadmin.net/