Dieses Tutorial ist Copyright (c) 2013 von Falko Timme. Es ist abgeleitet von einem Tutorial von Christoph Haas, das Sie unter http://workaround.org finden. Es steht Ihnen frei, dieses Tutorial unter der Creative Commons-Lizenz 2.5 oder einer späteren Version zu verwenden.
Dieses Dokument beschreibt, wie Sie einen Postfix-Mailserver installieren, der auf virtuellen Benutzern und Domänen basiert, d. h. Benutzern und Domänen, die sich in einer MySQL-Datenbank befinden. Ich werde auch die Installation und Konfiguration von Courier (Courier-POP3, Courier-IMAP) demonstrieren, damit Courier sich bei derselben MySQL-Datenbank authentifizieren kann, die Postfix verwendet.
Der resultierende Postfix-Server ist SMTP-AUTH-fähig und TLS und Quote (Kontingent ist standardmäßig nicht in Postfix integriert, ich werde zeigen, wie Sie Ihr Postfix entsprechend patchen können). Passwörter werden verschlüsselt gespeichert Formular in der Datenbank (die meisten Dokumente, die ich gefunden habe, befassten sich mit Passwörtern im Klartext, was ein Sicherheitsrisiko darstellt). Darüber hinaus behandelt dieses Tutorial die Installation von Amavisd , SpamAssassin und ClamAV damit E-Mails auf Spam und Viren gescannt werden. Ich werde auch zeigen, wie man SquirrelMail installiert als Webmail-Schnittstelle, damit Benutzer E-Mails lesen und senden und ihre Passwörter ändern können.
Der Vorteil eines solchen „virtuellen“ Setups (virtuelle Benutzer und Domänen in einer MySQL-Datenbank) ist, dass es wesentlich performanter ist als ein Setup, das auf „echten“ Systembenutzern basiert. Mit diesem virtuellen Setup kann Ihr Mailserver Tausende von Domänen und Benutzern verwalten. Außerdem ist es einfacher zu administrieren, da Sie sich nur mit der MySQL-Datenbank befassen müssen, wenn Sie neue Benutzer/Domains hinzufügen oder bestehende bearbeiten. Keine Postmap-Befehle mehr zum Erstellen von db-Dateien, kein erneutes Laden von Postfix usw. Für die Verwaltung der MySQL-Datenbank können Sie webbasierte Tools wie phpMyAdmin verwenden, die auch in diesem Howto installiert werden. Der dritte Vorteil ist, dass Benutzer eine E-Mail-Adresse als Benutzernamen haben (statt Benutzername + E-Mail-Adresse), was einfacher zu verstehen und zu merken ist.
Dieses Howto ist als praktischer Leitfaden gedacht; es deckt nicht die theoretischen Hintergründe ab. Sie werden in vielen anderen Dokumenten im Internet behandelt.
Dieses Dokument wird ohne jegliche Gewährleistung geliefert! Ich möchte sagen, dass dies nicht die einzige Möglichkeit ist, ein solches System einzurichten. Es gibt viele Wege, dieses Ziel zu erreichen, aber ich gehe diesen Weg. Ich gebe keine Garantie dafür, dass dies bei Ihnen funktioniert!
1 Vorbemerkung
Dieses Tutorial basiert auf CentOS 6.3 x86_64, daher sollten Sie eine grundlegende CentOS 6.3-Serverinstallation einrichten, bevor Sie mit diesem Tutorial fortfahren. Das System sollte eine statische IP-Adresse haben. Ich verwende 192.168.0.100 als IP-Adresse in diesem Tutorial und server1.example.com als Hostnamen.
Stellen Sie sicher, dass die Firewall ausgeschaltet ist (zumindest für den Moment) und dass SELinux deaktiviert ist (Das ist wichtig!).
2 Zusätzliche Repositories aktivieren und einige Software installieren
Zuerst importieren wir die GPG-Schlüssel für Softwarepakete:
rpm --import /etc/pki/rpm-gpg/RPM-GPG-KEY*
Dann aktivieren wir die RPMforge- und EPEL-Repositories auf unserem CentOS-System, da viele der Pakete, die wir im Laufe dieses Tutorials installieren werden, nicht in den offiziellen CentOS 6.3-Repositories verfügbar sind:
rpm --import http://dag.wieers.com/rpm/packages/RPM-GPG-KEY.dag.txt
cd /tmp
wget http://pkgs.repoforge.org/rpmforge-release/rpmforge-release-0.5.2-2.el6.rf.x86_64.rpm
rpm -ivh rpmforge-release-0.5.2-2.el6.rf.x86_64.rpm
(Wenn der obige Link nicht mehr funktioniert, finden Sie die aktuelle Version von rpmforge-release hier:http://packages.sw.be/rpmforge-release/)
rpm --import https://fedoraproject.org/static/0608B895.txt
wget http://dl.fedoraproject.org/pub/epel/6/x86_64/epel-release-6-8.noarch.rpm
rpm -ivh epel-release-6-8.noarch.rpm
yum install yum-priorities
Bearbeiten Sie /etc/yum.repos.d/epel.repo...
vi /etc/yum.repos.d/epel.repo
... und fügen Sie die Zeile priority=10 zum Abschnitt [epel] hinzu:
[epel] name=Extra Packages for Enterprise Linux 6 - $basearch #baseurl=http://download.fedoraproject.org/pub/epel/6/$basearch mirrorlist=https://mirrors.fedoraproject.org/metalink?repo=epel-6&arch=$basearch failovermethod=priority enabled=1 priority=10 gpgcheck=1 gpgkey=file:///etc/pki/rpm-gpg/RPM-GPG-KEY-EPEL-6 [...] |
Dann aktualisieren wir unsere bestehenden Pakete auf dem System:
yum update
Jetzt installieren wir einige Software, die wir später brauchen:
yum groupinstall 'Development Tools'
3 Installieren Sie Apache, MySQL, phpMyAdmin
Dies kann alles mit einem einzigen Befehl installiert werden (einschließlich der Pakete, die wir zum Erstellen von Courier-IMAP benötigen):
yum install ntp httpd mysql-server php php-mysql php-mbstring rpm-build gcc mysql-devel openssl-devel cyrus-sasl-devel pkgconfig zlib-devel phpMyAdmin pcre-devel openldap-devel postgresql-devel expect libtool-ltdl-devel openldap-servers libtool gdbm-devel pam-devel gamin-devel libidn-devel db4-devel mod_ssl telnet sqlite-devel
4 Installieren Sie Courier-IMAP, Courier-Authlib und Maildrop
Leider gibt es keine RPM-Pakete für Courier-IMAP, Courier-Authlib und Maildrop, daher müssen wir sie selbst bauen.
RPM-Pakete sollten nicht als Root erstellt werden; courier-imap verweigert sogar die Kompilierung, wenn es feststellt, dass die Kompilierung als Root-Benutzer ausgeführt wird. Deshalb erstellen wir jetzt ein normales Benutzerkonto (in diesem Beispiel falko) und geben ihm ein Passwort:
useradd -m -s /bin/bash falko
passwd falko
Den sudo-Befehl benötigen wir später, damit der Benutzer falko die RPM-Pakete kompilieren und installieren kann. Aber zuerst müssen wir falko erlauben, alle Befehle mit sudo:
auszuführenAusführen
visudo
In der sich öffnenden Datei gibt es eine Zeile root ALL=(ALL) ALL. Fügen Sie direkt unter dieser Zeile eine ähnliche Zeile für falko hinzu:
[...] |
Jetzt können wir unser RPM-Paket erstellen. Werde zuerst der Benutzer falko:
su falko
Als nächstes erstellen wir unsere Build-Umgebung:
mkdir $HOME/rpm
mkdir $HOME/rpm/SOURCES
mkdir $HOME/rpm/SPECS
mkdir $HOME/rpm/BUILD
mkdir $HOME/rpm/BUILDROOT
mkdir $HOME/rpm/SRPMS
mkdir $HOME/rpm/RPMS
mkdir $HOME/rpm/RPMS/i386
mkdir $HOME/rpm/RPMS/x86_64
echo "%_topdir $HOME/rpm" >> $HOME/.rpmmacros
Jetzt erstellen wir ein Download-Verzeichnis und laden die Quelldateien von http://www.courier-mta.org/download.php:
heruntermkdir $HOME/downloads
cd $HOME/downloads
wget --no-check-certificate https://sourceforge.net/projects/courier/files/authlib/0.65.0/courier-authlib-0.65.0.tar.bz2/download
wget --no-check-certificate https://sourceforge.net/projects/courier/files/imap/4.12.0/courier-imap-4.12.0.tar.bz2/download
wget --no-check-certificate https://sourceforge.net/projects/courier/files/maildrop/2.6.0/maildrop-2.6.0.tar.bz2/download
Jetzt (immer noch in $HOME/downloads) können wir courier-authlib bauen:
sudo rpmbuild -ta courier-authlib-0.65.0.tar.bz2
Nach dem Erstellungsprozess finden Sie die RPM-Pakete in /root/rpmbuild/RPMS/x86_64 (/root/rpmbuild/RPMS/i386, wenn Sie sich auf einem i386-System befinden). Der Befehl
sudo ls -l /root/rpmbuild/RPMS/x86_64
zeigt Ihnen die verfügbaren RPM-Pakete:
[[email protected] downloads]$ sudo ls -l /root/rpmbuild/RPMS/x86_64
total 544
-rw-r--r-- 1 root root 126728 Mar  4 12:49 courier-authlib-0.65.0-1.el6.x86_64.rpm
-rw-r--r-- 1 root root 274772 Mar  4 12:49 courier-authlib-debuginfo-0.65.0-1.el6.x86_64.rpm
-rw-r--r-- 1 root root  37824 Mar  4 12:49 courier-authlib-devel-0.65.0-1.el6.x86_64.rpm
-rw-r--r-- 1 root root  17256 Mar  4 12:49 courier-authlib-ldap-0.65.0-1.el6.x86_64.rpm
-rw-r--r-- 1 root root  12000 Mar  4 12:49 courier-authlib-mysql-0.65.0-1.el6.x86_64.rpm
-rw-r--r-- 1 root root  12984 Mar  4 12:49 courier-authlib-pgsql-0.65.0-1.el6.x86_64.rpm
-rw-r--r-- 1 root root   8244 Mar  4 12:49 courier-authlib-pipe-0.65.0-1.el6.x86_64.rpm
-rw-r--r-- 1 root root  10620 Mar  4 12:49 courier-authlib-sqlite-0.65.0-1.el6.x86_64.rpm
-rw-r--r-- 1 root root  34644 Mar  4 12:49 courier-authlib-userdb-0.65.0-1.el6.x86_64.rpm
[[email protected] downloads]$
Wählen Sie diejenigen aus, die Sie installieren möchten, und installieren Sie sie wie folgt:
sudo rpm -ivh /root/rpmbuild/RPMS/x86_64/courier-authlib-0.65.0-1.el6.x86_64.rpm /root/rpmbuild/RPMS/x86_64/courier-authlib-mysql-0.65.0-1.el6.x86_64.rpm /root/rpmbuild/RPMS/x86_64/courier-authlib-devel-0.65.0-1.el6.x86_64.rpm
Jetzt gehen wir zurück zu unserem Download-Verzeichnis:
cd $HOME/downloads
Führen Sie die folgenden Befehle aus, um erforderliche Verzeichnisse zu erstellen/Verzeichnisberechtigungen zu ändern (da sonst der Erstellungsprozess für Courier-Imap fehlschlägt):
sudo mkdir -p /var/cache/ccache/tmp
sudo chmod o+rwx /var/cache/ccache/
sudo chmod 777 /var/cache/ccache/tmp
Führen Sie jetzt rpmbuild erneut aus, diesmal ohne sudo, sonst schlägt die Kompilierung fehl, weil sie als root ausgeführt wurde:
rpmbuild -ta courier-imap-4.12.0.tar.bz2
Nach dem Erstellungsprozess finden Sie die RPM-Pakete in $HOME/rpm/RPMS/x86_64 ($HOME/rpm/RPMS/i386, wenn Sie sich auf einem i386-System befinden):
cd $HOME/rpm/RPMS/x86_64
Der Befehl
ls -l
zeigt Ihnen die verfügbaren RPM-Pakete:
[[email protected] x86_64]$ ls -l
total 1116
-rw-rw-r-- 1 falko falko 332112 Mar  4 12:53 courier-imap-4.12.0-1.x86_64.rpm
-rw-rw-r-- 1 falko falko 805288 Mar  4 12:53 courier-imap-debuginfo-4.12.0-1.x86_64.rpm
[[email protected] x86_64]$
Sie können courier-imap wie folgt installieren:
sudo rpm -ivh courier-imap-4.12.0-1.x86_64.rpm
Jetzt gehen wir zurück zu unserem Download-Verzeichnis:
cd $HOME/downloads
und führen Sie rpmbuild erneut aus, diesmal um ein Maildrop-Paket zu erstellen:
sudo rpmbuild -ta maildrop-2.6.0.tar.bz2
Nach dem Erstellungsprozess finden Sie die RPM-Pakete in /root/rpmbuild/RPMS/x86_64 (/root/rpmbuild/RPMS/i386, wenn Sie sich auf einem i386-System befinden). Der Befehl
sudo ls -l /root/rpmbuild/RPMS/x86_64
zeigt Ihnen die verfügbaren RPM-Pakete:
[[email protected] downloads]$ sudo ls -l /root/rpmbuild/RPMS/x86_64
total 1732
-rw-r--r-- 1 root root 126728 Mar  4 12:49 courier-authlib-0.65.0-1.el6.x86_64.rpm
-rw-r--r-- 1 root root 274772 Mar  4 12:49 courier-authlib-debuginfo-0.65.0-1.el6.x86_64.rpm
-rw-r--r-- 1 root root  37824 Mar  4 12:49 courier-authlib-devel-0.65.0-1.el6.x86_64.rpm
-rw-r--r-- 1 root root  17256 Mar  4 12:49 courier-authlib-ldap-0.65.0-1.el6.x86_64.rpm
-rw-r--r-- 1 root root  12000 Mar  4 12:49 courier-authlib-mysql-0.65.0-1.el6.x86_64.rpm
-rw-r--r-- 1 root root  12984 Mar  4 12:49 courier-authlib-pgsql-0.65.0-1.el6.x86_64.rpm
-rw-r--r-- 1 root root   8244 Mar  4 12:49 courier-authlib-pipe-0.65.0-1.el6.x86_64.rpm
-rw-r--r-- 1 root root  10620 Mar  4 12:49 courier-authlib-sqlite-0.65.0-1.el6.x86_64.rpm
-rw-r--r-- 1 root root  34644 Mar  4 12:49 courier-authlib-userdb-0.65.0-1.el6.x86_64.rpm
-rw-r--r-- 1 root root 286752 Mar  4 13:03 maildrop-2.6.0-1.x86_64.rpm
-rw-r--r-- 1 root root 751304 Mar  4 13:03 maildrop-debuginfo-2.6.0-1.x86_64.rpm
-rw-r--r-- 1 root root 102052 Mar  4 13:03 maildrop-devel-2.6.0-1.x86_64.rpm
-rw-r--r-- 1 root root  66184 Mar  4 13:03 maildrop-man-2.6.0-1.x86_64.rpm
[[email protected] downloads]$
Sie können Maildrop jetzt wie folgt installieren:
sudo rpm -ivh /root/rpmbuild/RPMS/x86_64/maildrop-2.6.0-1.x86_64.rpm
Nachdem Sie alle benötigten Pakete kompiliert und installiert haben, können Sie wieder root werden, indem Sie
eingebenexit
5 Kontingent-Patch auf Postfix anwenden
Wir müssen das Postfix-Quell-RPM besorgen, es mit dem Quota-Patch patchen, ein neues Postfix-RPM-Paket erstellen und es installieren.
cd /usr/src
wget http://vault.centos.org/6.3/os/Source/SPackages/postfix-2.6.6-2.2.el6_1.src.rpm
rpm -ivh postfix-2.6.6-2.2.el6_1.src.rpm
Der letzte Befehl zeigt einige Warnungen, die Sie ignorieren können:
warning: user mockbuild does not exist - using root
warning: group mockbuild does not exist - using root
cd /root/rpmbuild/SOURCES
wget http://vda.sourceforge.net/VDA/postfix-2.6.5-vda-ng.patch.gz
gunzip postfix-2.6.5-vda-ng.patch.gz
cd /root/rpmbuild/SPECS/
Jetzt müssen wir die Datei postfix.spec bearbeiten:
vi postfix.spec
Fügen Sie Patch0:postfix-2.6.5-vda-ng.patch zur Zeilengruppe # Patches und %patch0 -p1 -b .vda-ng zur Zeilengruppe %setup -q hinzu:
[...] |
Dann bauen wir unser neues Postfix-RPM-Paket mit Quota- und MySQL-Unterstützung:
rpmbuild -ba postfix.spec
Unser Postfix-RPM-Paket wird in /root/rpmbuild/RPMS/x86_64 (/root/rpmbuild/RPMS/i386, wenn Sie sich auf einem i386-System befinden) erstellt, also gehen wir dorthin:
cd /root/rpmbuild/RPMS/x86_64
Der Befehl
ls -l
zeigt Ihnen die verfügbaren Pakete:
[[email protected] x86_64]# ls -l
total 10748
-rw-r--r-- 1 root root  126728 Mar  4 12:49 courier-authlib-0.65.0-1.el6.x86_64.rpm
-rw-r--r-- 1 root root  274772 Mar  4 12:49 courier-authlib-debuginfo-0.65.0-1.el6.x86_64.rpm
-rw-r--r-- 1 root root   37824 Mar  4 12:49 courier-authlib-devel-0.65.0-1.el6.x86_64.rpm
-rw-r--r-- 1 root root   17256 Mar  4 12:49 courier-authlib-ldap-0.65.0-1.el6.x86_64.rpm
-rw-r--r-- 1 root root   12000 Mar  4 12:49 courier-authlib-mysql-0.65.0-1.el6.x86_64.rpm
-rw-r--r-- 1 root root   12984 Mar  4 12:49 courier-authlib-pgsql-0.65.0-1.el6.x86_64.rpm
-rw-r--r-- 1 root root    8244 Mar  4 12:49 courier-authlib-pipe-0.65.0-1.el6.x86_64.rpm
-rw-r--r-- 1 root root   10620 Mar  4 12:49 courier-authlib-sqlite-0.65.0-1.el6.x86_64.rpm
-rw-r--r-- 1 root root   34644 Mar  4 12:49 courier-authlib-userdb-0.65.0-1.el6.x86_64.rpm
-rw-r--r-- 1 root root  286752 Mar  4 13:03 maildrop-2.6.0-1.x86_64.rpm
-rw-r--r-- 1 root root  751304 Mar  4 13:03 maildrop-debuginfo-2.6.0-1.x86_64.rpm
-rw-r--r-- 1 root root  102052 Mar  4 13:03 maildrop-devel-2.6.0-1.x86_64.rpm
-rw-r--r-- 1 root root   66184 Mar  4 13:03 maildrop-man-2.6.0-1.x86_64.rpm
-rw-r--r-- 1 root root 2138908 Mar  4 13:15 postfix-2.6.6-2.2.el6.x86_64.rpm
-rw-r--r-- 1 root root 7021184 Mar  4 13:15 postfix-debuginfo-2.6.6-2.2.el6.x86_64.rpm
-rw-r--r-- 1 root root   61752 Mar  4 13:15 postfix-perl-scripts-2.6.6-2.2.el6.x86_64.rpm
[[email protected] x86_64]#
Um sicherzustellen, dass zuvor keine Version von Postfix auf Ihrem System installiert war, verwenden Sie:
yum remove postfix
Wählen Sie das Postfix-Paket aus und installieren Sie es wie folgt:
rpm -ivh postfix-2.6.6-2.2.el6.x86_64.rpm
6 Legen Sie MySQL-Passwörter fest und konfigurieren Sie phpMyAdmin
Starten Sie MySQL:
chkconfig --levels 235 mysqld on
/etc/init.d/mysqld start
Legen Sie dann Passwörter für das MySQL-Root-Konto fest:
mysql_secure_installation
[[email protected] ~]# mysql_secure_installation
HINWEIS: DIE AUSFÜHRUNG ALLER TEILE DIESES SKRIPTS WIRD FÜR ALLE MySQL
SERVER IM PRODUKTIONSZWECK EMPFOHLEN ! BITTE JEDEN SCHRITT SORGFÄLTIG LESEN!
Um sich bei MySQL anzumelden, um es zu sichern, benötigen wir das aktuelle
Passwort für den Root-Benutzer. Wenn Sie gerade MySQL installiert und
das Root-Passwort noch nicht festgelegt haben, ist das Passwort leer,
also sollten Sie hier einfach die Eingabetaste drücken.
Enter Aktuelles Passwort für Root (Eingabe für keine): <-- ENTER
OK, erfolgreich verwendetes Passwort, weiter ...
Das Festlegen des Root-Passworts stellt sicher, dass sich niemand bei MySQL anmelden kann
Root-Benutzer ohne die entsprechende Berechtigung.
Root-Passwort festlegen? [Y/n] <-- ENTER
Neues Passwort: <-- yourrootsqlpassword
Neues Passwort erneut eingeben: <-- yourrootsqlpassword
Passwort erfolgreich aktualisiert!
Berechtigungstabellen werden neu geladen. .
... Erfolg!
Standardmäßig hat eine MySQL-Installation einen anonymen Benutzer, der erlaubt, dass sich jeder
bei MySQL anmelden kann, ohne einen Benutzeraccount haben zu müssen für
sie erstellt. Dies ist nur zum Testen sollte und damit die Installation
etwas flüssiger läuft. Sie sollten sie entfernen, bevor Sie in eine
Produktionsumgebung wechseln.
Anonyme Benutzer entfernen? [Y/n] <-- ENTER
... Erfolgreich!
Normalerweise sollte root nur erlaubt werden, sich von 'localhost' aus zu verbinden. Dies
stellt sicher, dass niemand das Root-Passwort aus dem Netzwerk erraten kann.
Root-Anmeldung aus der Ferne nicht zulassen? [J/n] <-- EINGABE
... Erfolg!
Standardmäßig wird MySQL mit einer Datenbank namens "test" geliefert, auf die jeder
zugreifen kann. Dies ist ebenfalls nur zum Testen vorgesehen und sollte entfernt werden
bevor in eine Produktionsumgebung umgezogen wird.
Testdatenbank und Zugriff darauf entfernen? [Y/n] <-- ENTER
- Testdatenbank wird gelöscht...
... Erfolg!
- Berechtigungen für Testdatenbank entfernen...
... Erfolg !
Das Neuladen der Berechtigungstabellen stellt sicher, dass alle bisher vorgenommenen Änderungen
sofort wirksam werden.
Berechtigungstabellen jetzt neu laden? [Y/n] <-- EINGABE
... Erfolg!
Aufräumen ...
Alle fertig! Wenn Sie alle oben genannten Schritte ausgeführt haben, sollte Ihre MySQL-Installation
jetzt sicher sein.
Vielen Dank, dass Sie MySQL verwenden!
[[ E-Mail-geschützt] ~]#
Jetzt konfigurieren wir phpMyAdmin. Wir ändern die Apache-Konfiguration so, dass phpMyAdmin Verbindungen nicht nur von localhost zulässt (durch Auskommentieren der Zeilengruppe
vi /etc/httpd/conf.d/phpMyAdmin.conf
[...]zulassen |
Dann erstellen wir die Systemstartlinks für Apache und starten es:
chkconfig --levels 235 httpd on
/etc/init.d/httpd start
Jetzt können Sie Ihren Browser auf http://server1.example.com/phpMyAdmin/ oder http://192.168.0.100/phpMyAdmin/ leiten und sich mit dem Benutzernamen root und Ihrem neuen root-MySQL-Passwort anmelden.
7 Erstellen Sie die MySQL-Datenbank für Postfix/Courier
Wir erstellen eine Datenbank namens mail:
mysqladmin -u root -p create mail
Als nächstes gehen wir zur MySQL-Shell:
mysql -u root -p
Auf der MySQL-Shell erstellen wir den Benutzer mail_admin mit dem Passwort mail_admin_password (ersetzen Sie es durch Ihr eigenes Passwort), der die Berechtigungen SELECT, INSERT, UPDATE, DELETE in der Mail-Datenbank hat. Dieser Benutzer wird von Postfix und Courier verwendet, um sich mit der Mail-Datenbank zu verbinden:
GRANT SELECT, INSERT, UPDATE, DELETE ON mail.* TO 'mail_admin'@'localhost' IDENTIFIED BY 'mail_admin_password';
GRANT SELECT, INSERT, UPDATE, DELETE ON mail.* TO 'mail_admin'@'localhost.localdomain' IDENTIFIED BY 'mail_admin_password';
FLUSH PRIVILEGES;
Immer noch auf der MySQL-Shell erstellen wir die Tabellen, die Postfix und Courier benötigen:
USE mail;
CREATE TABLE domains (
domain varchar(50) NOT NULL,
PRIMARY KEY (domain) )
ENGINE=MyISAM;
CREATE TABLE forwardings (
source varchar(80) NOT NULL,
destination TEXT NOT NULL,
PRIMARY KEY (source) )
ENGINE=MyISAM;
CREATE TABLE users (
email varchar(80) NOT NULL,
password varchar(20) NOT NULL,
quota bigint(20) DEFAULT '10485760',
PRIMARY KEY (email)
) ENGINE=MyISAM;
CREATE TABLE transport (
domain varchar(128) NOT NULL default '',
transport varchar(128) NOT NULL default '',
UNIQUE KEY domain (domain)
) ENGINE=MyISAM;
quit;
Wie Sie vielleicht bemerkt haben, wird mit quit; Befehl haben wir die MySQL-Shell verlassen und befinden uns wieder auf der Linux-Shell.
Die Domänen Tabelle speichert jede virtuelle Domain, für die Postfix E-Mails erhalten soll (z. B. example.com ).
| Domäne |
| beispiel.com |
Die Weiterleitungen Tabelle dient zum Aliasing einer E-Mail-Adresse zu einer anderen, z. E-Mails für [email protected] weiterleiten an [email protected] .
| Quelle | Ziel |
| [E-Mail-geschützt] | [E-Mail-geschützt] |
Die Benutzer Tabelle speichert alle virtuellen Benutzer (d. h. E-Mail-Adressen, weil E-Mail-Adresse und Benutzername identisch sind) und Passwörter (in verschlüsselt Formular!) und einen Kontingentwert für jedes Postfach (in diesem Beispiel ist der Standardwert 10485760 Bytes, was 10 MB entspricht).
| Passwort | Kontingent | |
| [E-Mail-geschützt] | No9.E4skNvGa. ("geheim" in verschlüsselter Form) | 10485760 |
Der Transport Tabelle ist optional, sie ist für fortgeschrittene Benutzer. Es erlaubt, Mails für einzelne Benutzer, ganze Domänen oder alle Mails an einen anderen Server weiterzuleiten. Zum Beispiel
| Domäne | Transport |
| beispiel.com | smtp:[1.2.3.4] |
würde alle E-Mails für example.com weiterleiten über das SMTP-Protokoll an den Server mit der IP-Adresse 1.2.3.4 (die eckigen Klammern [] bedeutet "keine Suche nach dem MX-DNS-Eintrag durchführen" (was für IP-Adressen sinnvoll ist ...). Wenn Sie stattdessen einen vollständig qualifizierten Domänennamen (FQDN) verwenden, würden Sie die eckigen Klammern nicht verwenden.).
8 Postfix konfigurieren
Jetzt müssen wir Postfix mitteilen, wo es alle Informationen in der Datenbank finden kann. Dazu müssen wir sechs Textdateien erstellen. Sie werden feststellen, dass ich Postfix anweise, sich mit MySQL über die IP-Adresse 127.0.0.1 zu verbinden statt localhost . Dies liegt daran, dass Postfix in einem Chroot-Gefängnis läuft und keinen Zugriff auf den MySQL-Socket hat, den es zu verbinden versuchen würde, wenn ich Postfix sage, dass es localhost verwenden soll . Wenn ich 127.0.0.1 verwende Postfix verwendet TCP-Netzwerke, um sich mit MySQL zu verbinden, was selbst in einem Chroot-Gefängnis kein Problem darstellt (die Alternative wäre, den MySQL-Socket in das Chroot-Gefängnis zu verschieben, was einige andere Probleme verursacht).
Lassen Sie uns nun unsere sechs Textdateien erstellen.
vi /etc/postfix/mysql-virtual_domains.cf
user = mail_admin |
vi /etc/postfix/mysql-virtual_forwardings.cf
user = mail_admin |
vi /etc/postfix/mysql-virtual_mailboxes.cf
user = mail_admin |
vi /etc/postfix/mysql-virtual_email2email.cf
user = mail_admin |
vi /etc/postfix/mysql-virtual_transports.cf
user = mail_admin |
vi /etc/postfix/mysql-virtual_mailbox_limit_maps.cf
user = mail_admin |
chmod o= /etc/postfix/mysql-virtual_*.cf
chgrp postfix /etc/postfix/mysql-virtual_*.cf
Jetzt erstellen wir einen Benutzer und eine Gruppe namens vmail mit dem Home-Verzeichnis /home/vmail . Hier werden alle Postfächer gespeichert.
groupadd -g 5000 vmail
useradd -g vmail -u 5000 vmail -d /home/vmail -m
Als nächstes nehmen wir eine Postfix-Konfiguration vor. Stellen Sie sicher, dass Sie server1.example.com ersetzen mit einem gültigen FQDN, sonst funktioniert Ihr Postfix möglicherweise nicht richtig!
postconf -e 'myhostname = server1.example.com'
postconf -e 'mydestination = server1.example.com, localhost, localhost.localdomain'
postconf -e 'mynetworks = 127.0.0.0/8'
postconf -e 'virtual_alias_domains ='
postconf -e ' virtual_alias_maps = proxy:mysql:/etc/postfix/mysql-virtual_forwardings.cf, mysql:/etc/postfix/mysql-virtual_email2email.cf'
postconf -e 'virtual_mailbox_domains = proxy:mysql:/etc/postfix/mysql-virtual_domains.cf'
postconf -e 'virtual_mailbox_maps = proxy:mysql:/etc/postfix/mysql-virtual_mailboxes.cf'
postconf -e 'virtual_mailbox_base = /home/vmail'
postconf -e 'virtual_uid_maps = static:5000'
postconf -e 'virtual_gid_maps = static:5000'
postconf -e 'smtpd_sasl_auth_enable = yes'
postconf -e 'broken_sasl_auth_clients = yes'
postconf -e 'smtpd_sasl_authenticated_header = yes'
postconf -e 'smtpd_recipient_restrictions = permit_mynetworks, permit_sasl_authenticated, reject_unauth_destination'
postconf -e 'smtpd_use_tls = yes'
postconf -e 'smtpd_tls_cert_file = /etc/postfix/smtpd.cert'
postconf -e 'smtpd_tls_key_file = /etc/postfix/smtpd.key'
postconf -e 'transport_maps = proxy:mysql:/etc/postfix/mysql-virtual_transports.cf'
postconf -e 'virtual_create_maildirsize = yes'
postconf -e 'virtual_maildir_extended = yes'
postconf -e 'virtual_mailbox_limit_maps = proxy:mysql:/etc/postfix/mysql-virtual_mailbox_limit_maps.cf'
postconf -e 'virtual_mailbox_limit_override = yes'
postconf -e 'virtual_maildir_limit_message = "The user you are trying to reach is over quota."'
postconf -e 'virtual_overquota_bounce = yes'
postconf -e 'proxy_read_maps = $local_recipient_maps $mydestination $virtual_alias_maps $virtual_alias_domains $virtual_mailbox_maps $virtual_mailbox_domains $relay_recipient_maps $relay_domains $canonical_maps $sender_canonical_maps $recipient_canonical_maps $relocated_maps $transport_maps $mynetworks $virtual_mailbox_limit_maps'
postconf -e 'inet_interfaces = all'
Anschließend erstellen wir das für TLS benötigte SSL-Zertifikat :
cd /etc/postfix
openssl req -new -outform PEM -out smtpd.cert -newkey rsa:2048 -nodes -keyout smtpd.key -keyform PEM -days 365 -x509
Ländername (2-Buchstaben-Code) [XX]:<-- Geben Sie Ihren Ländernamen ein (z. B. "DE").
Staats- oder Provinzname (vollständiger Name) []:<-- Geben Sie Ihren Staats- oder Provinznamen ein .
Ortsname (z. B. Stadt) [Standardstadt]:<-- Geben Sie Ihre Stadt ein.
Organisationsname (z. B. Firma) [Standardfirma GmbH]:<-- Geben Sie Ihren Organisationsnamen ein (z. B. , der Name Ihres Unternehmens).
Name der Organisationseinheit (z. B. Abschnitt) []:<-- Geben Sie den Namen Ihrer Organisationseinheit ein (z. B. "IT-Abteilung").
Allgemeiner Name (z. B. Ihr Name oder den Hostnamen Ihres Servers) []:<-- Geben Sie den vollständig qualifizierten Domänennamen des Systems ein (z. B. "server1.example.com").
E-Mail-Adresse []:<-- Geben Sie Ihre E-Mail-Adresse ein.
Ändern Sie dann die Berechtigungen des smtpd.key:
chmod o= /etc/postfix/smtpd.key
9 Saslauthd konfigurieren
Bearbeiten Sie /etc/sasl2/smtpd.conf. Es sollte so aussehen:
vi /etc/sasl2/smtpd.conf
pwcheck_method: authdaemond |
Deaktivieren Sie dann Sendmail und starten Sie Postfix, saslauthd und courier-authlib:
chmod 755 /var/spool/authdaemon
chkconfig --levels 235 courier-authlib on
/etc/init.d/courier-authlib start
chkconfig --levels 235 sendmail off
chkconfig --levels 235 postfix on
chkconfig --levels 235 saslauthd on
/etc/init.d/sendmail stop
/etc/init.d/postfix start
/etc/init.d/saslauthd start
10 Kurier konfigurieren
Jetzt müssen wir Courier mitteilen, dass es sich gegen unsere MySQL-Datenbank authentifizieren soll. Bearbeiten Sie zuerst /etc/authlib/authdaemonrc und ändern Sie den Wert von authmodulelist damit es lautet
vi /etc/authlib/authdaemonrc
[...] |
Bearbeiten Sie dann /etc/authlib/authmysqlrc. Es sollte genau so aussehen (achten Sie auch hier darauf, die richtigen Datenbankdetails einzugeben):
cp /etc/authlib/authmysqlrc /etc/authlib/authmysqlrc_orig
cat /dev/null > /etc/authlib/authmysqlrc
vi /etc/authlib/authmysqlrc
MYSQL_SERVER localhost |
Starten Sie dann Courier neu:
chkconfig --levels 235 courier-imap on
/etc/init.d/courier-authlib restart
/etc/init.d/courier-imap restart
Wenn courier-imap das erste Mal gestartet wird, erstellt es automatisch die Zertifikatsdateien /usr/lib/courier-imap/share/imapd.pem und /usr/lib/courier-imap/share/pop3d.pem aus dem Verzeichnis /usr /lib/courier-imap/etc/imapd.cnf- und /usr/lib/courier-imap/etc/pop3d.cnf-Dateien. Da die .cnf-Dateien die Zeile CN=localhost enthalten, unser Server aber server1.example.com heißt, können die Zertifikate Probleme verursachen, wenn Sie TLS-Verbindungen verwenden. Um dies zu lösen, löschen wir beide Zertifikate...
cd /usr/lib/courier-imap/share
rm -f imapd.pem
rm -f pop3d.pem
... und ersetzen Sie die Zeilen CN=localhost in /usr/lib/courier-imap/etc/imapd.cnf und /usr/lib/courier-imap/etc/pop3d.cnf durch CN=server1.example.com:
vi /usr/lib/courier-imap/etc/imapd.cnf
[...] |
vi /usr/lib/courier-imap/etc/pop3d.cnf
[...] |
Dann erstellen wir beide Zertifikate neu...
./mkimapdcert
./mkpop3dcert
... und starten Sie courier-authlib und courier-imap neu:
/etc/init.d/courier-authlib restart
/etc/init.d/courier-imap restart
Durch Ausführen
telnet localhost pop3
können Sie sehen, ob Ihr POP3-Server ordnungsgemäß funktioniert. Es sollte +OK Hallo zusammen zurückgeben . (geben Sie quit ein zurück zur Linux-Shell):
[[email protected] share]# telnet localhost pop3
Trying ::1...
Connected to localhost.
Escape-Zeichen ist '^]'.
+OK Hallo .
<-- beenden
+OK Viel Glück beim nächsten Mal.
Verbindung von fremdem Host geschlossen.
[[email protected] share]#
11 /etc/aliases ändern
Jetzt sollten wir /etc/aliases öffnen. Stellen Sie sicher, dass postmaster auf root zeigt und root auf Ihren eigenen Benutzernamen oder Ihre E-Mail-Adresse, z. so:
vi /etc/aliases
[...] |
oder so (wenn Administrator Ihr eigener Benutzername ist):
[...] |
Wann immer Sie /etc/aliases ändern, müssen Sie
ausführennewaliases
anschließend Postfix neu starten:
/etc/init.d/postfix restart
12 Installieren Sie Amavisd-new, SpamAssassin und ClamAV
Führen Sie den folgenden Befehl aus, um amavisd-new, spamassassin und clamav zu installieren:
yum install amavisd-new spamassassin clamav clamd unzip bzip2 unrar perl-DBD-mysql
Jetzt müssen wir /etc/amavisd/amavisd.conf bearbeiten.
vi /etc/amavisd/amavisd.conf
In dieser Datei ändern wir fünf Stellen:
1) Ändern
$mydomain = 'example.com'; # a convenient default for other settings |
zu
$mydomain = 'localhost'; |
2) Ändern
$sa_tag_level_deflt = 2.0; # add spam info headers if at, or above that level |
zu
$sa_tag_level_deflt = 2.0; # add spam info headers if at, or above that level |
(Natürlich können Sie den Spam-Score nach Ihren Wünschen anpassen.)
3) Ändern
# @lookup_sql_dsn = |
zu
# @lookup_sql_dsn = |
(Stellen Sie sicher, dass Sie die richtigen Datenbankdetails eingeben!)
4) Ändern
# $recipient_delimiter = '+'; # undef disables address extensions altogether |
zu
$recipient_delimiter = undef; # undef disables address extensions altogether |
5) Ändern
$final_virus_destiny = D_DISCARD; |
zu
$final_virus_destiny = D_REJECT; |
(Natürlich liegt es an Ihnen, zu entscheiden, was mit Spam und Viren passieren soll. Ich entscheide mich, Spam zu akzeptieren (D_PASS), damit Spam in meinem E-Mail-Client mit einer einfachen Filterregel (basierend auf dem Betreff, der umgeschrieben wird) gefiltert werden kann amavisd-new, wenn es eine Mail für Spam hält.) Die erlaubten Aktionen (D_PASS, D_DISCARD, D_BOUNCE und D_REJECT) werden hier erklärt:http://www.ijs.si/software/amavisd/amavisd-new-docs.html #Aktionen)
Nach meinen Änderungen sieht /etc/amavisd/amavisd.conf so aus:
use strict;
# a minimalistic configuration file for amavisd-new with all necessary settings
#
# see amavisd.conf-default for a list of all variables with their defaults;
# see amavisd.conf-sample for a traditional-style commented file;
# for more details see documentation in INSTALL, README_FILES/*
# and at http://www.ijs.si/software/amavisd/amavisd-new-docs.html
# COMMONLY ADJUSTED SETTINGS:
# @bypass_virus_checks_maps = (1); # controls running of anti-virus code
# @bypass_spam_checks_maps = (1); # controls running of anti-spam code
# $bypass_decode_parts = 1; # controls running of decoders&dearchivers
$max_servers = 2; # num of pre-forked children (2..30 is common), -m
$daemon_user = 'amavis'; # (no default; customary: vscan or amavis), -u
$daemon_group = 'amavis'; # (no default; customary: vscan or amavis), -g
$mydomain = 'localhost';
#$mydomain = 'example.com';   # a convenient default for other settings
$MYHOME = '/var/spool/amavisd'; # a convenient default for other settings, -H
$TEMPBASE = "$MYHOME/tmp"; # working directory, needs to exist, -T
$ENV{TMPDIR} = $TEMPBASE; # environment variable TMPDIR, used by SA, etc.
$QUARANTINEDIR = undef; # -Q
# $quarantine_subdir_levels = 1; # add level of subdirs to disperse quarantine
# $release_format = 'resend'; # 'attach', 'plain', 'resend'
# $report_format = 'arf'; # 'attach', 'plain', 'resend', 'arf'
# $daemon_chroot_dir = $MYHOME; # chroot directory or undef, -R
$db_home = "$MYHOME/db"; # dir for bdb nanny/cache/snmp databases, -D
# $helpers_home = "$MYHOME/var"; # working directory for SpamAssassin, -S
$lock_file = "/var/run/amavisd/amavisd.lock"; # -L
$pid_file = "/var/run/amavisd/amavisd.pid"; # -P
#NOTE: create directories $MYHOME/tmp, $MYHOME/var, $MYHOME/db manually
$log_level = 0; # verbosity 0..5, -d
$log_recip_templ = undef; # disable by-recipient level-0 log entries
$DO_SYSLOG = 1; # log via syslogd (preferred)
$syslog_facility = 'mail'; # Syslog facility as a string
# e.g.: mail, daemon, user, local0, ... local7
$syslog_priority = 'debug'; # Syslog base (minimal) priority as a string,
# choose from: emerg, alert, crit, err, warning, notice, info, debug
$enable_db = 1; # enable use of BerkeleyDB/libdb (SNMP and nanny)
$enable_global_cache = 1; # enable use of libdb-based cache if $enable_db=1
$nanny_details_level = 2; # nanny verbosity: 1: traditional, 2: detailed
$enable_dkim_verification = 1; # enable DKIM signatures verification
$enable_dkim_signing = 1; # load DKIM signing code, keys defined by dkim_key
@local_domains_maps = ( [".$mydomain"] ); # list of all local domains
@mynetworks = qw( 127.0.0.0/8 [::1] [FE80::]/10 [FEC0::]/10
10.0.0.0/8 172.16.0.0/12 192.168.0.0/16 );
$unix_socketname = "$MYHOME/amavisd.sock"; # amavisd-release or amavis-milter
# option(s) -p overrides $inet_socket_port and $unix_socketname
$inet_socket_port = 10024; # listen on this local TCP port(s)
# $inet_socket_port = [10024,10026]; # listen on multiple TCP ports
$policy_bank{'MYNETS'} = { # mail originating from @mynetworks
originating => 1, # is true in MYNETS by default, but let's make it explicit
os_fingerprint_method => undef, # don't query p0f for internal clients
};
# it is up to MTA to re-route mail from authenticated roaming users or
# from internal hosts to a dedicated TCP port (such as 10026) for filtering
$interface_policy{'10026'} = 'ORIGINATING';
$policy_bank{'ORIGINATING'} = { # mail supposedly originating from our users
originating => 1, # declare that mail was submitted by our smtp client
allow_disclaimers => 1, # enables disclaimer insertion if available
# notify administrator of locally originating malware
virus_admin_maps => ["virusalert\@$mydomain"],
spam_admin_maps => ["virusalert\@$mydomain"],
warnbadhsender => 1,
# forward to a smtpd service providing DKIM signing service
forward_method => 'smtp:[127.0.0.1]:10027',
# force MTA conversion to 7-bit (e.g. before DKIM signing)
smtpd_discard_ehlo_keywords => ['8BITMIME'],
bypass_banned_checks_maps => [1], # allow sending any file names and types
terminate_dsn_on_notify_success => 0, # don't remove NOTIFY=SUCCESS option
};
$interface_policy{'SOCK'} = 'AM.PDP-SOCK'; # only applies with $unix_socketname
# Use with amavis-release over a socket or with Petr Rehor's amavis-milter.c
# (with amavis-milter.c from this package or old amavis.c client use 'AM.CL'):
$policy_bank{'AM.PDP-SOCK'} = {
protocol => 'AM.PDP',
auth_required_release => 0, # do not require secret_id for amavisd-release
};
$sa_tag_level_deflt  = 2.0;  # add spam info headers if at, or above that level
$sa_tag2_level_deflt = 4.0;  # add 'spam detected' headers at that level
$sa_kill_level_deflt = $sa_tag2_level_deflt;  # triggers spam evasive actions (e.g. blocks mail)
$sa_dsn_cutoff_level = 10;   # spam level beyond which a DSN is not sent

#$sa_tag_level_deflt  = 2.0;  # add spam info headers if at, or above that level
#$sa_tag2_level_deflt = 6.2;  # add 'spam detected' headers at that level
#$sa_kill_level_deflt = 6.9;  # triggers spam evasive actions (e.g. blocks mail)
#$sa_dsn_cutoff_level = 10;   # spam level beyond which a DSN is not sent
$sa_crediblefrom_dsn_cutoff_level = 18; # likewise, but for a likely valid From
# $sa_quarantine_cutoff_level = 25; # spam level beyond which quarantine is off
$penpals_bonus_score = 8; # (no effect without a @storage_sql_dsn database)
$penpals_threshold_high = $sa_kill_level_deflt; # don't waste time on hi spam
$bounce_killer_score = 100; # spam score points to add for joe-jobbed bounces
$sa_mail_body_size_limit = 400*1024; # don't waste time on SA if mail is larger
$sa_local_tests_only = 0; # only tests which do not require internet access?
# @lookup_sql_dsn =
#   ( ['DBI:mysql:database=mail;host=127.0.0.1;port=3306', 'user1', 'passwd1'],
#     ['DBI:mysql:database=mail;host=host2', 'username2', 'password2'],
#     ["DBI:SQLite:dbname=$MYHOME/sql/mail_prefs.sqlite", '', ''] );
# @storage_sql_dsn = @lookup_sql_dsn;  # none, same, or separate database
@lookup_sql_dsn =
( ['DBI:mysql:database=mail;host=127.0.0.1;port=3306', 'mail_admin', 'mail_admin_password'] );
$sql_select_policy = 'SELECT "Y" as local FROM domains WHERE CONCAT("@",domain) IN (%k)';
$sql_select_white_black_list = undef; # undef disables SQL white/blacklisting
$recipient_delimiter = '+'; # (default is '+')
$replace_existing_extension = 1; # (default is false)
$localpart_is_case_sensitive = 0; # (default is false)
# $timestamp_fmt_mysql = 1; # if using MySQL *and* msgs.time_iso is TIMESTAMP;
# defaults to 0, which is good for non-MySQL or if msgs.time_iso is CHAR(16)
$virus_admin = undef; # notifications recip.
$mailfrom_notify_admin = undef; # notifications sender
$mailfrom_notify_recip = undef; # notifications sender
$mailfrom_notify_spamadmin = undef; # notifications sender
$mailfrom_to_quarantine = ''; # null return path; uses original sender if undef
@addr_extension_virus_maps = ('virus');
@addr_extension_banned_maps = ('banned');
@addr_extension_spam_maps = ('spam');
@addr_extension_bad_header_maps = ('badh');
$recipient_delimiter = undef; # undef disables address extensions altogether
# $recipient_delimiter = '+';  # undef disables address extensions altogether
# when enabling addr extensions do also Postfix/main.cf: recipient_delimiter=+
$path = '/usr/local/sbin:/usr/local/bin:/usr/sbin:/sbin:/usr/bin:/bin';
# $dspam = 'dspam';
$MAXLEVELS = 14;
$MAXFILES = 1500;
$MIN_EXPANSION_QUOTA = 100*1024; # bytes (default undef, not enforced)
$MAX_EXPANSION_QUOTA = 300*1024*1024; # bytes (default undef, not enforced)
$sa_spam_subject_tag = '***SPAM*** ';
$defang_virus = 1; # MIME-wrap passed infected mail
$defang_banned = 1; # MIME-wrap passed mail containing banned name
# for defanging bad headers only turn on certain minor contents categories:
$defang_by_ccat{+CC_BADH.",3"} = 1; # NUL or CR character in header
$defang_by_ccat{+CC_BADH.",5"} = 1; # header line longer than 998 characters
$defang_by_ccat{+CC_BADH.",6"} = 1; # header field syntax error
# OTHER MORE COMMON SETTINGS (defaults may suffice):
# $myhostname = 'host.example.com'; # must be a fully-qualified domain name!
# $notify_method = 'smtp:[127.0.0.1]:10025';
# $forward_method = 'smtp:[127.0.0.1]:10025'; # set to undef with milter!
$final_virus_destiny      = D_REJECT;
$final_banned_destiny     = D_REJECT;
$final_spam_destiny       = D_PASS;
$final_bad_header_destiny = D_PASS;

#$final_virus_destiny      = D_DISCARD;
#$final_banned_destiny     = D_BOUNCE;
#$final_spam_destiny       = D_DISCARD;
#$final_bad_header_destiny = D_BOUNCE;
# $bad_header_quarantine_method = undef;
# $os_fingerprint_method = 'p0f:*:2345'; # to query p0f-analyzer.pl
## hierarchy by which a final setting is chosen:
## policy bank (based on port or IP address) -> *_by_ccat
## *_by_ccat (based on mail contents) -> *_maps
## *_maps (based on recipient address) -> final configuration value
# SOME OTHER VARIABLES WORTH CONSIDERING (see amavisd.conf-default for all)
# $warnbadhsender,
# $warnvirusrecip, $warnbannedrecip, $warnbadhrecip, (or @warn*recip_maps)
#
# @bypass_virus_checks_maps, @bypass_spam_checks_maps,
# @bypass_banned_checks_maps, @bypass_header_checks_maps,
#
# @virus_lovers_maps, @spam_lovers_maps,
# @banned_files_lovers_maps, @bad_header_lovers_maps,
#
# @blacklist_sender_maps, @score_sender_maps,
#
# $clean_quarantine_method, $virus_quarantine_to, $banned_quarantine_to,
# $bad_header_quarantine_to, $spam_quarantine_to,
#
# $defang_bad_header, $defang_undecipherable, $defang_spam
# REMAINING IMPORTANT VARIABLES ARE LISTED HERE BECAUSE OF LONGER ASSIGNMENTS
@keep_decoded_original_maps = (new_RE(
qr'^MAIL$', # retain full original message for virus checking
qr'^MAIL-UNDECIPHERABLE$', # recheck full mail if it contains undecipherables
qr'^(ASCII(?! cpio)|text|uuencoded|xxencoded|binhex)'i,
# qr'^Zip archive data', # don't trust Archive::Zip
));
# for $banned_namepath_re (a new-style of banned table) see amavisd.conf-sample
$banned_filename_re = new_RE(
### BLOCKED ANYWHERE
# qr'^UNDECIPHERABLE$', # is or contains any undecipherable components
qr'^\.(exe-ms|dll)$', # banned file(1) types, rudimentary
# qr'^\.(exe|lha|tnef|cab|dll)$', # banned file(1) types
### BLOCK THE FOLLOWING, EXCEPT WITHIN UNIX ARCHIVES:
# [ qr'^\.(gz|bz2)$' => 0 ], # allow any in gzip or bzip2
[ qr'^\.(rpm|cpio|tar)$' => 0 ], # allow any in Unix-type archives
qr'.\.(pif|scr)$'i, # banned extensions - rudimentary
# qr'^\.zip$', # block zip type
### BLOCK THE FOLLOWING, EXCEPT WITHIN ARCHIVES:
# [ qr'^\.(zip|rar|arc|arj|zoo)$'=> 0 ], # allow any within these archives
qr'^application/x-msdownload$'i, # block these MIME types
qr'^application/x-msdos-program$'i,
qr'^application/hta$'i,
# qr'^message/partial$'i, # rfc2046 MIME type
# qr'^message/external-body$'i, # rfc2046 MIME type
# qr'^(application/x-msmetafile|image/x-wmf)$'i, # Windows Metafile MIME type
# qr'^\.wmf$', # Windows Metafile file(1) type
# block certain double extensions in filenames
qr'\.[^./]*[A-Za-z][^./]*\.\s*(exe|vbs|pif|scr|bat|cmd|com|cpl|dll)[.\s]*$'i,
# qr'\{[0-9a-f]{8}(-[0-9a-f]{4}){3}-[0-9a-f]{12}\}?'i, # Class ID CLSID, strict
# qr'\{[0-9a-z]{4,}(-[0-9a-z]{4,}){0,7}\}?'i, # Class ID extension CLSID, loose
qr'.\.(exe|vbs|pif|scr|cpl)$'i, # banned extension - basic
# qr'.\.(exe|vbs|pif|scr|cpl|bat|cmd|com)$'i, # banned extension - basic+cmd
# qr'.\.(ade|adp|app|bas|bat|chm|cmd|com|cpl|crt|emf|exe|fxp|grp|hlp|hta|
# inf|ins|isp|js|jse|lnk|mda|mdb|mde|mdw|mdt|mdz|msc|msi|msp|mst|
# ops|pcd|pif|prg|reg|scr|sct|shb|shs|vb|vbe|vbs|
# wmf|wsc|wsf|wsh)$'ix, # banned ext - long
# qr'.\.(ani|cur|ico)$'i, # banned cursors and icons filename
# qr'^\.ani$', # banned animated cursor file(1) type
# qr'.\.(mim|b64|bhx|hqx|xxe|uu|uue)$'i, # banned extension - WinZip vulnerab.
);
# See http://support.microsoft.com/default.aspx?scid=kb;EN-US;q262631
# and http://www.cknow.com/vtutor/vtextensions.htm
# ENVELOPE SENDER SOFT-WHITELISTING / SOFT-BLACKLISTING
@score_sender_maps = ({ # a by-recipient hash lookup table,
# results from all matching recipient tables are summed
# ## per-recipient personal tables (NOTE: positive: black, negative: white)
# '[email protected]' => [{'[email protected]' => 10.0}],
# '[email protected]' => [{'.ebay.com' => -3.0}],
# '[email protected]' => [{'[email protected]' => -7.0,
# '.cleargreen.com' => -5.0}],
## site-wide opinions about senders (the '.' matches any recipient)
'.' => [ # the _first_ matching sender determines the score boost
new_RE( # regexp-type lookup table, just happens to be all soft-blacklist
[qr'^(bulkmail|offers|cheapbenefits|earnmoney|foryou)@'i => 5.0],
[qr'^(greatcasino|investments|lose_weight_today|market\.alert)@'i=> 5.0],
[qr'^(money2you|MyGreenCard|new\.tld\.registry|opt-out|opt-in)@'i=> 5.0],
[qr'^(optin|saveonlsmoking2002k|specialoffer|specialoffers)@'i => 5.0],
[qr'^(stockalert|stopsnoring|wantsome|workathome|yesitsfree)@'i => 5.0],
[qr'^(your_friend|greatoffers)@'i => 5.0],
[qr'^(inkjetplanet|marketopt|MakeMoney)\d*@'i => 5.0],
),
# read_hash("/var/amavis/sender_scores_sitewide"),
{ # a hash-type lookup table (associative array)
'[email protected]' => -3.0,
'[email protected]' => -3.0,
'[email protected]' => -3.0,
'[email protected]' => -3.0,
'securityfocus.com' => -3.0,
'[email protected]' => -3.0,
'[email protected]' => -3.0,
'[email protected]' => -3.0,
'[email protected]'=> -3.0,
'[email protected]' => -3.0,
'spamassassin.apache.org' => -3.0,
'[email protected]' => -3.0,
'[email protected]' => -3.0,
'[email protected]' => -3.0,
'[email protected]' => -3.0,
'[email protected]' => -3.0,
'[email protected]' => -3.0,
'[email protected]' => -3.0,
'[email protected]' => -3.0,
'[email protected]' => -3.0,
'[email protected]' => -3.0,
'[email protected]' => -3.0,
'[email protected]' => -3.0,
'[email protected]' => -3.0,
'[email protected]' => -3.0,
'[email protected]' => -5.0,
'[email protected]' => -3.0,
'returns.groups.yahoo.com' => -3.0,
'[email protected]' => -3.0,
lc('[email protected]') => -3.0,
lc('[email protected]') => -5.0,
# soft-blacklisting (positive score)
'[email protected]' => 3.0,
'.example.net' => 1.0,
},
], # end of site-wide tables
});
@decoders = (
['mail', \&do_mime_decode],
['asc', \&do_ascii],
['uue', \&do_ascii],
['hqx', \&do_ascii],
['ync', \&do_ascii],
['F', \&do_uncompress, ['unfreeze','freeze -d','melt','fcat'] ],
['Z', \&do_uncompress, ['uncompress','gzip -d','zcat'] ],
['gz', \&do_uncompress, 'gzip -d'],
['gz', \&do_gunzip],
['bz2', \&do_uncompress, 'bzip2 -d'],
['lzo', \&do_uncompress, 'lzop -d'],
['rpm', \&do_uncompress, ['rpm2cpio.pl','rpm2cpio'] ],
['cpio', \&do_pax_cpio, ['pax','gcpio','cpio'] ],
['tar', \&do_pax_cpio, ['pax','gcpio','cpio'] ],
['deb', \&do_ar, 'ar'],
# ['a', \&do_ar, 'ar'], # unpacking .a seems an overkill
['zip', \&do_unzip],
['7z', \&do_7zip, ['7zr','7za','7z'] ],
['rar', \&do_unrar, ['rar','unrar'] ],
['arj', \&do_unarj, ['arj','unarj'] ],
['arc', \&do_arc, ['nomarch','arc'] ],
['zoo', \&do_zoo, ['zoo','unzoo'] ],
['lha', \&do_lha, 'lha'],
# ['doc', \&do_ole, 'ripole'],
['cab', \&do_cabextract, 'cabextract'],
['tnef', \&do_tnef_ext, 'tnef'],
['tnef', \&do_tnef],
# ['sit', \&do_unstuff, 'unstuff'], # broken/unsafe decoder
['exe', \&do_executable, ['rar','unrar'], 'lha', ['arj','unarj'] ],
);
@av_scanners = (
# ### http://www.clanfield.info/sophie/ (http://www.vanja.com/tools/sophie/)
# ['Sophie',
# \&ask_daemon, ["{}/\n", '/var/run/sophie'],
# qr/(?x)^ 0+ ( : | [\000\r\n]* $)/m, qr/(?x)^ 1 ( : | [\000\r\n]* $)/m,
# qr/(?x)^ [-+]? \d+ : (.*?) [\000\r\n]* $/m ],
# ### http://www.csupomona.edu/~henson/www/projects/SAVI-Perl/
# ['Sophos SAVI', \&sophos_savi ],
# ### http://www.clamav.net/
['ClamAV-clamd',
\&ask_daemon, ["CONTSCAN {}\n", "/var/spool/amavisd/clamd.sock"],
qr/\bOK$/m, qr/\bFOUND$/m,
qr/^.*?: (?!Infected Archive)(.*) FOUND$/m ],
# # NOTE: run clamd under the same user as amavisd, or run it under its own
# # uid such as clamav, add user clamav to the amavis group, and then add
# # AllowSupplementaryGroups to clamd.conf;
# # NOTE: match socket name (LocalSocket) in clamav.conf to the socket name in
# # this entry; when running chrooted one may prefer socket "$MYHOME/clamd".
# ### http://www.clamav.net/ and CPAN (memory-hungry! clamd is preferred)
# # note that Mail::ClamAV requires perl to be build with threading!
# ['Mail::ClamAV', \&ask_clamav, "*", [0], [1], qr/^INFECTED: (.+)/m ],
# ### http://www.openantivirus.org/
# ['OpenAntiVirus ScannerDaemon (OAV)',
# \&ask_daemon, ["SCAN {}\n", '127.0.0.1:8127'],
# qr/^OK/m, qr/^FOUND: /m, qr/^FOUND: (.+)/m ],
# ### http://www.vanja.com/tools/trophie/
# ['Trophie',
# \&ask_daemon, ["{}/\n", '/var/run/trophie'],
# qr/(?x)^ 0+ ( : | [\000\r\n]* $)/m, qr/(?x)^ 1 ( : | [\000\r\n]* $)/m,
# qr/(?x)^ [-+]? \d+ : (.*?) [\000\r\n]* $/m ],
# ### http://www.grisoft.com/
# ['AVG Anti-Virus',
# \&ask_daemon, ["SCAN {}\n", '127.0.0.1:55555'],
# qr/^200/m, qr/^403/m, qr/^403 .*?: ([^\r\n]+)/m ],
# ### http://www.f-prot.com/
# ['F-Prot fpscand', # F-PROT Antivirus for BSD/Linux/Solaris, version 6
# \&ask_daemon,
# ["SCAN FILE {}/*\n", '127.0.0.1:10200'],
# qr/^(0|8|64) /m,
# qr/^([1235679]|1[01345]) |<[^>:]*(?i)(infected|suspicious|unwanted)/m,
# qr/(?i)<[^>:]*(?:infected|suspicious|unwanted)[^>:]*: ([^>]*)>/m ],
# ### http://www.f-prot.com/
# ['F-Prot f-protd', # old version
# \&ask_daemon,
# ["GET {}/*?-dumb%20-archive%20-packed HTTP/1.0\r\n\r\n",
# ['127.0.0.1:10200', '127.0.0.1:10201', '127.0.0.1:10202',
# '127.0.0.1:10203', '127.0.0.1:10204'] ],
# qr/(?i)<summary[^>]*>clean<\/summary>/m,
# qr/(?i)<summary[^>]*>infected<\/summary>/m,
# qr/(?i)<name>(.+)<\/name>/m ],
# ### http://www.sald.com/, http://www.dials.ru/english/, http://www.drweb.ru/
# ['DrWebD', \&ask_daemon, # DrWebD 4.31 or later
# [pack('N',1). # DRWEBD_SCAN_CMD
# pack('N',0x00280001). # DONT_CHANGEMAIL, IS_MAIL, RETURN_VIRUSES
# pack('N', # path length
# length("$TEMPBASE/amavis-yyyymmddTHHMMSS-xxxxx/parts/pxxx")).
# '{}/*'. # path
# pack('N',0). # content size
# pack('N',0),
# '/var/drweb/run/drwebd.sock',
# # '/var/amavis/var/run/drwebd.sock', # suitable for chroot
# # '/usr/local/drweb/run/drwebd.sock', # FreeBSD drweb ports default
# # '127.0.0.1:3000', # or over an inet socket
# ],
# qr/\A\x00[\x10\x11][\x00\x10]\x00/sm, # IS_CLEAN,EVAL_KEY; SKIPPED
# qr/\A\x00[\x00\x01][\x00\x10][\x20\x40\x80]/sm,# KNOWN_V,UNKNOWN_V,V._MODIF
# qr/\A.{12}(?:infected with )?([^\x00]+)\x00/sm,
# ],
# # NOTE: If using amavis-milter, change length to:
# # length("$TEMPBASE/amavis-milter-xxxxxxxxxxxxxx/parts/pxxx").
### http://www.kaspersky.com/ (kav4mailservers)
['KasperskyLab AVP - aveclient',
['/usr/local/kav/bin/aveclient','/usr/local/share/kav/bin/aveclient',
'/opt/kav/5.5/kav4mailservers/bin/aveclient','aveclient'],
'-p /var/run/aveserver -s {}/*',
[0,3,6,8], qr/\b(INFECTED|SUSPICION|SUSPICIOUS)\b/m,
qr/(?:INFECTED|WARNING|SUSPICION|SUSPICIOUS) (.+)/m,
],
# NOTE: one may prefer [0],[2,3,4,5], depending on how suspicious,
# currupted or protected archives are to be handled
### http://www.kaspersky.com/
['KasperskyLab AntiViral Toolkit Pro (AVP)', ['avp'],
'-* -P -B -Y -O- {}', [0,3,6,8], [2,4], # any use for -A -K ?
qr/infected: (.+)/m,
sub {chdir('/opt/AVP') or die "Can't chdir to AVP: $!"},
sub {chdir($TEMPBASE) or die "Can't chdir back to $TEMPBASE $!"},
],
### The kavdaemon and AVPDaemonClient have been removed from Kasperky
### products and replaced by aveserver and aveclient
['KasperskyLab AVPDaemonClient',
[ '/opt/AVP/kavdaemon', 'kavdaemon',
'/opt/AVP/AvpDaemonClient', 'AvpDaemonClient',
'/opt/AVP/AvpTeamDream', 'AvpTeamDream',
'/opt/AVP/avpdc', 'avpdc' ],
"-f=$TEMPBASE {}", [0,8], [3,4,5,6], qr/infected: ([^\r\n]+)/m ],
# change the startup-script in /etc/init.d/kavd to:
# DPARMS="-* -Y -dl -f=/var/amavis /var/amavis"
# (or perhaps: DPARMS="-I0 -Y -* /var/amavis" )
# adjusting /var/amavis above to match your $TEMPBASE.
# The '-f=/var/amavis' is needed if not running it as root, so it
# can find, read, and write its pid file, etc., see 'man kavdaemon'.
# defUnix.prf: there must be an entry "*/var/amavis" (or whatever
# directory $TEMPBASE specifies) in the 'Names=' section.
# cd /opt/AVP/DaemonClients; configure; cd Sample; make
# cp AvpDaemonClient /opt/AVP/
# su - vscan -c "${PREFIX}/kavdaemon ${DPARMS}"
### http://www.centralcommand.com/
['CentralCommand Vexira (new) vascan',
['vascan','/usr/lib/Vexira/vascan'],
"-a s --timeout=60 --temp=$TEMPBASE -y $QUARANTINEDIR ".
"--log=/var/log/vascan.log {}",
[0,3], [1,2,5],
qr/(?x)^\s* (?:virus|iworm|macro|mutant|sequence|trojan)\ found:\ ( [^\]\s']+ )\ \.\.\.\ /m ],
# Adjust the path of the binary and the virus database as needed.
# 'vascan' does not allow to have the temp directory to be the same as
# the quarantine directory, and the quarantine option can not be disabled.
# If $QUARANTINEDIR is not used, then another directory must be specified
# to appease 'vascan'. Move status 3 to the second list if password
# protected files are to be considered infected.
### http://www.avira.com/
### Avira AntiVir (formerly H+BEDV) or (old) CentralCommand Vexira Antivirus
['Avira AntiVir', ['antivir','vexira'],
'--allfiles -noboot -nombr -rs -s -z {}', [0], qr/ALERT:|VIRUS:/m,
qr/(?x)^\s* (?: ALERT: \s* (?: \[ | [^']* ' ) |
(?i) VIRUS:\ .*?\ virus\ '?) ( [^\]\s']+ )/m ],
# NOTE: if you only have a demo version, remove -z and add 214, as in:
# '--allfiles -noboot -nombr -rs -s {}', [0,214], qr/ALERT:|VIRUS:/,
### http://www.commandsoftware.com/
['Command AntiVirus for Linux', 'csav',
'-all -archive -packed {}', [50], [51,52,53],
qr/Infection: (.+)/m ],
### http://www.symantec.com/
['Symantec CarrierScan via Symantec CommandLineScanner',
'cscmdline', '-a scan -i 1 -v -s 127.0.0.1:7777 {}',
qr/^Files Infected:\s+0$/m, qr/^Infected\b/m,
qr/^(?:Info|Virus Name):\s+(.+)/m ],
### http://www.symantec.com/
['Symantec AntiVirus Scan Engine',
'savsecls', '-server 127.0.0.1:7777 -mode scanrepair -details -verbose {}',
[0], qr/^Infected\b/m,
qr/^(?:Info|Virus Name):\s+(.+)/m ],
# NOTE: check options and patterns to see which entry better applies
# ### http://www.f-secure.com/products/anti-virus/ version 4.65
# ['F-Secure Antivirus for Linux servers',
# ['/opt/f-secure/fsav/bin/fsav', 'fsav'],
# '--delete=no --disinf=no --rename=no --archive=yes --auto=yes '.
# '--dumb=yes --list=no --mime=yes {}', [0], [3,6,8],
# qr/(?:infection|Infected|Suspected): (.+)/m ],
### http://www.f-secure.com/products/anti-virus/ version 5.52
['F-Secure Antivirus for Linux servers',
['/opt/f-secure/fsav/bin/fsav', 'fsav'],
'--virus-action1=report --archive=yes --auto=yes '.
'--dumb=yes --list=no --mime=yes {}', [0], [3,4,6,8],
qr/(?:infection|Infected|Suspected|Riskware): (.+)/m ],
# NOTE: internal archive handling may be switched off by '--archive=no'
# to prevent fsav from exiting with status 9 on broken archives
# ### http://www.avast.com/
# ['avast! Antivirus daemon',
# \&ask_daemon, # greets with 220, terminate with QUIT
# ["SCAN {}\015\012QUIT\015\012", '/var/run/avast4/mailscanner.sock'],
# qr/\t\[\+\]/m, qr/\t\[L\]\t/m, qr/\t\[L\]\t([^[ \t\015\012]+)/m ],
# ### http://www.avast.com/
# ['avast! Antivirus - Client/Server Version', 'avastlite',
# '-a /var/run/avast4/mailscanner.sock -n {}', [0], [1],
# qr/\t\[L\]\t([^[ \t\015\012]+)/m ],
['CAI InoculateIT', 'inocucmd', # retired product
'-sec -nex {}', [0], [100],
qr/was infected by virus (.+)/m ],
# see: http://www.flatmtn.com/computer/Linux-Antivirus_CAI.html
### http://www3.ca.com/Solutions/Product.asp?ID=156 (ex InoculateIT)
['CAI eTrust Antivirus', 'etrust-wrapper',
'-arc -nex -spm h {}', [0], [101],
qr/is infected by virus: (.+)/m ],
# NOTE: requires suid wrapper around inocmd32; consider flag: -mod reviewer
# see http://marc.theaimsgroup.com/?l=amavis-user&m=109229779912783
### http://mks.com.pl/english.html
['MkS_Vir for Linux (beta)', ['mks32','mks'],
'-s {}/*', [0], [1,2],
qr/--[ \t]*(.+)/m ],
### http://mks.com.pl/english.html
['MkS_Vir daemon', 'mksscan',
'-s -q {}', [0], [1..7],
qr/^... (\S+)/m ],
# ### http://www.nod32.com/, version v2.52 (old)
# ['ESET NOD32 for Linux Mail servers',
# ['/opt/eset/nod32/bin/nod32cli', 'nod32cli'],
# '--subdir --files -z --sfx --rtp --adware --unsafe --pattern --heur '.
# '-w -a --action-on-infected=accept --action-on-uncleanable=accept '.
# '--action-on-notscanned=accept {}',
# [0,3], [1,2], qr/virus="([^"]+)"/m ],
# ### http://www.eset.com/, version v2.7 (old)
# ['ESET NOD32 Linux Mail Server - command line interface',
# ['/usr/bin/nod32cli', '/opt/eset/nod32/bin/nod32cli', 'nod32cli'],
# '--subdir {}', [0,3], [1,2], qr/virus="([^"]+)"/m ],
# ### http://www.eset.com/, version 2.71.12
# ['ESET Software ESETS Command Line Interface',
# ['/usr/bin/esets_cli', 'esets_cli'],
# '--subdir {}', [0], [1,2,3], qr/virus="([^"]+)"/m ],
### http://www.eset.com/, version 3.0
['ESET Software ESETS Command Line Interface',
['/usr/bin/esets_cli', 'esets_cli'],
'--subdir {}', [0], [1,2,3],
qr/:\s*action="(?!accepted)[^"]*"\n.*:\s*virus="([^"]*)"/m ],
## http://www.nod32.com/, NOD32LFS version 2.5 and above
['ESET NOD32 for Linux File servers',
['/opt/eset/nod32/sbin/nod32','nod32'],
'--files -z --mail --sfx --rtp --adware --unsafe --pattern --heur '.
'-w -a --action=1 -b {}',
[0], [1,10], qr/^object=.*, virus="(.*?)",/m ],
# Experimental, based on posting from Rado Dibarbora (Dibo) on 2002-05-31
# ['ESET Software NOD32 Client/Server (NOD32SS)',
# \&ask_daemon2, # greets with 200, persistent, terminate with QUIT
# ["SCAN {}/*\r\n", '127.0.0.1:8448' ],
# qr/^200 File OK/m, qr/^201 /m, qr/^201 (.+)/m ],
### http://www.norman.com/products_nvc.shtml
['Norman Virus Control v5 / Linux', 'nvcc',
'-c -l:0 -s -u -temp:$TEMPBASE {}', [0,10,11], [1,2,14],
qr/(?i).* virus in .* -> \'(.+)\'/m ],
### http://www.pandasoftware.com/
['Panda CommandLineSecure 9 for Linux',
['/opt/pavcl/usr/bin/pavcl','pavcl'],
'-auto -aex -heu -cmp -nbr -nor -nos -eng -nob {}',
qr/Number of files infected[ .]*: 0+(?!\d)/m,
qr/Number of files infected[ .]*: 0*[1-9]/m,
qr/Found virus :\s*(\S+)/m ],
# NOTE: for efficiency, start the Panda in resident mode with 'pavcl -tsr'
# before starting amavisd - the bases are then loaded only once at startup.
# To reload bases in a signature update script:
# /opt/pavcl/usr/bin/pavcl -tsr -ulr; /opt/pavcl/usr/bin/pavcl -tsr
# Please review other options of pavcl, for example:
# -nomalw, -nojoke, -nodial, -nohackt, -nospyw, -nocookies
# ### http://www.pandasoftware.com/
# ['Panda Antivirus for Linux', ['pavcl'],
# '-TSR -aut -aex -heu -cmp -nbr -nor -nso -eng {}',
# [0], [0x10, 0x30, 0x50, 0x70, 0x90, 0xB0, 0xD0, 0xF0],
# qr/Found virus :\s*(\S+)/m ],
# GeCAD AV technology is acquired by Microsoft; RAV has been discontinued.
# Check your RAV license terms before fiddling with the following two lines!
# ['GeCAD RAV AntiVirus 8', 'ravav',
# '--all --archive --mail {}', [1], [2,3,4,5], qr/Infected: (.+)/m ],
# # NOTE: the command line switches changed with scan engine 8.5 !
# # (btw, assigning stdin to /dev/null causes RAV to fail)
### http://www.nai.com/
['NAI McAfee AntiVirus (uvscan)', 'uvscan',
'--secure -rv --mime --summary --noboot - {}', [0], [13],
qr/(?x) Found (?:
\ the\ (.+)\ (?:virus|trojan) |
\ (?:virus|trojan)\ or\ variant\ ([^ ]+) |
:\ (.+)\ NOT\ a\ virus)/m,
# sub {$ENV{LD_PRELOAD}='/lib/libc.so.6'},
# sub {delete $ENV{LD_PRELOAD}},
],
# NOTE1: with RH9: force the dynamic linker to look at /lib/libc.so.6 before
# anything else by setting environment variable LD_PRELOAD=/lib/libc.so.6
# and then clear it when finished to avoid confusing anything else.
# NOTE2: to treat encrypted files as viruses replace the [13] with:
# qr/^\s{5,}(Found|is password-protected|.*(virus|trojan))/
### http://www.virusbuster.hu/en/
['VirusBuster', ['vbuster', 'vbengcl'],
"{} -ss -i '*' -log=$MYHOME/vbuster.log", [0], [1],
qr/: '(.*)' - Virus/m ],
# VirusBuster Ltd. does not support the daemon version for the workstation
# engine (vbuster-eng-1.12-linux-i386-libc6.tgz) any longer. The names of
# binaries, some parameters AND return codes have changed (from 3 to 1).
# See also the new Vexira entry 'vascan' which is possibly related.
# ### http://www.virusbuster.hu/en/
# ['VirusBuster (Client + Daemon)', 'vbengd',
# '-f -log scandir {}', [0], [3],
# qr/Virus found = (.*);/m ],
# # HINT: for an infected file it always returns 3,
# # although the man-page tells a different story
### http://www.cyber.com/
['CyberSoft VFind', 'vfind',
'--vexit {}/*', [0], [23], qr/##==>>>> VIRUS ID: CVDL (.+)/m,
# sub {$ENV{VSTK_HOME}='/usr/lib/vstk'},
],
### http://www.avast.com/
['avast! Antivirus', ['/usr/bin/avastcmd','avastcmd'],
'-a -i -n -t=A {}', [0], [1], qr/\binfected by:\s+([^ \t\n\[\]]+)/m ],
### http://www.ikarus-software.com/
['Ikarus AntiVirus for Linux', 'ikarus',
'{}', [0], [40], qr/Signature (.+) found/m ],
### http://www.bitdefender.com/
['BitDefender', 'bdscan', # new version
'--action=ignore --no-list {}', qr/^Infected files\s*:\s*0+(?!\d)/m,
qr/^(?:Infected files|Identified viruses|Suspect files)\s*:\s*0*[1-9]/m,
qr/(?:suspected|infected)\s*:\s*(.*)(?:\033|$)/m ],
### http://www.bitdefender.com/
['BitDefender', 'bdc', # old version
'--arc --mail {}', qr/^Infected files *:0+(?!\d)/m,
qr/^(?:Infected files|Identified viruses|Suspect files) *:0*[1-9]/m,
qr/(?:suspected|infected): (.*)(?:\033|$)/m ],
# consider also: --all --nowarn --alev=15 --flev=15. The --all argument may
# not apply to your version of bdc, check documentation and see 'bdc --help'
### ArcaVir for Linux and Unix http://www.arcabit.pl/
['ArcaVir for Linux', ['arcacmd','arcacmd.static'],
'-v 1 -summary 0 -s {}', [0], [1,2],
qr/(?:VIR|WIR):[ \t]*(.+)/m ],
# ### a generic SMTP-client interface to a SMTP-based virus scanner
# ['av_smtp', \&ask_av_smtp,
# ['{}', 'smtp:[127.0.0.1]:5525', '[email protected]'],
# qr/^2/, qr/^5/, qr/^\s*(.*?)\s*$/m ],
# ['File::Scan', sub {Amavis::AV::ask_av(sub{
# use File::Scan; my($fn)[email protected]_;
# my($f)=File::Scan->new(max_txt_size=>0, max_bin_size=>0);
# my($vname) = $f->scan($fn);
# $f->error ? (2,"Error: ".$f->error)
# : ($vname ne '') ? (1,"$vname FOUND") : (0,"Clean")}, @_) },
# ["{}/*"], [0], [1], qr/^(.*) FOUND$/m ],
# ### fully-fledged checker for JPEG marker segments of invalid length
# ['check-jpeg',
# sub { use JpegTester (); Amavis::AV::ask_av(\&JpegTester::test_jpeg, @_) },
# ["{}/*"], undef, [1], qr/^(bad jpeg: .*)$/m ],
# # NOTE: place file JpegTester.pm somewhere where Perl can find it,
# # for example in /usr/local/lib/perl5/site_perl
);
@av_scanners_backup = (
### http://www.clamav.net/ - backs up clamd or Mail::ClamAV
['ClamAV-clamscan', 'clamscan',
"--stdout --no-summary -r --tempdir=$TEMPBASE {}",
[0], qr/:.*\sFOUND$/m, qr/^.*?: (?!Infected Archive)(.*) FOUND$/m ],
### http://www.f-prot.com/ - backs up F-Prot Daemon, V6
['F-PROT Antivirus for UNIX', ['fpscan'],
'--report --mount --adware {}', # consider: --applications -s 4 -u 3 -z 10
[0,8,64], [1,2,3, 4+1,4+2,4+3, 8+1,8+2,8+3, 12+1,12+2,12+3],
qr/^\[Found\s+[^\]]*\]\s+<([^ \t(>]*)/m ],
### http://www.f-prot.com/ - backs up F-Prot Daemon (old)
['FRISK F-Prot Antivirus', ['f-prot','f-prot.sh'],
'-dumb -archive -packed {}', [0,8], [3,6], # or: [0], [3,6,8],
qr/(?:Infection:|security risk named) (.+)|\s+contains\s+(.+)$/m ],
### http://www.trendmicro.com/ - backs up Trophie
['Trend Micro FileScanner', ['/etc/iscan/vscan','vscan'],
'-za -a {}', [0], qr/Found virus/m, qr/Found virus (.+) in/m ],
### http://www.sald.com/, http://drweb.imshop.de/ - backs up DrWebD
['drweb - DrWeb Antivirus', # security LHA hole in Dr.Web 4.33 and earlier
['/usr/local/drweb/drweb', '/opt/drweb/drweb', 'drweb'],
'-path={} -al -go -ot -cn -upn -ok-',
[0,32], [1,9,33], qr' infected (?:with|by)(?: virus)? (.*)$'m ],
### http://www.kaspersky.com/
['Kaspersky Antivirus v5.5',
['/opt/kaspersky/kav4fs/bin/kav4fs-kavscanner',
'/opt/kav/5.5/kav4unix/bin/kavscanner',
'/opt/kav/5.5/kav4mailservers/bin/kavscanner', 'kavscanner'],
'-i0 -xn -xp -mn -R -ePASBME {}/*', [0,10,15], [5,20,21,25],
qr/(?:INFECTED|WARNING|SUSPICION|SUSPICIOUS) (.*)/m,
# sub {chdir('/opt/kav/bin') or die "Can't chdir to kav: $!"},
# sub {chdir($TEMPBASE) or die "Can't chdir back to $TEMPBASE $!"},
],
# Commented out because the name 'sweep' clashes with Debian and FreeBSD
# package/port of an audio editor. Make sure the correct 'sweep' is found
# in the path when enabling.
#
# ### http://www.sophos.com/ - backs up Sophie or SAVI-Perl
# ['Sophos Anti Virus (sweep)', 'sweep',
# '-nb -f -all -rec -ss -sc -archive -cab -mime -oe -tnef '.
# '--no-reset-atime {}',
# [0,2], qr/Virus .*? found/m,
# qr/^>>> Virus(?: fragment)? '?(.*?)'? found/m,
# ],
# # other options to consider: -idedir=/usr/local/sav
# Always succeeds and considers mail clean.
# Potentially useful when all other scanners fail and it is desirable
# to let mail continue to flow with no virus checking (when uncommented).
# ['always-clean', sub {0}],
);
1; # insure a defined return value |
amavisd-new is the program that glues together Postfix and SpamAssassin/ClamAV. Postfix passes the mails to amavisd-new which then invokes SpamAssassin and ClamAV to scan the emails. Please have a look at the Spamassassin and ClamAV settings in /etc/amavisd/amavisd.conf . Of course, you can customize that file a lot more. Feel free to do so, and have a look at the explanations in the original /etc/amavisd/amavisd.conf file!
Now let's create the system startup links for ClamAV and amavisd-new, update ClamAV's virus signature database, and start both services:
chkconfig --levels 235 amavisd on
chkconfig --levels 235 clamd.amavisd on
/usr/bin/freshclam
/etc/init.d/amavisd start
/etc/init.d/clamd.amavisd start
Jetzt müssen wir Postfix so konfigurieren, dass eingehende E-Mails durch amavisd-new:
geleitet werdenpostconf -e 'content_filter = amavis:[127.0.0.1]:10024'
postconf -e 'receive_override_options = no_address_mappings'
Afterwards append the following lines to /etc/postfix/master.cf :
vi /etc/postfix/master.cf
[...] |
und starten Sie Postfix neu:
/etc/init.d/postfix restart
13 Install Razor, Pyzor And DCC And Configure SpamAssassin
Razor, Pyzor und DCC sind Spamfilter, die ein kollaboratives Filternetzwerk verwenden. Um Razor und Pyzor zu installieren, führen Sie
ausyum install perl-Razor-Agent pyzor
Then initialize both services:
chmod -R a+rX /usr/share/doc/pyzor-0.5.0 /usr/bin/pyzor /usr/bin/pyzord
chmod -R a+rX /usr/lib/python2.6/site-packages/pyzor
su -m amavis -c 'pyzor --homedir /var/spool/amavisd discover'
su -m amavis -c 'razor-admin -home=/var/spool/amavisd -create'
su -m amavis -c 'razor-admin -home=/var/spool/amavisd -register'
Then we install DCC as follows:
cd /tmp
wget http://www.dcc-servers.net/dcc/source/dcc-dccproc.tar.Z
tar xzvf dcc-dccproc.tar.Z
cd dcc-dccproc-1.3.144
./configure --with-uid=amavis
make
make install
chown -R amavis:amavis /var/dcc
ln -s /var/dcc/libexec/dccifd /usr/local/bin/dccifd
Jetzt müssen wir SpamAssassin anweisen, diese drei Programme zu verwenden. Edit /etc/mail/spamassassin/local.cf so that it looks like this:
vi /etc/mail/spamassassin/local.cf
# These values can be overridden by editing ~/.spamassassin/user_prefs.cf |
Dann müssen wir das DCC-Plugin in SpamAssassin aktivieren. Open /etc/mail/spamassassin/v310.pre and uncomment the loadplugin Mail::SpamAssassin::Plugin::DCC line:
vi /etc/mail/spamassassin/v310.pre
[...] |
Sie können Ihre SpamAssassin-Konfiguration überprüfen, indem Sie Folgendes ausführen:
spamassassin --lint
Es sollte keine Fehler anzeigen.
Ausführen
/etc/init.d/amavisd restart
afterwards.
Jetzt aktualisieren wir unsere SpamAssassin-Regelsätze wie folgt:
sa-update --no-gpg
Wir erstellen einen Cron-Job, damit die Regelsätze regelmäßig aktualisiert werden. Ausführen
crontab -e
um den Cronjob-Editor zu öffnen. Erstellen Sie den folgenden Cronjob:
23 4 */2 * * /usr/bin/sa-update --no-gpg &> /dev/null |
Dadurch werden die Regelsätze jeden zweiten Tag um 4:23 Uhr aktualisiert.
14 Quota Exceedance Notifications
Wenn Sie Benachrichtigungen über alle E-Mail-Konten erhalten möchten, die das Kontingent überschritten haben, erstellen Sie die Datei /usr/local/sbin/quota_notify:
cd /usr/local/sbin/
vi quota_notify
#!/usr/bin/perl -w

# Author <[email protected]>
#
# This script assumes that virtual_mailbox_base in defined
# in postfix's main.cf file. This directory is assumed to contain
# directories which themselves contain your virtual user's maildirs.
# For example:
#
# -----------/
#            |
#            |
#    home/vmail/domains/
#        |          |
#        |          |
#  example.com/  foo.com/
#                   |
#                   |
#           -----------------
#           |       |       |
#           |       |       |
#         user1/   user2/  user3/
#                           |
#                           |
#                        maildirsize
#

use strict;

my $POSTFIX_CF = "/etc/postfix/main.cf";
my $MAILPROG = "/usr/sbin/sendmail -t";
my $WARNPERCENT = 80;
my @POSTMASTERS = ('[email protected]');
my $CONAME = 'My Company';
my $COADDR = '[email protected]';
my $SUADDR = '[email protected]';
my $MAIL_REPORT = 1;
my $MAIL_WARNING = 1;

#get virtual mailbox base from postfix config
open(PCF, "< $POSTFIX_CF") or die $!;
my $mboxBase;
while (<PCF>) {
   next unless /virtual_mailbox_base\s*=\s*(.*)\s*/;
   $mboxBase = $1;
}
close(PCF);

#assume one level of subdirectories for domain names
my @domains;
opendir(DIR, $mboxBase) or die $!;
while (defined(my $name = readdir(DIR))) {
   next if $name =~ /^\.\.?$/;        #skip '.' and '..'
   next unless (-d "$mboxBase/$name");
   push(@domains, $name);
}
closedir(DIR);
#iterate through domains for username/maildirsize files
my @users;
chdir($mboxBase);
foreach my $domain (@domains) {
        opendir(DIR, $domain) or die $!;
        while (defined(my $name = readdir(DIR))) {
           next if $name =~ /^\.\.?$/;        #skip '.' and '..'
           next unless (-d "$domain/$name");
      push(@users, {"$name\@$domain" => "$mboxBase/$domain/$name"});
        }
}
closedir(DIR);

#get user quotas and percent used
my (%lusers, $report);
foreach my $href (@users) {
   foreach my $user (keys %$href) {
      my $quotafile = "$href->{$user}/maildirsize";
      next unless (-f $quotafile);
      open(QF, "< $quotafile") or die $!;
      my ($firstln, $quota, $used);
      while (<QF>) {
         my $line = $_;
              if (! $firstln) {
                 $firstln = 1;
                 die "Error: corrupt quotafile $quotafile"
                    unless ($line =~ /^(\d+)S/);
                 $quota = $1;
            last if (! $quota);
            next;
         }
         die "Error: corrupt quotafile $quotafile"
            unless ($line =~ /\s*(-?\d+)/);
         $used += $1;
      }
      close(QF);
      next if (! $used);
      my $percent = int($used / $quota * 100);
      $lusers{$user} = $percent unless not $percent;
   }
}

#send a report to the postmasters
if ($MAIL_REPORT) {
   open(MAIL, "| $MAILPROG");
   select(MAIL);
   map {print "To: $_\n"} @POSTMASTERS;
   print "From: $COADDR\n";
   print "Subject: Daily Quota Report.\n";
   print "DAILY QUOTA REPORT:\n\n";
   print "----------------------------------------------\n";
   print "| % USAGE |            ACCOUNT NAME          |\n";
   print "----------------------------------------------\n";
   foreach my $luser ( sort { $lusers{$b} <=> $lusers{$a} } keys %lusers ) {
      printf("|   %3d   | %32s |\n", $lusers{$luser}, $luser);
      print "---------------------------------------------\n";
   }
        print "\n--\n";
        print "$CONAME\n";
        close(MAIL);
}

#email a warning to people over quota
if ($MAIL_WARNING) {
        foreach my $luser (keys (%lusers)) {
           next unless $lusers{$luser} >= $WARNPERCENT;       # skip those under quota
           open(MAIL, "| $MAILPROG");
           select(MAIL);
           print "To: $luser\n";
      map {print "BCC: $_\n"} @POSTMASTERS;
           print "From: $SUADDR\n";
           print "Subject: WARNING: Your mailbox is $lusers{$luser}% full.\n";
           print "Reply-to: $SUADDR\n";
           print "Your mailbox: $luser is $lusers{$luser}% full.\n\n";
           print "Once your e-mail box has exceeded your monthly storage quota\n";
      print "your monthly billing will be automatically adjusted.\n";
      print "Please consider deleting e-mail and emptying your trash folder to clear some space.\n\n";
           print "Contact <$SUADDR> for further assistance.\n\n";
           print "Thank You.\n\n";
           print "--\n";
           print "$CONAME\n";
           close(MAIL);
        }
} |
Stellen Sie sicher, dass Sie die Variablen oben anpassen (insbesondere die [E-Mail-geschützte] E-Mail-Adresse).
Wir müssen die Datei ausführbar machen:
chmod 755 quota_notify
Ausführen
crontab -e
um einen Cron-Job für dieses Skript zu erstellen:
0 0 * * * /usr/local/sbin/quota_notify &> /dev/null |
15 Test Postfix
To see if Postfix is ready for SMTP-AUTH and TLS , run
telnet localhost 25
Nachdem Sie die Verbindung zu Ihrem Postfix-Mailserver hergestellt haben, geben Sie
einehlo localhost
Wenn Sie die Linien sehen
250-STARTTLS
und
250-AUTH PLAIN LOGIN
everything is fine.
[[email protected] sbin]# telnet localhost 25
Trying ::1...
Connected to localhost.
Escape character is '^]'.
220 server1.example.com ESMTP Postfix
<-- ehlo localhost
250-server1.example.com
250-PIPELINING
250-SIZE 10240000
250-VRFY
250-ETRN
250-STARTTLS
250-AUTH PLAIN LOGIN
250-AUTH=PLAIN LOGIN
250-ENHANCEDSTATUSCODES
250-8BITMIME
250 DSN
<-- quit
221 2.0.0 Bye
Connection closed by foreign host.
[[email protected] sbin]#
Geben Sie
einexit
to return to the system's shell.
16 Populate The Database And Test
Um die Datenbank zu füllen, können Sie die MySQL-Shell verwenden:
mysql -u root -p
USE mail;
Zumindest müssen Sie Einträge in den Tabellen domains erstellen und Benutzer :
INSERT INTO `domains` (`domain`) VALUES ('example.com');
INSERT INTO `users` (`email`, `password`, `quota`) VALUES ('[email protected]', ENCRYPT('secret'), 10485760);
(Please take care you use the ENCRYPT syntax in the second INSERT statement in order to encrypt the password!)
Wenn Sie in den anderen beiden Tabellen Einträge machen wollen, sieht das so aus:
INSERT INTO `forwardings` (`source`, `destination`) VALUES ('[email protected]', '[email protected]');
INSERT INTO `transport` (`domain`, `transport`) VALUES ('example.com', 'smtp:mail.example.com');
Um die MySQL-Shell zu verlassen, geben Sie
einquit;
Für die meisten Leute ist es einfacher, wenn sie ein grafisches Frontend für MySQL haben; therefore you can also use phpMyAdmin (in this example under http://192.168.0.100/phpMyAdmin/ or http://server1.example.com/phpMyAdmin/) to administrate the mail Datenbank. Achten Sie auch hier beim Erstellen eines Benutzers darauf, dass Sie die ENCRYPT-Funktion verwenden, um das Passwort zu verschlüsseln:
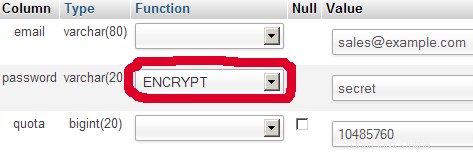
Ich glaube nicht, dass ich die Domänen- und Benutzertabelle weiter erklären muss.
Die Weiterleitungstabelle kann Einträge wie die folgenden haben:
| Quelle | Ziel | |
| [E-Mail-geschützt] | [E-Mail-geschützt] | Leitet E-Mails für [email protected] an [email protected] um |
| @example.com | [E-Mail-geschützt] | Erstellt ein Catch-All-Konto für [email protected] Alle E-Mails an example.com kommen bei [email protected] an, mit Ausnahme derjenigen, die in der Benutzertabelle vorhanden sind (d. h. wenn [email protected] existiert in In der Benutzertabelle kommen E-Mails an [email protected] weiterhin bei [email protected] an). |
| @example.com | @anotherdomain.tld | Hierdurch werden alle E-Mails an example.com an denselben Benutzer unter otherdomain.tld weitergeleitet. Beispielsweise werden E-Mails an [email protected] an [email protected] weitergeleitet |
| [E-Mail-geschützt] | [E-Mail-geschützt], [E-Mail-geschützt] | E-Mails für [email protected] an zwei oder mehr E-Mail-Adressen weiterleiten. Alle unter Ziel aufgelisteten E-Mail-Adressen erhalten eine Kopie der E-Mail. |
Die Transporttabelle kann folgende Einträge haben:
| Domäne | Transport | |
| beispiel.com | : | stellt E-Mails für example.com lokal zu. Dies ist so, als ob dieser Datensatz in dieser Tabelle überhaupt nicht vorhanden wäre. |
| beispiel.com | smtp:mail.anotherdomain.tld | Liefert alle E-Mails für example.com per SMTP an den Server mail.anotherdomain.com. |
| beispiel.com | smtp:mail.anotherdomain.tld:2025 | Liefert alle E-Mails für example.com über SMTP an den Server mail.anotherdomain.com, aber auf Port 2025, nicht 25, der der Standardport für SMTP ist. |
| beispiel.com |
smtp:[1.2.3.4] | Die eckigen Klammern verhindern, dass Postfix den MX-DNS-Eintrag nach der Adresse in eckigen Klammern sucht. Sinnvoll bei IP-Adressen. |
| .example.com | smtp:mail.anotherdomain.tld | E-Mails für alle Subdomains von example.com werden an mail.anotherdomain.tld zugestellt. |
| * | smtp:mail.anotherdomain.tld | Alle E-Mails werden an mail.anotherdomain.tld. | zugestellt
| [E-Mail-geschützt] | smtp:mail.anotherdomain.tld | E-Mails für [email protected] werden an mail.anotherdomain.tld. | zugestellt
Siehe
man transport
für weitere Details.
Bitte beachten Sie, dass die Reihenfolge der Einträge in der Transporttabelle wichtig ist! Die Einträge werden von oben nach unten verfolgt.
Wichtig: Postfix verwendet einen Caching-Mechanismus für die Transporte, daher kann es eine Weile dauern, bis Ihre Änderungen in der Transporttabelle wirksam werden. Wenn Sie möchten, dass sie sofort wirksam werden, führen Sie
auspostfix reload
nachdem Sie Ihre Änderungen in der Transporttabelle vorgenommen haben.
17 Send A Welcome Email For Creating Maildir
Wenn Sie ein neues E-Mail-Konto erstellen und versuchen, E-Mails von dort abzurufen (mit POP3/IMAP), erhalten Sie wahrscheinlich Fehlermeldungen, die besagen, dass das Maildir nicht existiert. Das Maildir wird automatisch erstellt, wenn die erste E-Mail für das neue Konto eintrifft. Daher ist es eine gute Idee, eine Willkommens-E-Mail an ein neues Konto zu senden.
Zuerst installieren wir das mailx-Paket:
yum install mailx
So senden Sie eine Willkommens-E-Mail an [email protected]:
mailx [email protected]
Sie werden nach dem Betreff gefragt. Geben Sie den Betreff ein (z. B. Willkommen), drücken Sie dann die EINGABETASTE, und geben Sie in der nächsten Zeile Ihre Nachricht ein. When the message is finished, press ENTER again so that you are in a new line, then press CTRL+D:
[[email protected] ~]# mailx [email protected]
Subject:Welcome <-- ENTER
Welcome! Viel Spaß mit Ihrem neuen Mailkonto. <-- ENTER
<-- CTRL+D
EOT
[[email protected] ~]#
18 Installing SquirrelMail
SquirrelMail ist eine Webmail-Schnittstelle, mit der Ihre Benutzer E-Mails in einem Browser senden und empfangen können. Dieses Kapitel zeigt, wie man es installiert und an unser Setup anpasst, sodass Benutzer sogar das Passwort ihres E-Mail-Kontos über die SquirrelMail-Oberfläche ändern können.
Um SquirrelMail zu installieren, führen wir Folgendes aus:
yum install squirrelmail php-pear-DB
Afterwards we restart Apache:
/etc/init.d/httpd restart
SquirrelMail wird mit einigen vorinstallierten Plugins geliefert, leider ist keines davon in der Lage, uns unser E-Mail-Passwort in unserer MySQL-Datenbank ändern zu lassen. Aber es gibt das Plugin zum Ändern des SQL-Passworts, das wir manuell installieren können:
cd /usr/share/squirrelmail/plugins
wget http://www.squirrelmail.org/plugins/change_sqlpass-3.3-1.2.tar.gz
tar xvfz change_sqlpass-3.3-1.2.tar.gz
cd change_sqlpass
cp config.php.sample config.php
Nun müssen wir die config.php editieren und an unser Setup anpassen. Bitte passen Sie die Variablen $csp_dsn, $lookup_password_query, $password_update_queries, $password_encryption, $csp_salt_static und $csp_delimiter wie folgt an und kommentieren Sie $csp_salt_query aus:
vi config.php
[...] |
Die vollständige Datei sieht wie folgt aus:
<?php |
The Change SQL Password plugin also depends on the Compatibility plugin which we install as follows:
cd /usr/share/squirrelmail/plugins
wget http://www.squirrelmail.org/countdl.php?fileurl=http%3A%2F%2Fwww.squirrelmail.org%2Fplugins%2Fcompatibility-2.0.16-1.0.tar.gz
tar xvfz compatibility-2.0.16-1.0.tar.gz
Jetzt müssen wir in die SquirrelMail-Konfiguration gehen und SquirrelMail mitteilen, dass wir Courier als unseren POP3- und IMAP-Server verwenden und die Plug-ins „SQL-Passwort ändern“ und „Kompatibilität“ aktivieren:
/usr/share/squirrelmail/config/conf.pl
Sie sehen das folgende Menü. Navigieren Sie wie angegeben durch:
SquirrelMail Configuration : Read: config.php (1.4.0)
---------------------------------------------------------
Main Menu --
1.  Organization Preferences
2.  Server Settings
3.  Folder Defaults
4.  General Options
5.  Themes
6.  Address Books
7.  Message of the Day (MOTD)
8.  Plugins
9.  Database
10. Languages

D.  Set pre-defined settings for specific IMAP servers

C   Turn color off
S   Save data
Q   Quit

Command >> <-- D


SquirrelMail Configuration : Read: config.php
---------------------------------------------------------
While we have been building SquirrelMail, we have discovered some
preferences that work better with some servers that don't work so
well with others.  If you select your IMAP server, this option will
set some pre-defined settings for that server.

Please note that you will still need to go through and make sure
everything is correct.  This does not change everything.  There are
only a few settings that this will change.

Please select your IMAP server:
    bincimap    = Binc IMAP server
    courier     = Courier IMAP server
    cyrus       = Cyrus IMAP server
    dovecot     = Dovecot Secure IMAP server
    exchange    = Microsoft Exchange IMAP server
    hmailserver = hMailServer
    macosx      = Mac OS X Mailserver
    mercury32   = Mercury/32
    uw          = University of Washington's IMAP server
    gmail       = IMAP access to Google mail (Gmail) accounts

    quit        = Do not change anything
Command >> <-- courier


              imap_server_type = courier
         default_folder_prefix = INBOX.
                  trash_folder = Trash
                   sent_folder = Sent
                  draft_folder = Drafts
            show_prefix_option = false
          default_sub_of_inbox = false
show_contain_subfolders_option = false
            optional_delimiter = .
                 delete_folder = true

Press enter to continue... <-- ENTER


SquirrelMail Configuration : Read: config.php (1.4.0)
---------------------------------------------------------
Main Menu --
1.  Organization Preferences
2.  Server Settings
3.  Folder Defaults
4.  General Options
5.  Themes
6.  Address Books
7.  Message of the Day (MOTD)
8.  Plugins
9.  Database
10. Languages

D.  Set pre-defined settings for specific IMAP servers

C   Turn color off
S   Save data
Q   Quit

Command >> <-- 8


SquirrelMail Configuration : Read: config.php (1.4.0)
---------------------------------------------------------
Plugins
  Installed Plugins
    1. delete_move_next
    2. squirrelspell
    3. newmail

  Available Plugins:
    4. administrator
    5. bug_report
    6. calendar
    7. change_sqlpass
    8. compatibility
    9. filters
    10. fortune
    11. info
    12. listcommands
    13. mail_fetch
    14. message_details
    15. sent_subfolders
    16. spamcop
    17. test
    18. translate

R   Return to Main Menu
C   Turn color off
S   Save data
Q   Quit

Command >> <-- 8 (or whatever number the compatibility plugin has - it's needed by the change_sqlpass plugin)


SquirrelMail Configuration : Read: config.php (1.4.0)
---------------------------------------------------------
Plugins
  Installed Plugins
    1. delete_move_next
    2. squirrelspell
    3. newmail
    4. compatibility

  Available Plugins:
    5. administrator
    6. bug_report
    7. calendar
    8. change_sqlpass
    9. filters
    10. fortune
    11. info
    12. listcommands
    13. mail_fetch
    14. message_details
    15. sent_subfolders
    16. spamcop
    17. test
    18. translate

R   Return to Main Menu
C   Turn color off
S   Save data
Q   Quit

Command >> <-- 8 (the number of the change_sqlpass plugin)


SquirrelMail Configuration : Read: config.php (1.4.0)
---------------------------------------------------------
Plugins
  Installed Plugins
    1. delete_move_next
    2. squirrelspell
    3. newmail
    4. compatibility
    5. change_sqlpass

  Available Plugins:
    6. administrator
    7. bug_report
    8. calendar
    9. filters
    10. fortune
    11. info
    12. listcommands
    13. mail_fetch
    14. message_details
    15. sent_subfolders
    16. spamcop
    17. test
    18. translate

R   Return to Main Menu
C   Turn color off
S   Save data
Q   Quit

Command >> <-- S


SquirrelMail Configuration : Read: config.php (1.4.0)
---------------------------------------------------------
Plugins
  Installed Plugins
    1. delete_move_next
    2. squirrelspell
    3. newmail
    4. compatibility
    5. change_sqlpass

  Available Plugins:
    6. administrator
    7. bug_report
    8. calendar
    9. filters
    10. fortune
    11. info
    12. listcommands
    13. mail_fetch
    14. message_details
    15. sent_subfolders
    16. spamcop
    17. test
    18. translate

R   Return to Main Menu
C   Turn color off
S   Save data
Q   Quit

Command >> S

Data saved in config.php
Press enter to continue... <-- ENTER


SquirrelMail Configuration : Read: config.php (1.4.0)
---------------------------------------------------------
Plugins
  Installed Plugins
    1. delete_move_next
    2. squirrelspell
    3. newmail
    4. compatibility
    5. change_sqlpass

  Available Plugins:
    6. administrator
    7. bug_report
    8. calendar
    9. filters
    10. fortune
    11. info
    12. listcommands
    13. mail_fetch
    14. message_details
    15. sent_subfolders
    16. spamcop
    17. test
    18. translate

R   Return to Main Menu
C   Turn color off
S   Save data
Q   Quit

Command >> <-- Q
One last thing we need to do is modify the file /etc/squirrelmail/config_local.php and comment out the $default_folder_prefix variable - if you don't do this, you will see the following error message in SquirrelMail after you've logged in:Query:CREATE "Sent" Reason Given:Invalid mailbox name.
vi /etc/squirrelmail/config_local.php
<?php |
Now you can type in http://server1.example.com/webmail or http://192.168.0.100/webmail in your browser to access SquirrelMail.
Log in with your email address (e.g. [email protected]) and your password:
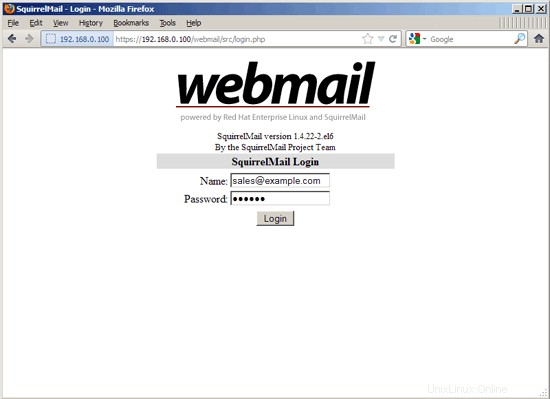
You should find the welcome email in your inbox:
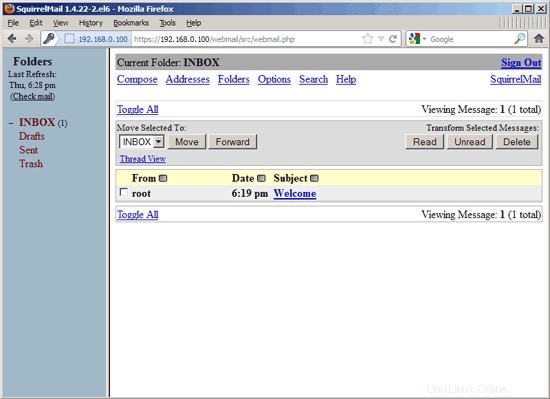
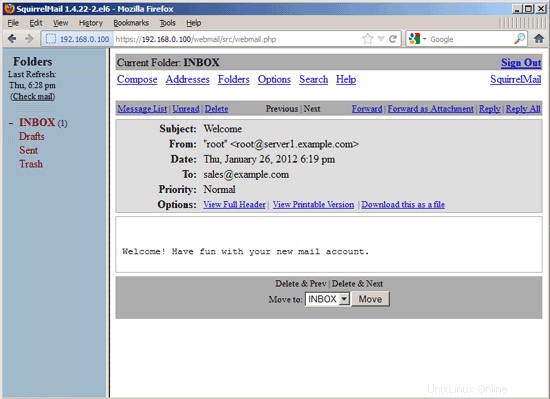
To change your password, go to Options and then select Change Password:
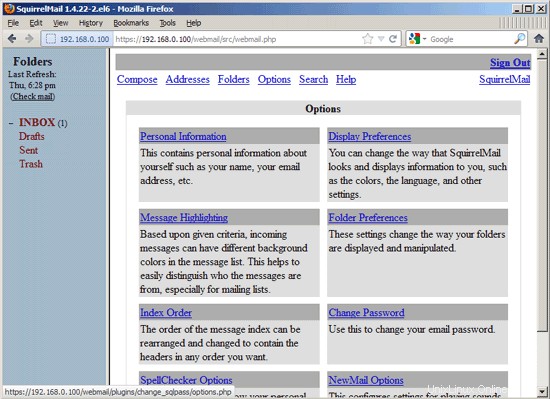
Type in your current password and then your new password twice:
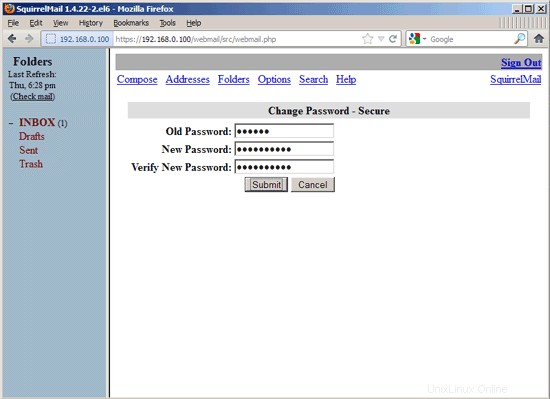
After you've changed the password, you will have to immediately log in again with the new password:
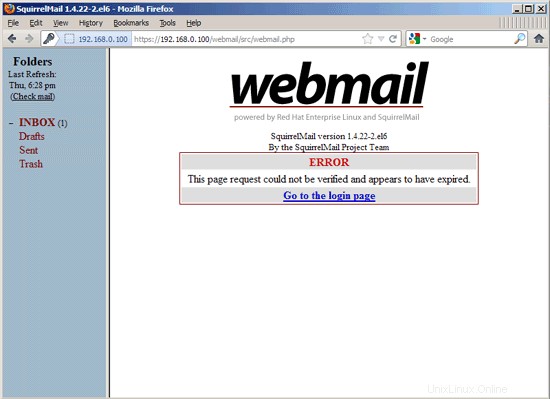
19 VMA (Virtual Mail Admin Interface)
Virtual Mail Admin (VMA) is a small PHP-based web app written to manage the email system set up in this guide. I didn't test it, but I thought I'd share.
This is what the developer (Charl Loubser) wrote to me in an email:
"Hi There,
I don't know if you'll like this, or if this has any use to you, but I thought I'd Share:
I wrote a silly little webapp for the setup you did in the Howto:https://www.howtoforge.com/virtual-users-domains-postfix-courier-mysql-squirrelmail-ubuntu-10.04
If you approve and think it worthy of sharing on your tutorial, you are more than welcome, and can feel free to do so.
As mentioned in the readme, this is not a perfect app, but it does the job for now, and I'd thing it's relatively safe in a closed environment (LAN setup between servers).
The rar file with the app is attached, but can also be downloaded at :http://code.google.com/p/vma/"
20 References
Tutorial:ISP-style Email Service with Debian-Sarge and Postfix 2.1:http://workaround.org/articles/ispmail-sarge/
Postfix + Quota:http://vhcs.net/new/modules/newbb/viewtopic.php?topic_id=3496&forum=17
Mail Passwords Encrypted using saslauthd:http://www.syscp.de/docs/public/contrib/cryptedmailpws
21 Links
- Postfix MTA:http://www.postfix.org/
- Postfix Quota Patch:http://web.onda.com.br/nadal/
- phpMyAdmin:http://www.phpmyadmin.net/
- SquirrelMail:http://www.squirrelmail.org/
- CentOS:http://www.centos.org/