Im vorherigen Tutorial habe ich Ihnen gezeigt, wie Sie Ansible AWX über Docker bereitstellen. In der Zwischenzeit habe ich zwei Projekte gefunden, die RPM-Pakete für AWX erstellen. Daher zeige ich Ihnen in diesem Tutorial, wie Sie Ansible AWX aus RPM-Dateien unter CentOS 7 installieren. Ansible AWX ist die OpenSource-Version der Ansible Tower-Software.
Ich werde 3 Server mit einer CentOS 7-Mindestinstallation und SELinux im zulässigen Modus verwenden.
- 192.168.1.25 AWX-Server
- 192.168.1.21 client1
- 192.168.1.22 client2
Mindestsystemanforderungen für AWX Server
- Mindestens 4 GB Arbeitsspeicher
- Mindestens 2 CPU-Kerne
- Mindestens 20 GB Speicherplatz
- Ausführen von Docker, Openshift oder Kubernetes
Prüfen Sie die SELinux-Konfiguration.
[[email protected] ~]# sestatus
SELinux status:                 enabled
SELinuxfs mount:                /sys/fs/selinux
SELinux root directory:         /etc/selinux
Loaded policy name:             targeted
Current mode:                   permissive
Mode from config file:          permissive
Policy MLS status:              enabled
Policy deny_unknown status:     allowed
Max kernel policy version:      28
[[email protected] ~]#
Fügen Sie die Hosteinträge hinzu in
/etc/hosts
[[email protected] ~]# cat /etc/hosts
192.168.1.25    awx.sunil.cc awx
192.168.1.21    client1.sunil.cc client1
192.168.1.22    client2.sunil.cc client2
[[email protected] ~]#
Fügen Sie die Firewall-Regeln hinzu
[[email protected] ~]# systemctl enable firewalld
Created symlink from /etc/systemd/system/dbus-org.fedoraproject.FirewallD1.service to /usr/lib/systemd/system/firewalld.service.
Created symlink from /etc/systemd/system/multi-user.target.wants/firewalld.service to /usr/lib/systemd/system/firewalld.service.
[[email protected] ~]# systemctl start firewalld
[[email protected] ~]# firewall-cmd --add-service=http --permanent;firewall-cmd --add-service=https --permanent
success
success
[[email protected] ~]# systemctl restart firewalld
[[email protected] ~]#
Aktivieren Sie das CentOS EPEL-Repository.
[[email protected] ~]# yum install -y epel-release
Wir benötigen postgresql 9.6 für die AWX-Installation.
PostgreSQL-Repository aktivieren.
[[email protected] ~]# yum install -y https://download.postgresql.org/pub/repos/yum/9.6/redhat/rhel-7-x86_64/pgdg-centos96-9.6-3.noarch.rpm
PostgreSQL installieren.
[[email protected] ~]# yum install postgresql96-server -y
Installation der anderen notwendigen RPMs.
[[email protected] ~]# yum install -y rabbitmq-server wget memcached nginx ansible
Installieren von Ansible AWX
Hinzufügen des AWX-Repos.
[[email protected] ~]# wget -O /etc/yum.repos.d/awx-rpm.repo https://copr.fedorainfracloud.org/coprs/mrmeee/awx/repo/epel-7/mrmeee-awx-epel-7.repo
RPM installieren
[[email protected] ~]# yum install -y awx
Datenbank initialisieren
[[email protected] ~]# /usr/pgsql-9.6/bin/postgresql96-setup initdb
Initializing database ... OK

[[email protected] ~]#
Starten des Rabbitmq-Dienstes
[[email protected] ~]# systemctl start rabbitmq-server
[[email protected] ~]# systemctl enable rabbitmq-server
Created symlink from /etc/systemd/system/multi-user.target.wants/rabbitmq-server.service to /usr/lib/systemd/system/rabbitmq-server.service.
[[email protected] ~]#
PostgreSQL-Dienst starten
[[email protected] ~]# systemctl enable postgresql-9.6
Created symlink from /etc/systemd/system/multi-user.target.wants/postgresql-9.6.service to /usr/lib/systemd/system/postgresql-9.6.service.
[[email protected] ~]# systemctl start postgresql-9.6
Starten des Memcache-Dienstes
[[email protected] ~]# systemctl enable memcached
Created symlink from /etc/systemd/system/multi-user.target.wants/memcached.service to /usr/lib/systemd/system/memcached.service.
[[email protected] ~]# systemctl start memcached
Postgres-Benutzer erstellen
[[email protected] ~]# sudo -u postgres createuser -S awx
could not change directory to "/root": Permission denied
[[email protected] ~]#
Ignoriere den Fehler
Erstellen der Datenbank
[[email protected] ~]# sudo -u postgres createdb -O awx awx
could not change directory to "/root": Permission denied
[[email protected] ~]#
Ignoriere den Fehler
Importieren der Daten in die Datenbank
[[email protected] ~]# sudo -u awx /opt/awx/bin/awx-manage migrate
Initialisieren der Konfiguration für AWX
[[email protected] ~]# echo "from django.contrib.auth.models import User; User.objects.create_superuser('admin', '[email protected]', 'password')" | sudo -u awx /opt/awx/bin/awx-manage shell
[[email protected] ~]# sudo -u awx /opt/awx/bin/awx-manage create_preload_data
Default organization added.
Demo Credential, Inventory, and Job Template added.
[[email protected] ~]# sudo -u awx /opt/awx/bin/awx-manage provision_instance --hostname=$(hostname)
Successfully registered instance awx.sunil.cc
(changed: True)
[[email protected] ~]# sudo -u awx /opt/awx/bin/awx-manage register_queue --queuename=tower --hostnames=$(hostname)
Creating instance group tower
Added instance awx.sunil.cc to tower
(changed: True)
[[email protected] ~]#
Nginx konfigurieren
Nehmen Sie das Backup von nginx.conf
[[email protected] ~]# cd /etc/nginx/
[[email protected] nginx]# pwd
/etc/nginx
[[email protected] nginx]# cp nginx.conf nginx.conf.bkp
Ersetzen Sie die nginx-conf-Datei
[[email protected] nginx]# wget -O /etc/nginx/nginx.conf https://raw.githubusercontent.com/sunilsankar/awx-build/master/nginx.conf
Nginx-Dienst aktivieren und starten
[[email protected] ~]# systemctl start nginx
[[email protected] ~]# systemctl enable nginx
Starten Sie die awx-Dienste
[[email protected] ~]# systemctl start awx-cbreceiver
[[email protected] ~]# systemctl start awx-celery-beat
[[email protected] ~]# systemctl start awx-celery-worker
[[email protected] ~]# systemctl start awx-channels-worker
[[email protected] ~]# systemctl start awx-daphne
[[email protected] ~]# systemctl start awx-web
Stellen Sie sicher, dass der Dienst während des Neustarts gestartet wird
[[email protected] ~]# systemctl enable awx-cbreceiver
Created symlink from /etc/systemd/system/multi-user.target.wants/awx-cbreceiver.service to /usr/lib/systemd/system/awx-cbreceiver.service.
[[email protected] ~]# systemctl enable awx-celery-beat
Created symlink from /etc/systemd/system/multi-user.target.wants/awx-celery-beat.service to /usr/lib/systemd/system/awx-celery-beat.service.
[[email protected] ~]# systemctl enable awx-celery-worker
Created symlink from /etc/systemd/system/multi-user.target.wants/awx-celery-worker.service to /usr/lib/systemd/system/awx-celery-worker.service.
[[email protected] ~]# systemctl enable awx-channels-worker
Created symlink from /etc/systemd/system/multi-user.target.wants/awx-channels-worker.service to /usr/lib/systemd/system/awx-channels-worker.service.
[[email protected] ~]# systemctl enable awx-daphne
Created symlink from /etc/systemd/system/multi-user.target.wants/awx-daphne.service to /usr/lib/systemd/system/awx-daphne.service.
[[email protected] ~]# systemctl enable awx-web
Created symlink from /etc/systemd/system/multi-user.target.wants/awx-web.service to /usr/lib/systemd/system/awx-web.service.
[[email protected] ~]#
Passwortlose Anmeldung vom AWX-Server konfigurieren
Erstellen Sie einen Benutzer auf allen 3 Hosts.
Hier in diesem Tutorial erstelle ich einen Benutzer ansible auf allen 3 Servern.
[[email protected] ~]# useradd ansible
[[email protected] ~]# useradd ansible
[[email protected] ~]# useradd ansible
Generieren des SSH-Schlüssels auf dem awx-Server
[[email protected] nginx]# su - ansible
[[email protected] ~]$ ssh-keygen
Generating public/private rsa key pair.
Enter file in which to save the key (/home/ansible/.ssh/id_rsa):
Created directory '/home/ansible/.ssh'.
Enter passphrase (empty for no passphrase):
Enter same passphrase again:
Your identification has been saved in /home/ansible/.ssh/id_rsa.
Your public key has been saved in /home/ansible/.ssh/id_rsa.pub.
The key fingerprint is:
SHA256:RW/dhTsxcyGicleRI0LpLm+LyhAVinm0xktapodc8gY [email protected]
The key's randomart image is:
+---[RSA 2048]----+
|   . .  ..o. +ooo|
|  = o .  +.oo+*.o|
| E @ . ..oo.+ o*.|
|. # o   oo..  o  |
| = *    S      . |
|  o .  . .       |
|   .    o        |
|    o   .o       |
|     o.....      |
+----[SHA256]-----+
[[email protected] ~]$
Hinzufügen des sudoers-Eintrags auf allen 3 Servern als letzten Eintrag zur Datei
[[email protected] nginx]# visudo
ansible ALL=(ALL) NOPASSWD: ALL
Kopieren Sie den Inhalt von „id_rsa.pub“ nach „authorized_keys“ auf allen 3 Servern
[[email protected] .ssh]$ cat id_rsa.pub
ssh-rsa AAAAB3NzaC1yc2EAAAADAQABAAABAQDStB8JGsVsSLppwYWdnEPLE4xwFqRDn7xE/d3hjBQ6A0JGm1t+GtHB3GPIEjANFTnxQwHpR+cRttbL3mlQvpIYqCZOMZds9XA7VI5qgs0aSGUU8cNYKjmmrMpJa9sB4WVtj3M4u2fEXt9FKKCtjMMpOfiQxIkEhYZ+2GoAX5sHXan7TPcgwb5r7WW6j43aaPc6g9XWN63nonQz6KeMSFZ/y0o2HJMh1FEkktZw6A1HVfn+JNWoQb1glyqGjO1ync+Sok8yXpqakEEWpXNQSQYs4eBEwfkKql5EuolQMIbF9VYhpEcR9LfbMvYdq/RPKWN3mmRMWfPZ2dTZl515XBdV [email protected]
[[email protected] .ssh]$
[[email protected] .ssh]$ cat authorized_keys
ssh-rsa AAAAB3NzaC1yc2EAAAADAQABAAABAQDStB8JGsVsSLppwYWdnEPLE4xwFqRDn7xE/d3hjBQ6A0JGm1t+GtHB3GPIEjANFTnxQwHpR+cRttbL3mlQvpIYqCZOMZds9XA7VI5qgs0aSGUU8cNYKjmmrMpJa9sB4WVtj3M4u2fEXt9FKKCtjMMpOfiQxIkEhYZ+2GoAX5sHXan7TPcgwb5r7WW6j43aaPc6g9XWN63nonQz6KeMSFZ/y0o2HJMh1FEkktZw6A1HVfn+JNWoQb1glyqGjO1ync+Sok8yXpqakEEWpXNQSQYs4eBEwfkKql5EuolQMIbF9VYhpEcR9LfbMvYdq/RPKWN3mmRMWfPZ2dTZl515XBdV [email protected]
[[email protected] .ssh]$ chmod 600 authorized_keys
Kunde1
[[email protected] ~]# su - ansible
[[email protected] ~]$ mkdir .ssh
[[email protected] ~]$ chmod 700 .ssh
[[email protected] ~]$ cat .ssh/authorized_keys
ssh-rsa AAAAB3NzaC1yc2EAAAADAQABAAABAQDStB8JGsVsSLppwYWdnEPLE4xwFqRDn7xE/d3hjBQ6A0JGm1t+GtHB3GPIEjANFTnxQwHpR+cRttbL3mlQvpIYqCZOMZds9XA7VI5qgs0aSGUU8cNYKjmmrMpJa9sB4WVtj3M4u2fEXt9FKKCtjMMpOfiQxIkEhYZ+2GoAX5sHXan7TPcgwb5r7WW6j43aaPc6g9XWN63nonQz6KeMSFZ/y0o2HJMh1FEkktZw6A1HVfn+JNWoQb1glyqGjO1ync+Sok8yXpqakEEWpXNQSQYs4eBEwfkKql5EuolQMIbF9VYhpEcR9LfbMvYdq/RPKWN3mmRMWfPZ2dTZl515XBdV [email protected]
[[email protected] ~]$ chmod 600 .ssh/authorized_keys
Client2
[[email protected] ~]# su - ansible
[[email protected] ~]$ mkdir .ssh
[[email protected] ~]$ chmod 700 .ssh
[[email protected] ~]$ cat .ssh/authorized_keys
ssh-rsa AAAAB3NzaC1yc2EAAAADAQABAAABAQDStB8JGsVsSLppwYWdnEPLE4xwFqRDn7xE/d3hjBQ6A0JGm1t+GtHB3GPIEjANFTnxQwHpR+cRttbL3mlQvpIYqCZOMZds9XA7VI5qgs0aSGUU8cNYKjmmrMpJa9sB4WVtj3M4u2fEXt9FKKCtjMMpOfiQxIkEhYZ+2GoAX5sHXan7TPcgwb5r7WW6j43aaPc6g9XWN63nonQz6KeMSFZ/y0o2HJMh1FEkktZw6A1HVfn+JNWoQb1glyqGjO1ync+Sok8yXpqakEEWpXNQSQYs4eBEwfkKql5EuolQMIbF9VYhpEcR9LfbMvYdq/RPKWN3mmRMWfPZ2dTZl515XBdV [email protected]
[[email protected] ~]$ chmod 600 .ssh/authorized_keys
Überprüfen Sie die passwortlose Anmeldung vom AWX-Server.
[[email protected] ~]$ ssh client1
Last login: Sun Mar 11 13:14:06 2018 from 192.168.1.25
[[email protected] ~]$ exit
logout
Connection to client1 closed.
[[email protected] ~]$ ssh client2
Last login: Sun Mar 11 12:50:14 2018 from 192.168.1.25
[[email protected] ~]$
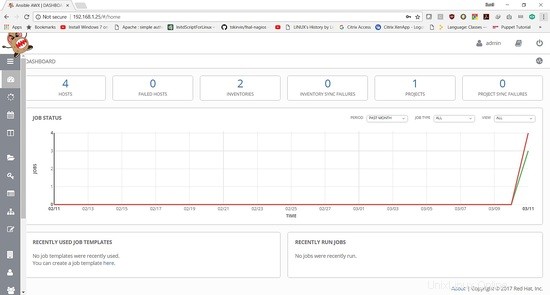
Bestätigen Sie die Anmeldung:
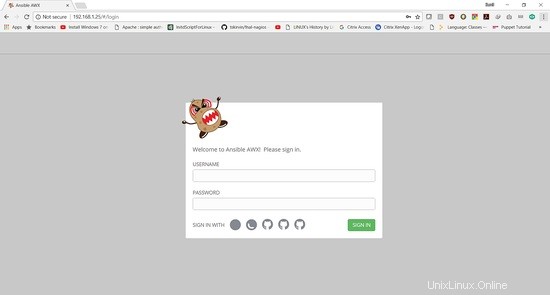
Die Anmeldedaten lauten:
Benutzername:"admin "
Passwort:"Passwort "
Im nächsten Tutorial wird gezeigt, wie man ein Playbook hinzufügt und den Job ausführt.